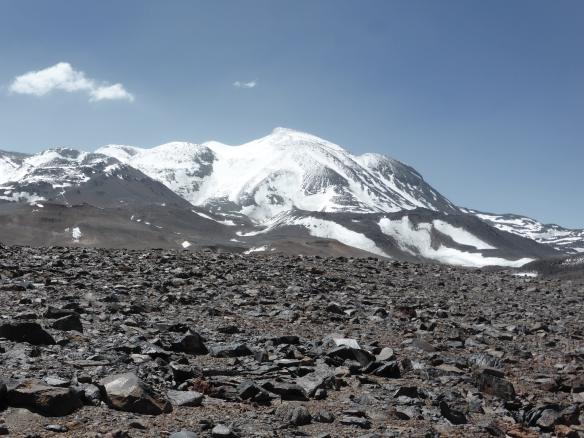
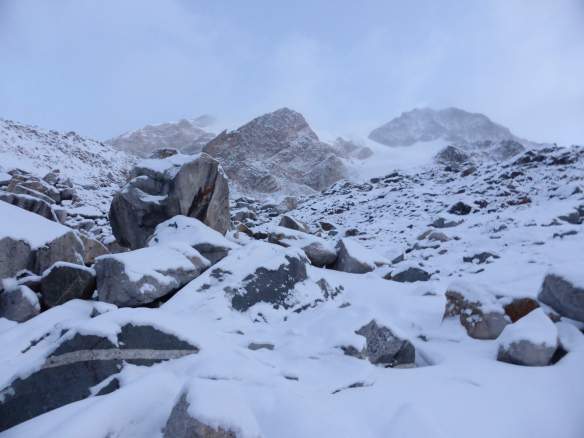
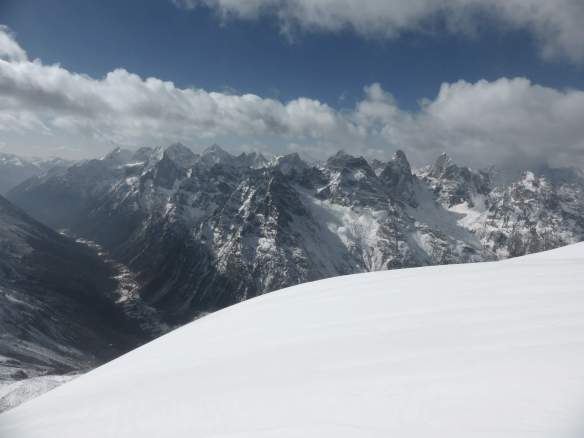
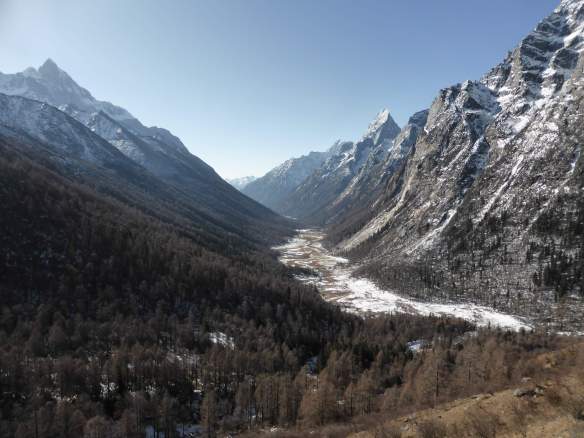
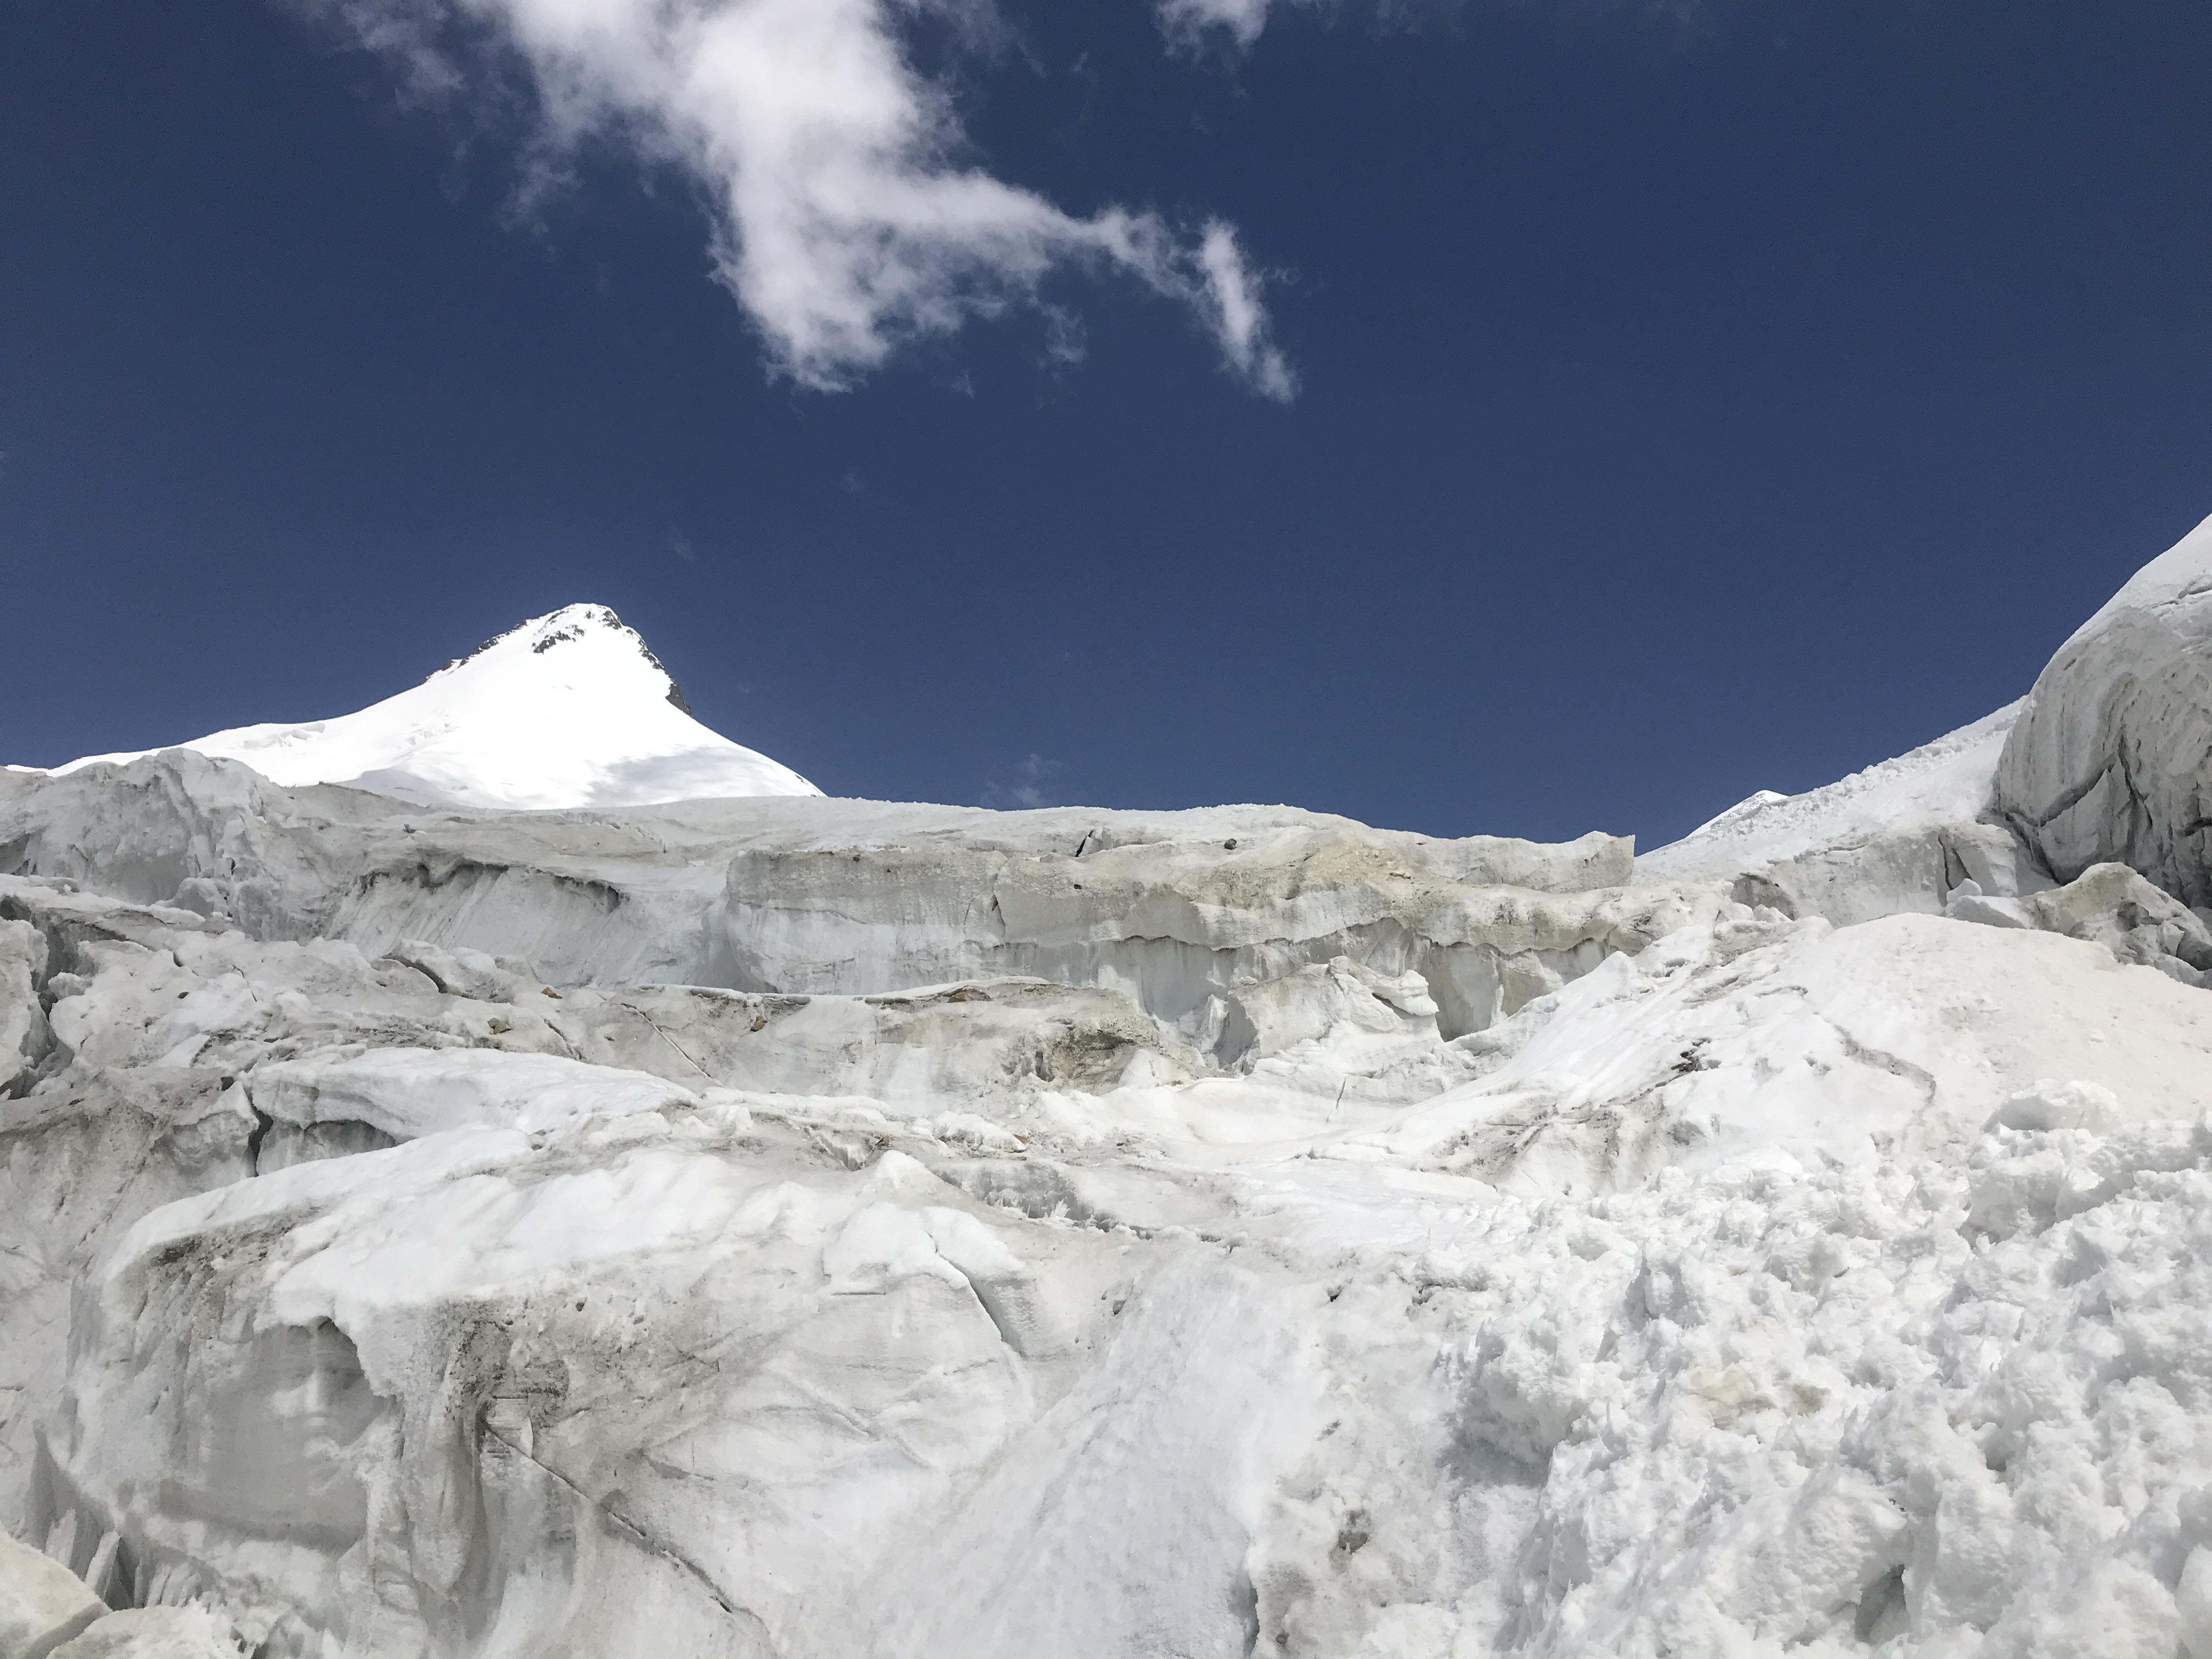
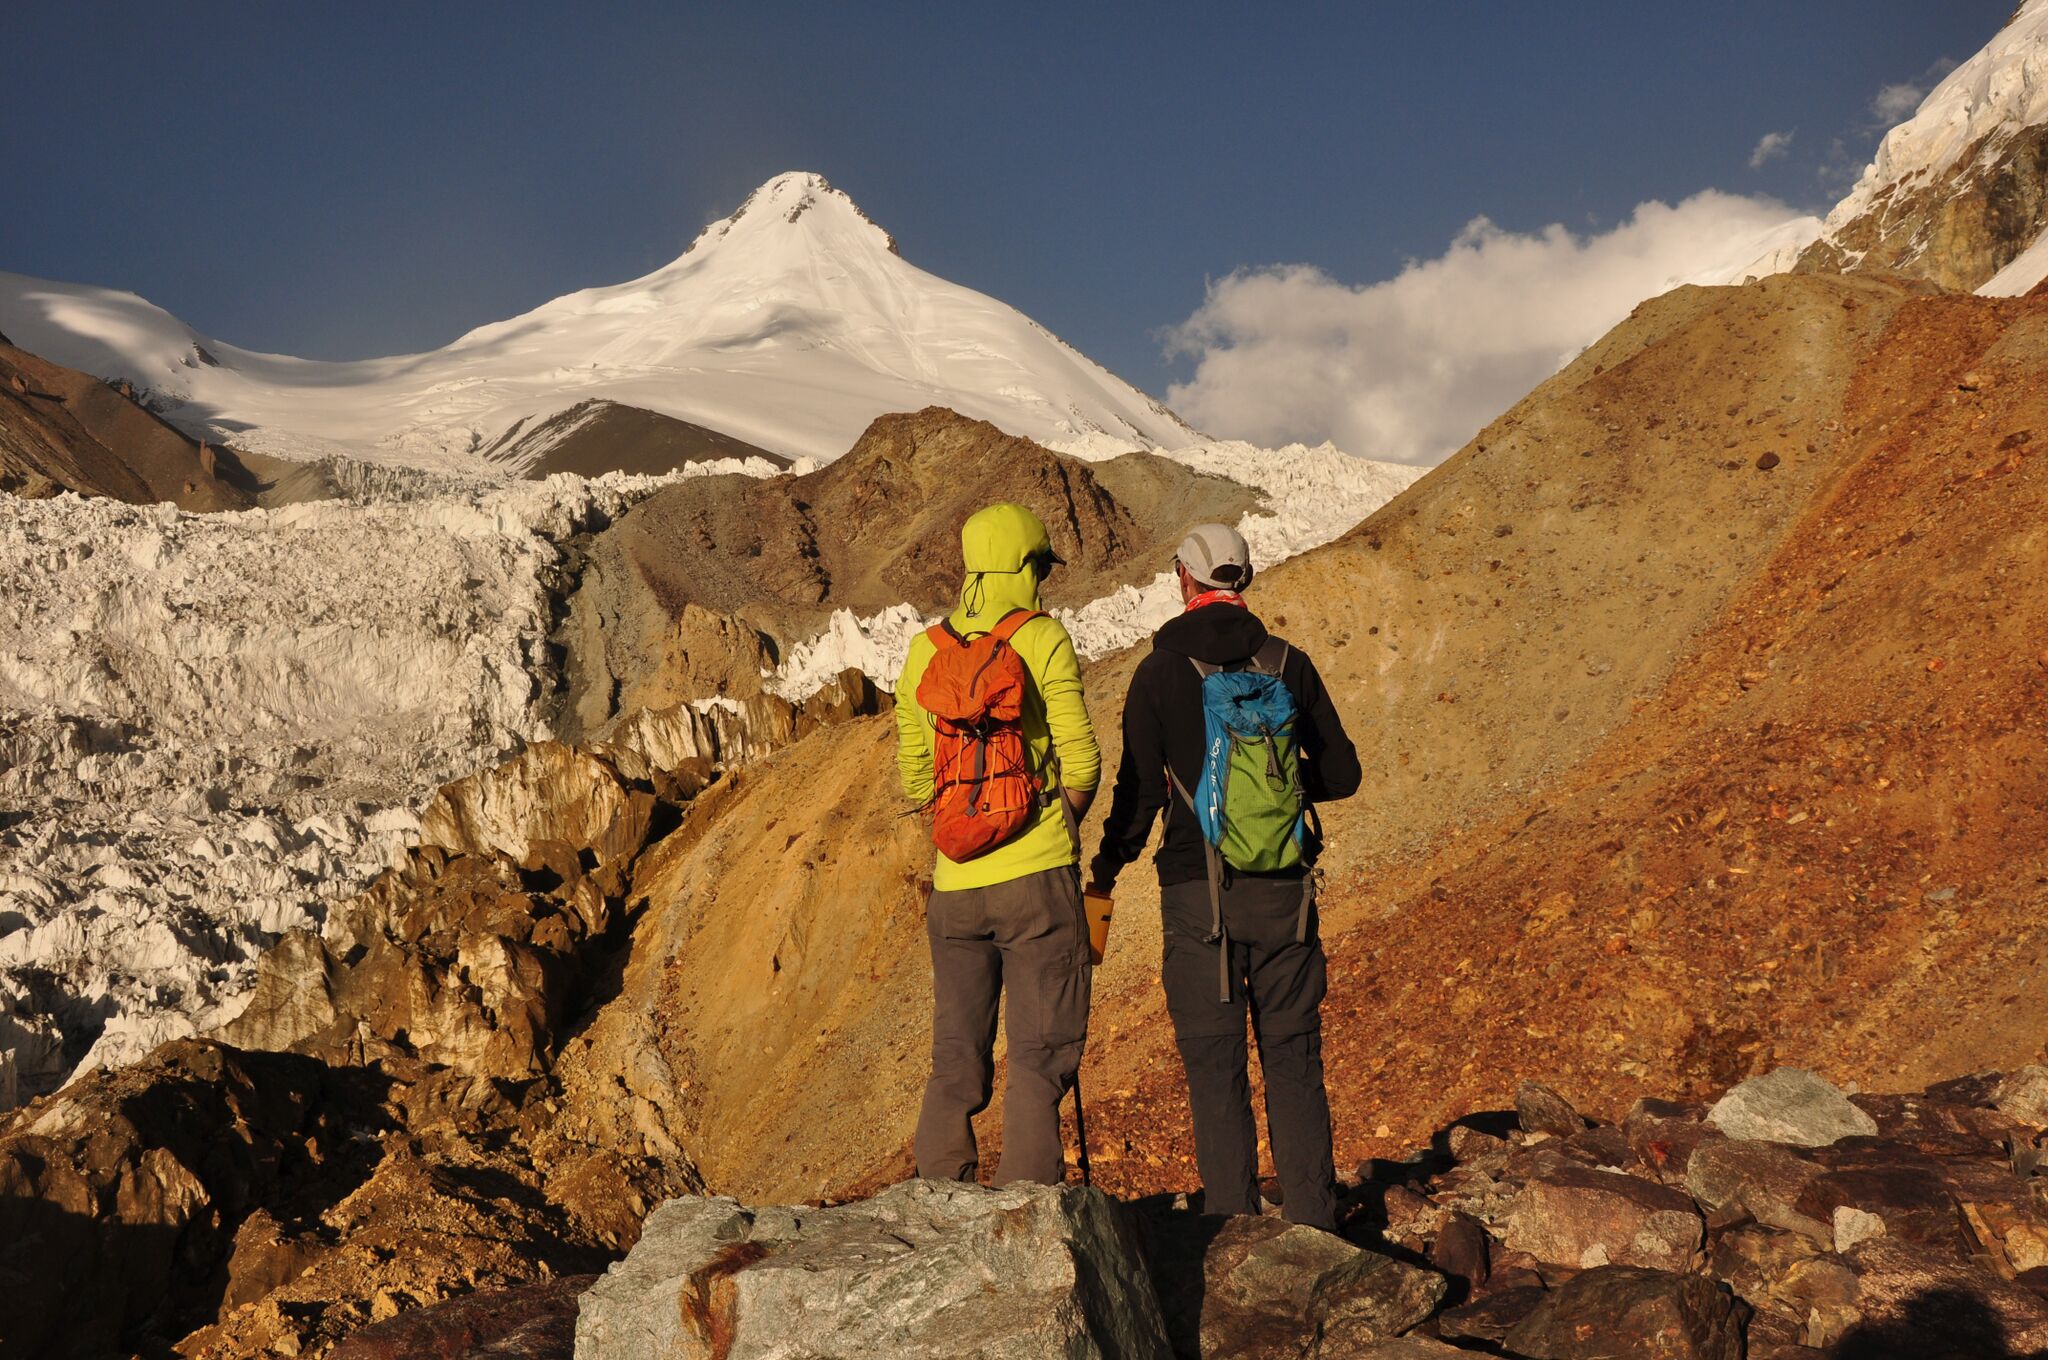
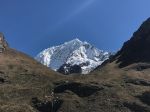
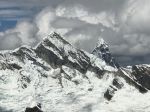
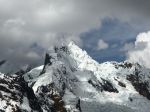
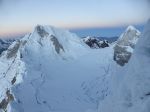
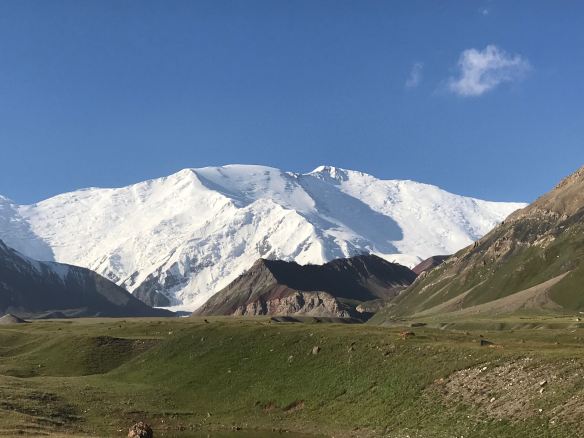
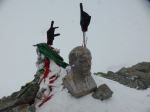
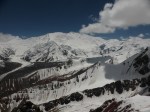
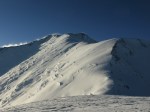
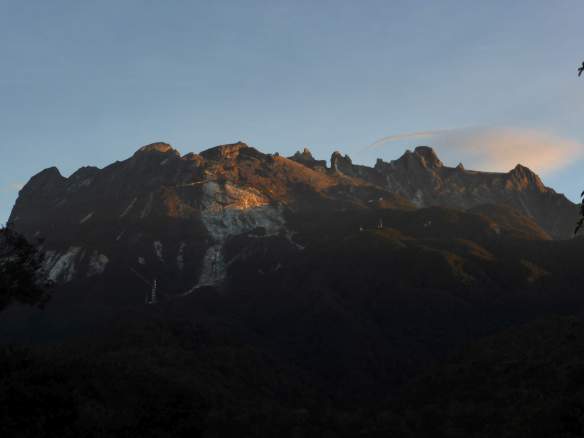
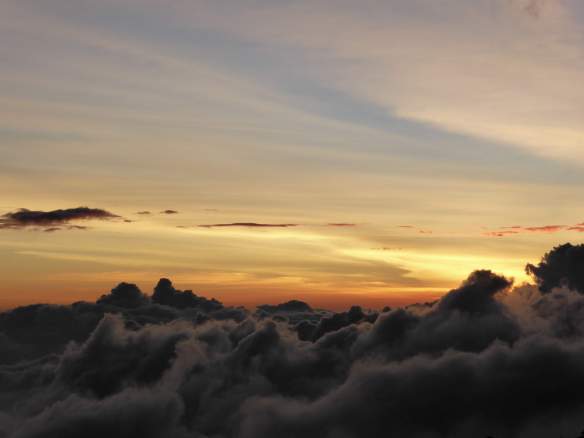
Pik Korzhenevskaya, viewed from the approach to Pik Chetyreh.

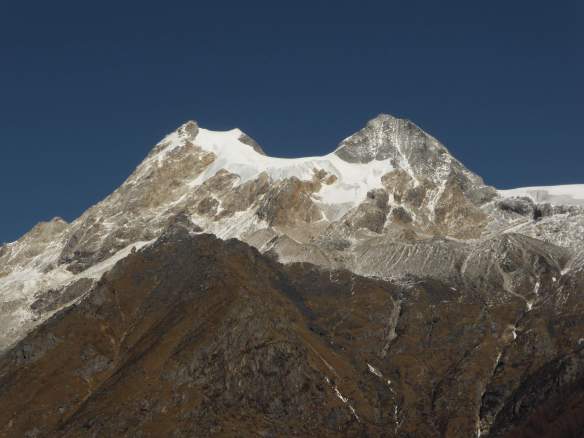
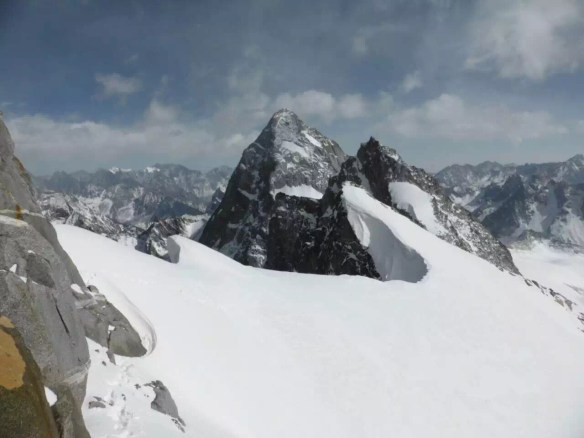
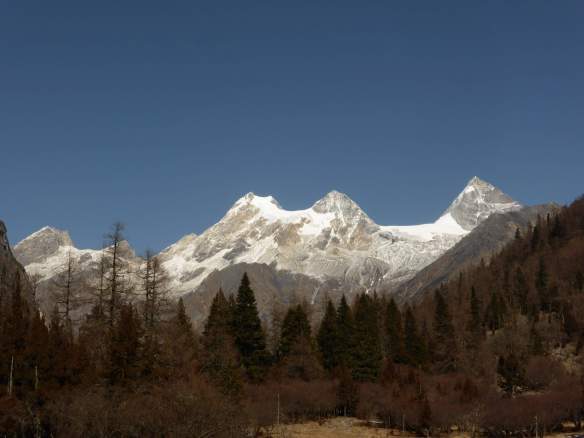
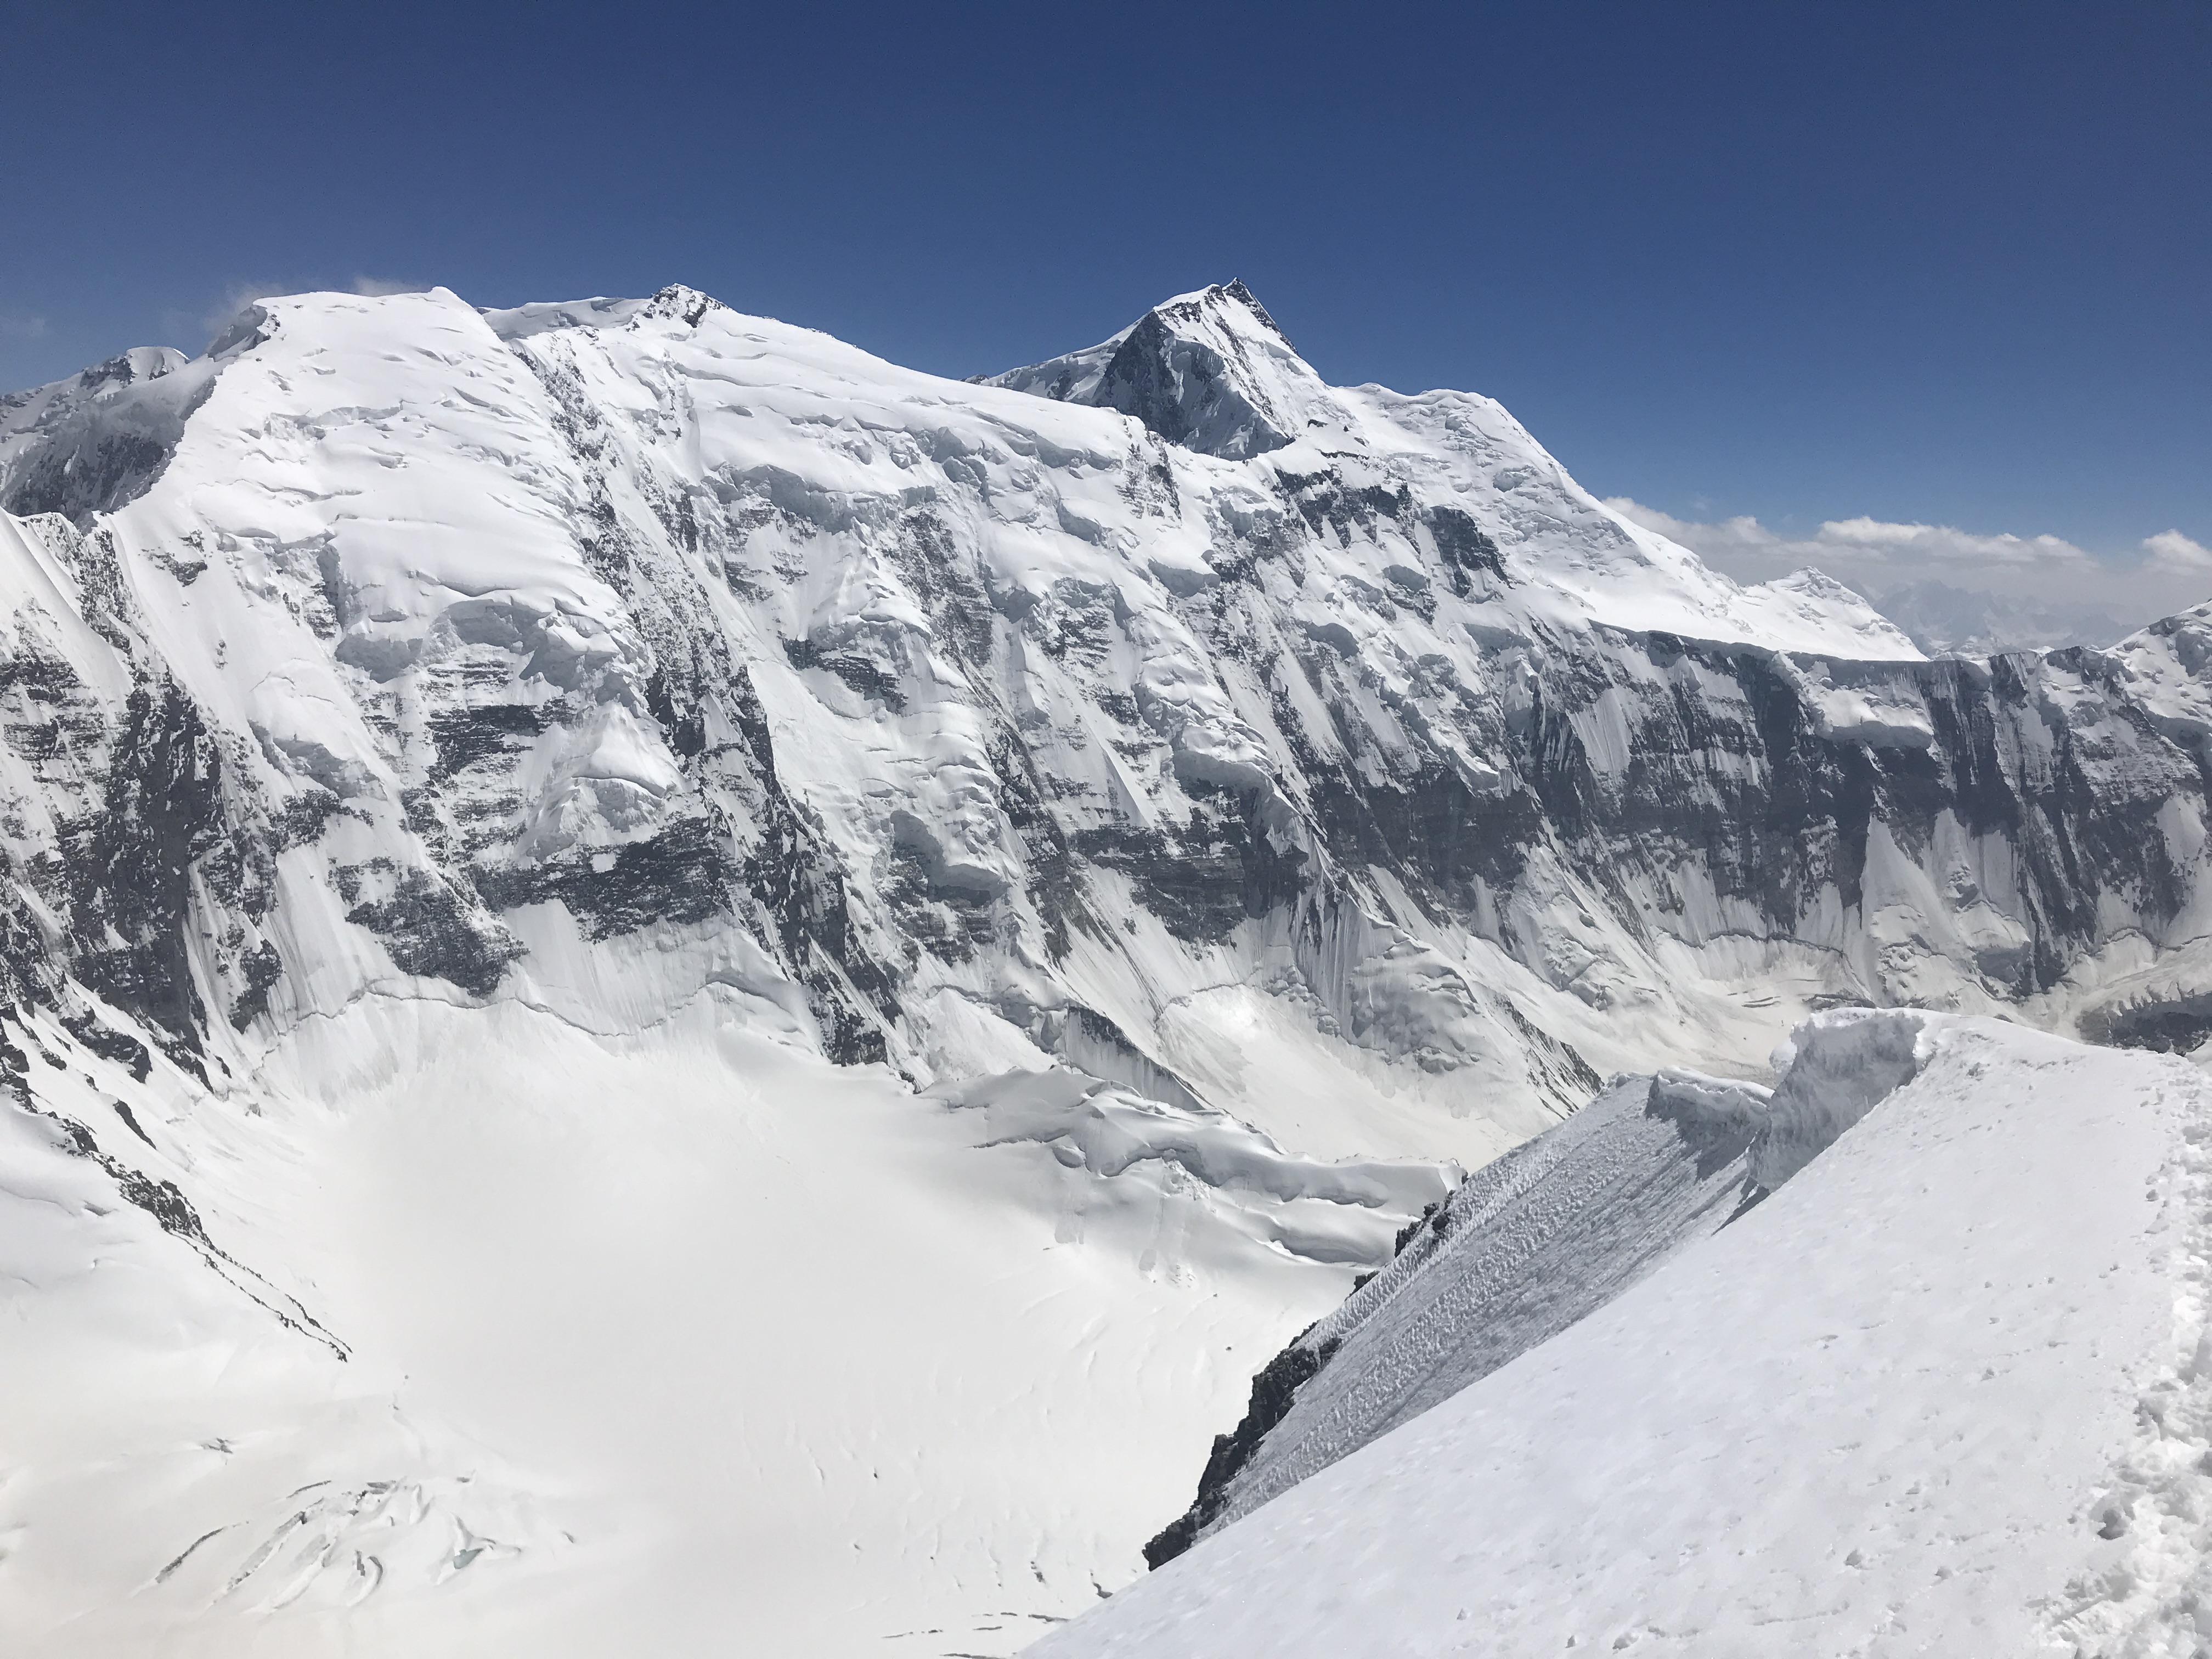
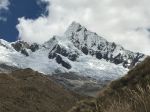
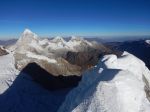
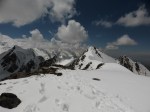
Pik Korzhenevskaya from the east, viewed from the summit of Pik Chetyreh.
Pik Korzhenevska and
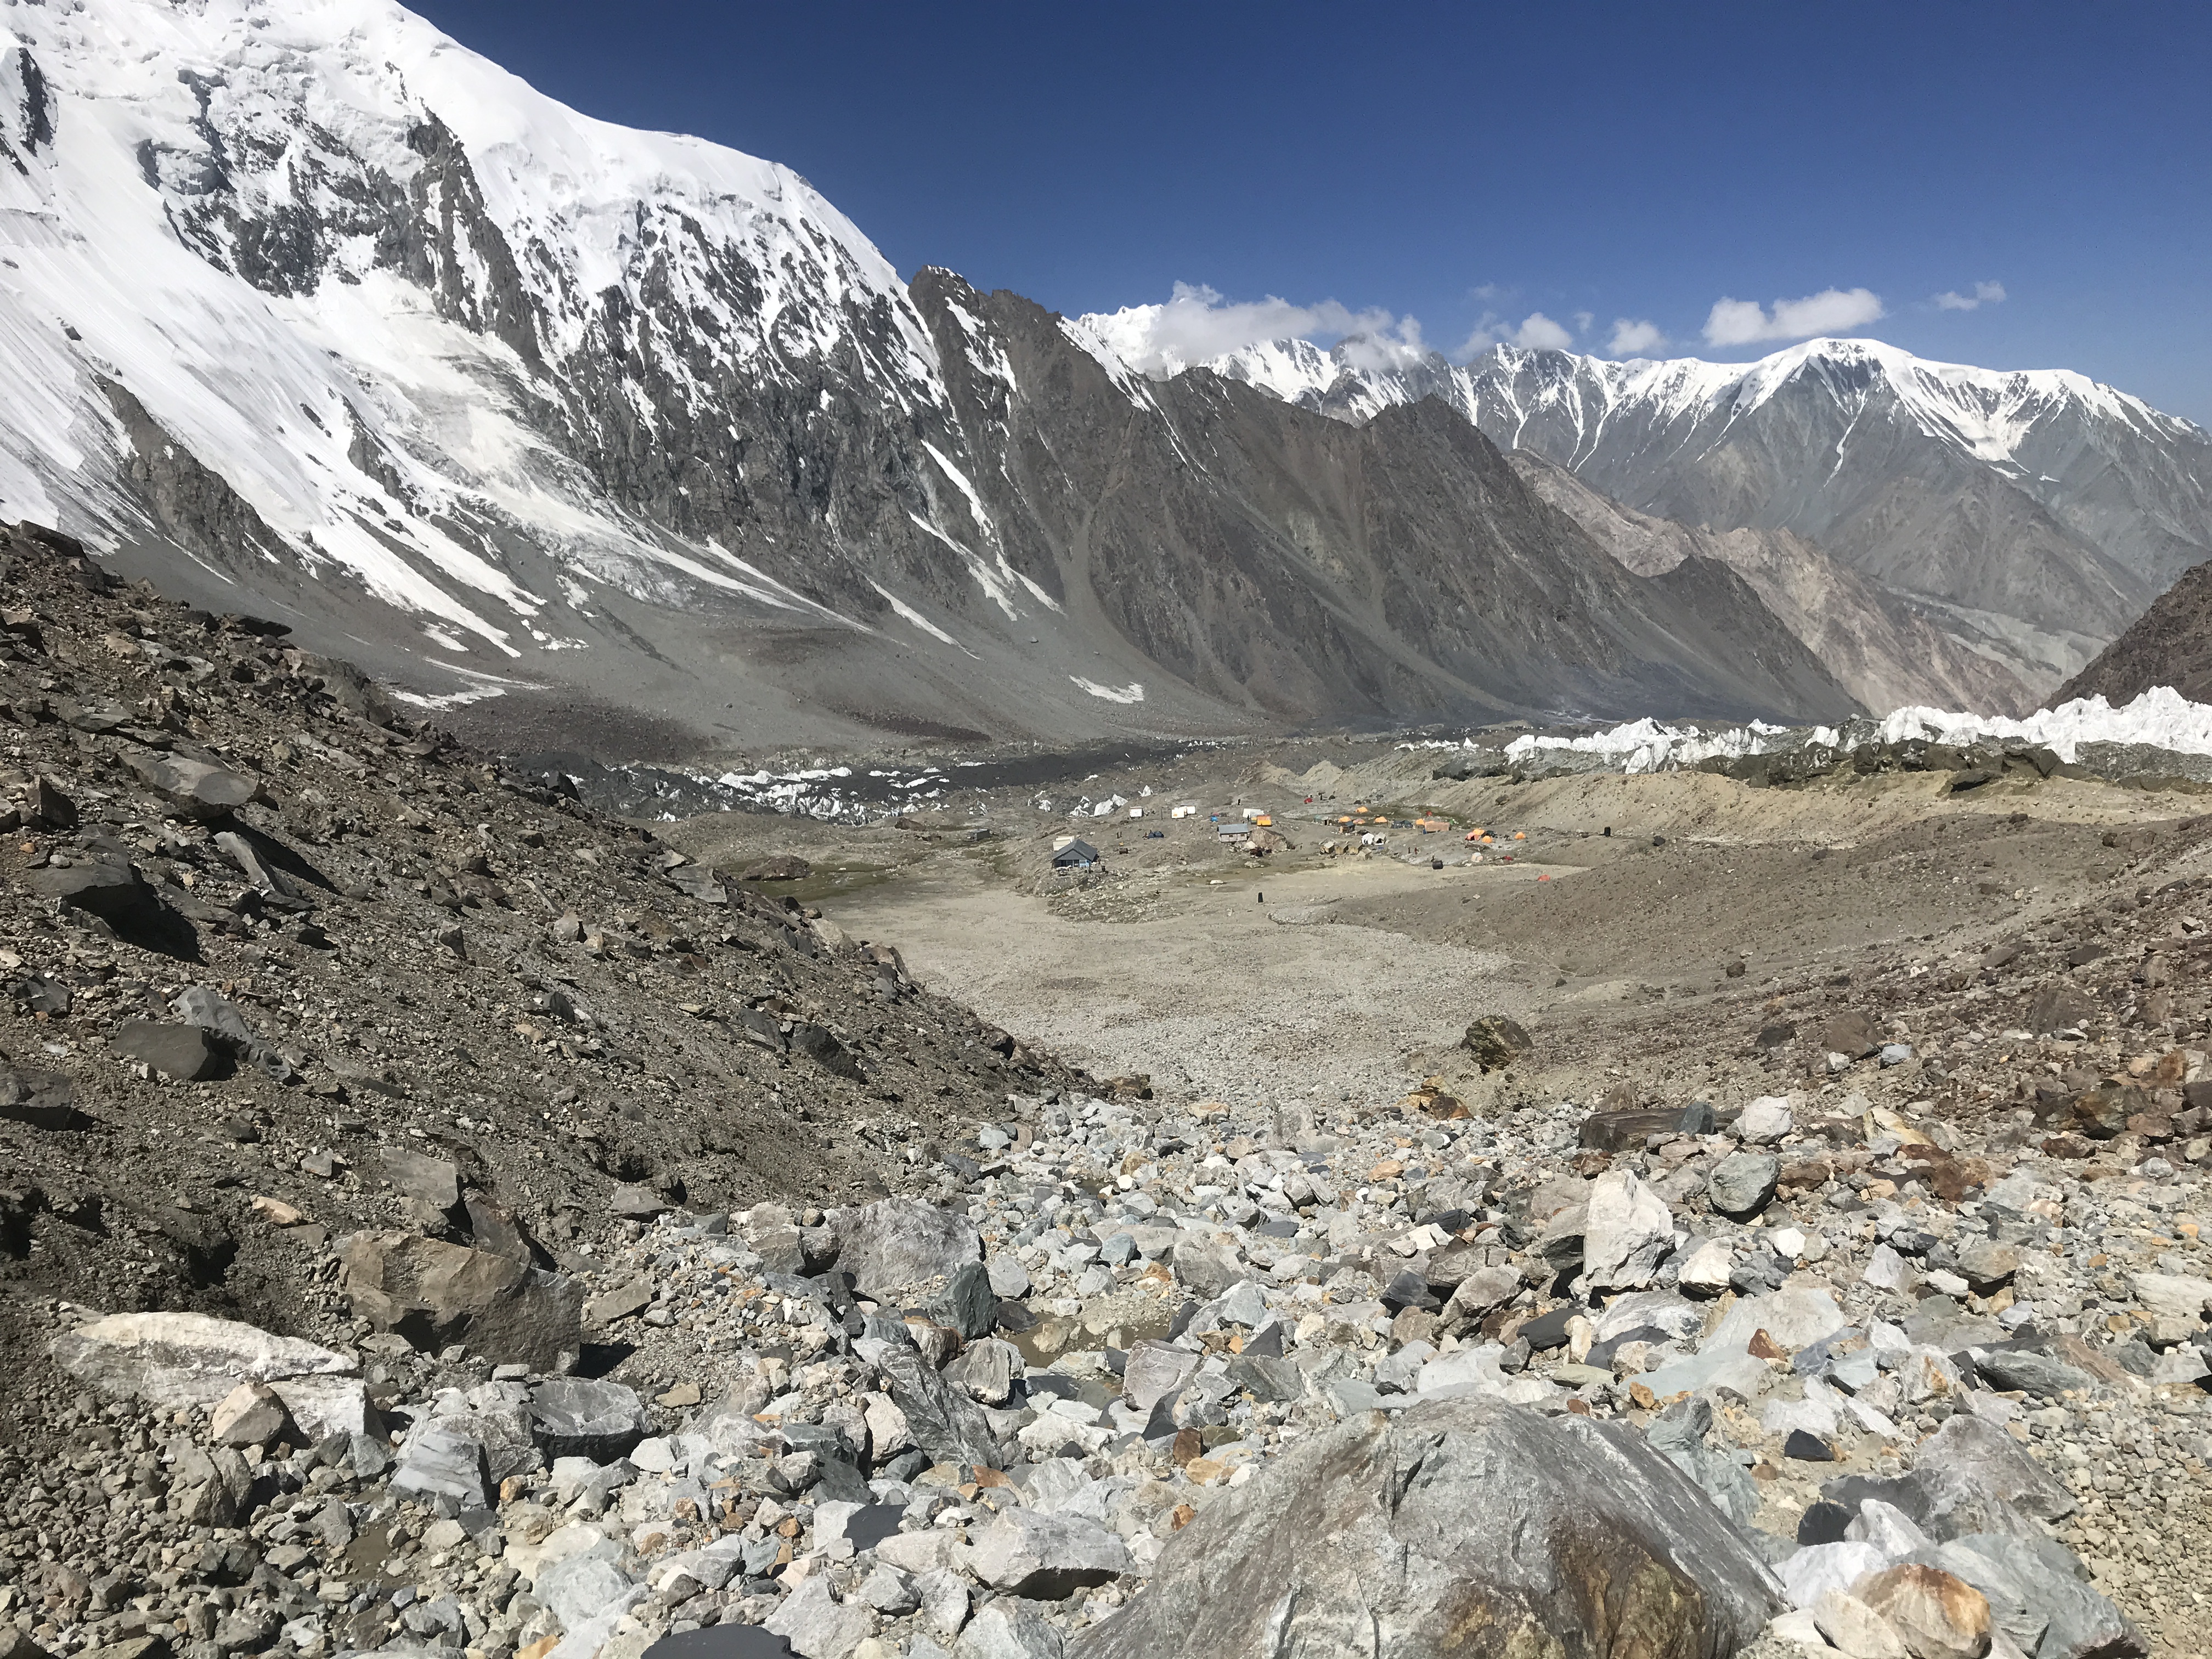
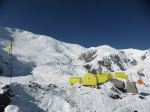
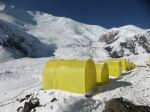
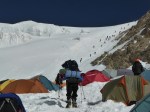
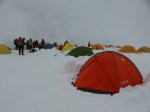
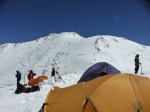
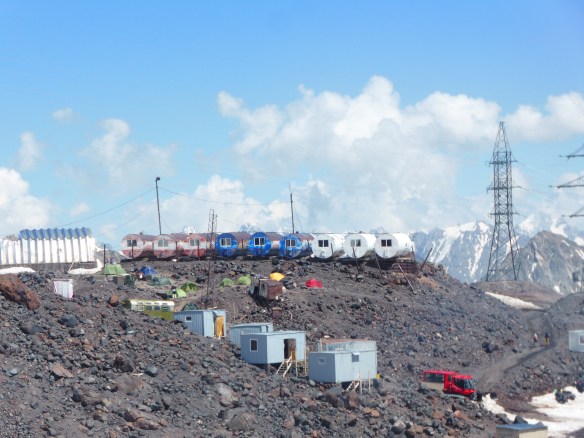
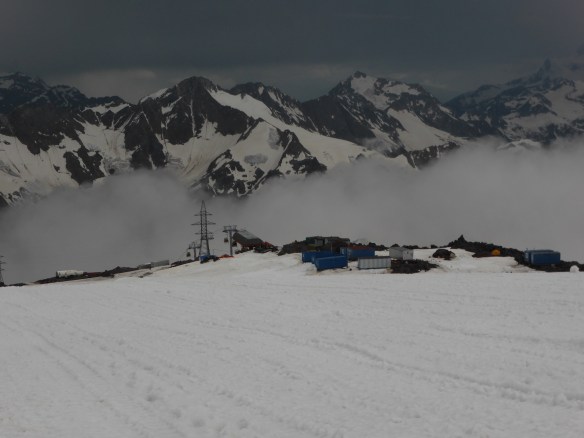
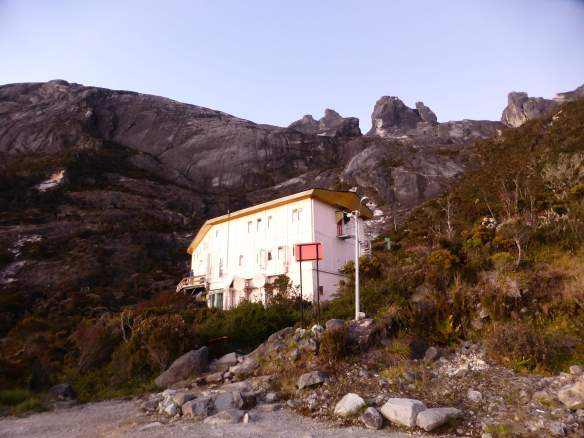
Moskvina Glades Basecamp
Tajikistan’s 7105m Pik Korzhenevskaya isn’t the most famous 7000m mountain, but is undeniably a peak of extraordinary beauty. Korzhenevskaya is named for the wife of the Russian geographer who discovered the peak, and the compliment in this gesture is clear to understand as soon as one sets eyes upon the mountain’s profile; the mountain’s eastern aspect is a gorgeous pyramid of snow and rock rising high above the surrounding valleys, both gargantuan and elegant in its lines. The standard climbing route is as inspiring as the mountain’s figure, and after navigating the lower mountain follows the exposed southern ridge line for over 1,000 vertical meters directly to the summit. Pik Korzhenevskaya is one of five 7000m peaks of the old Soviet Union, and thus is a required objective for any mountaineer who aspires to earn the Snow Leopard climbing award granted to those who attain their summits.
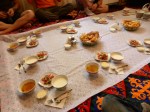
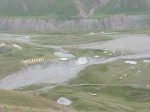
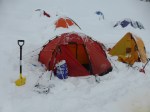
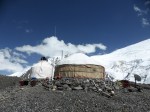
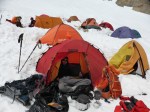
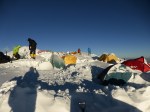
The Moskvina Glades basecamp used for ascents of Korzhenevskaya doubles as the basecamp for the highest peak in the area, 7495m Pik Kommunizma / Pik Somoni. This makes for a largish international population of varying ability and experience. The basecamp itself is operated by the Pamir Peaks company, who are the only game in town for logistics. The basecamp is decidedly rough and ready, and essentially only accessible by helicopter. The helicopter departs from the small town of Djirgital, a full day’s drive from Dushanbe, and operates on an unreliable, delay-prone schedule. Approach via foot is possible but very difficult, and in 2018 only two individuals made the trek into basecamp, both later opting to fly on the way out. The helicopter crashed several days after my departure from basecamp, killing five.

Moskvina Glades Basecamp.

Moskvina Glades Basecamp.

Moskvina Glades Basecamp.

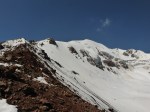
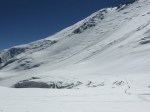
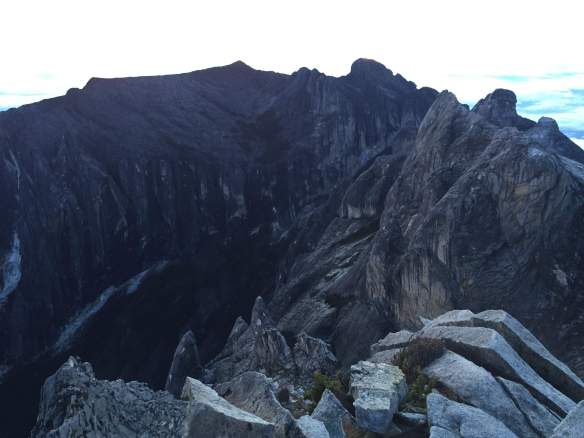
Pik Chetyreh from Basecamp.

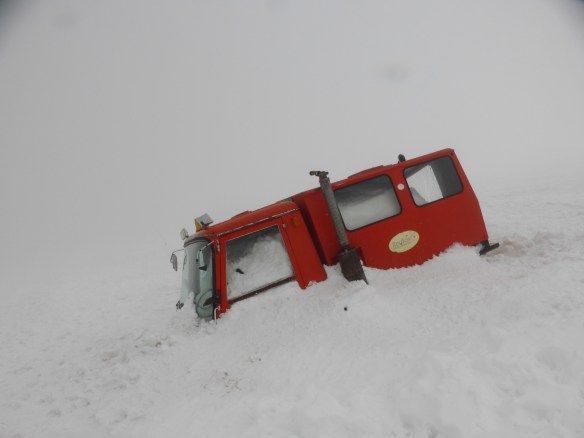
Helicopter.

Helicopter.

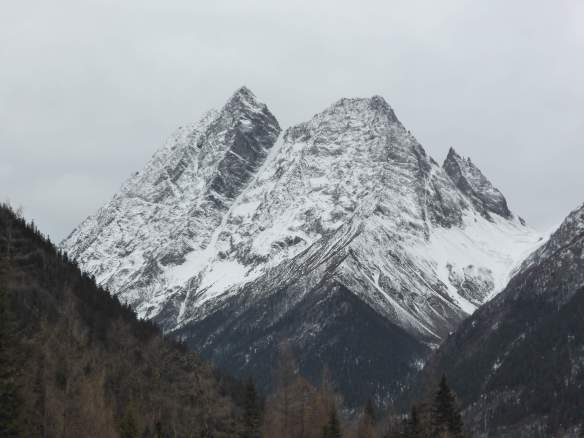
Pik Chetyreh.
There is no sensible alternative to using the Moskvina Glades basecamp, and it is far better than nothing – I would be doing a grave disservice not to compliment the wonderful sauna facility built from a repurposed shipping container, and would be wasting my energy were I to complain about any perceived inadequacies. One would do well to bring spare food, stomach medicine, water purification tabs, and all personal equipment – especially ropes. I kept a detailed diary throughout my time in basecamp and on the mountain, which I have summarized into this page.
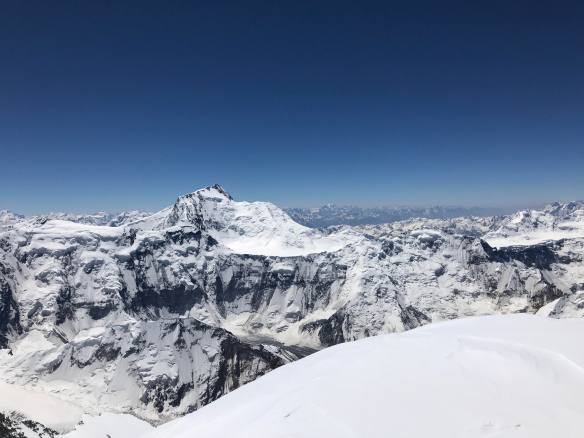
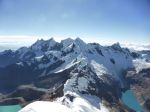
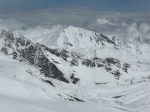
Pik Somoni, viewed from the summit of Pik Korzhenevskaya.
Route Description
The normal route is somewhat convoluted, at least until ~6100m where it gains the south ridge. The below images are of a map drawn by my Polish friend Konrad, who graciously gave me permission to share it. His descriptions are written in Polish, but it nonetheless should serve as a visual aid for understanding the route. I have color coded the camps and route sections in the image adjacent to the original drawing. Below, I have written my own detailed descriptions for each section of the route.

Map of route.

Map of route.
4200m Basecamp to 5100m Camp 1
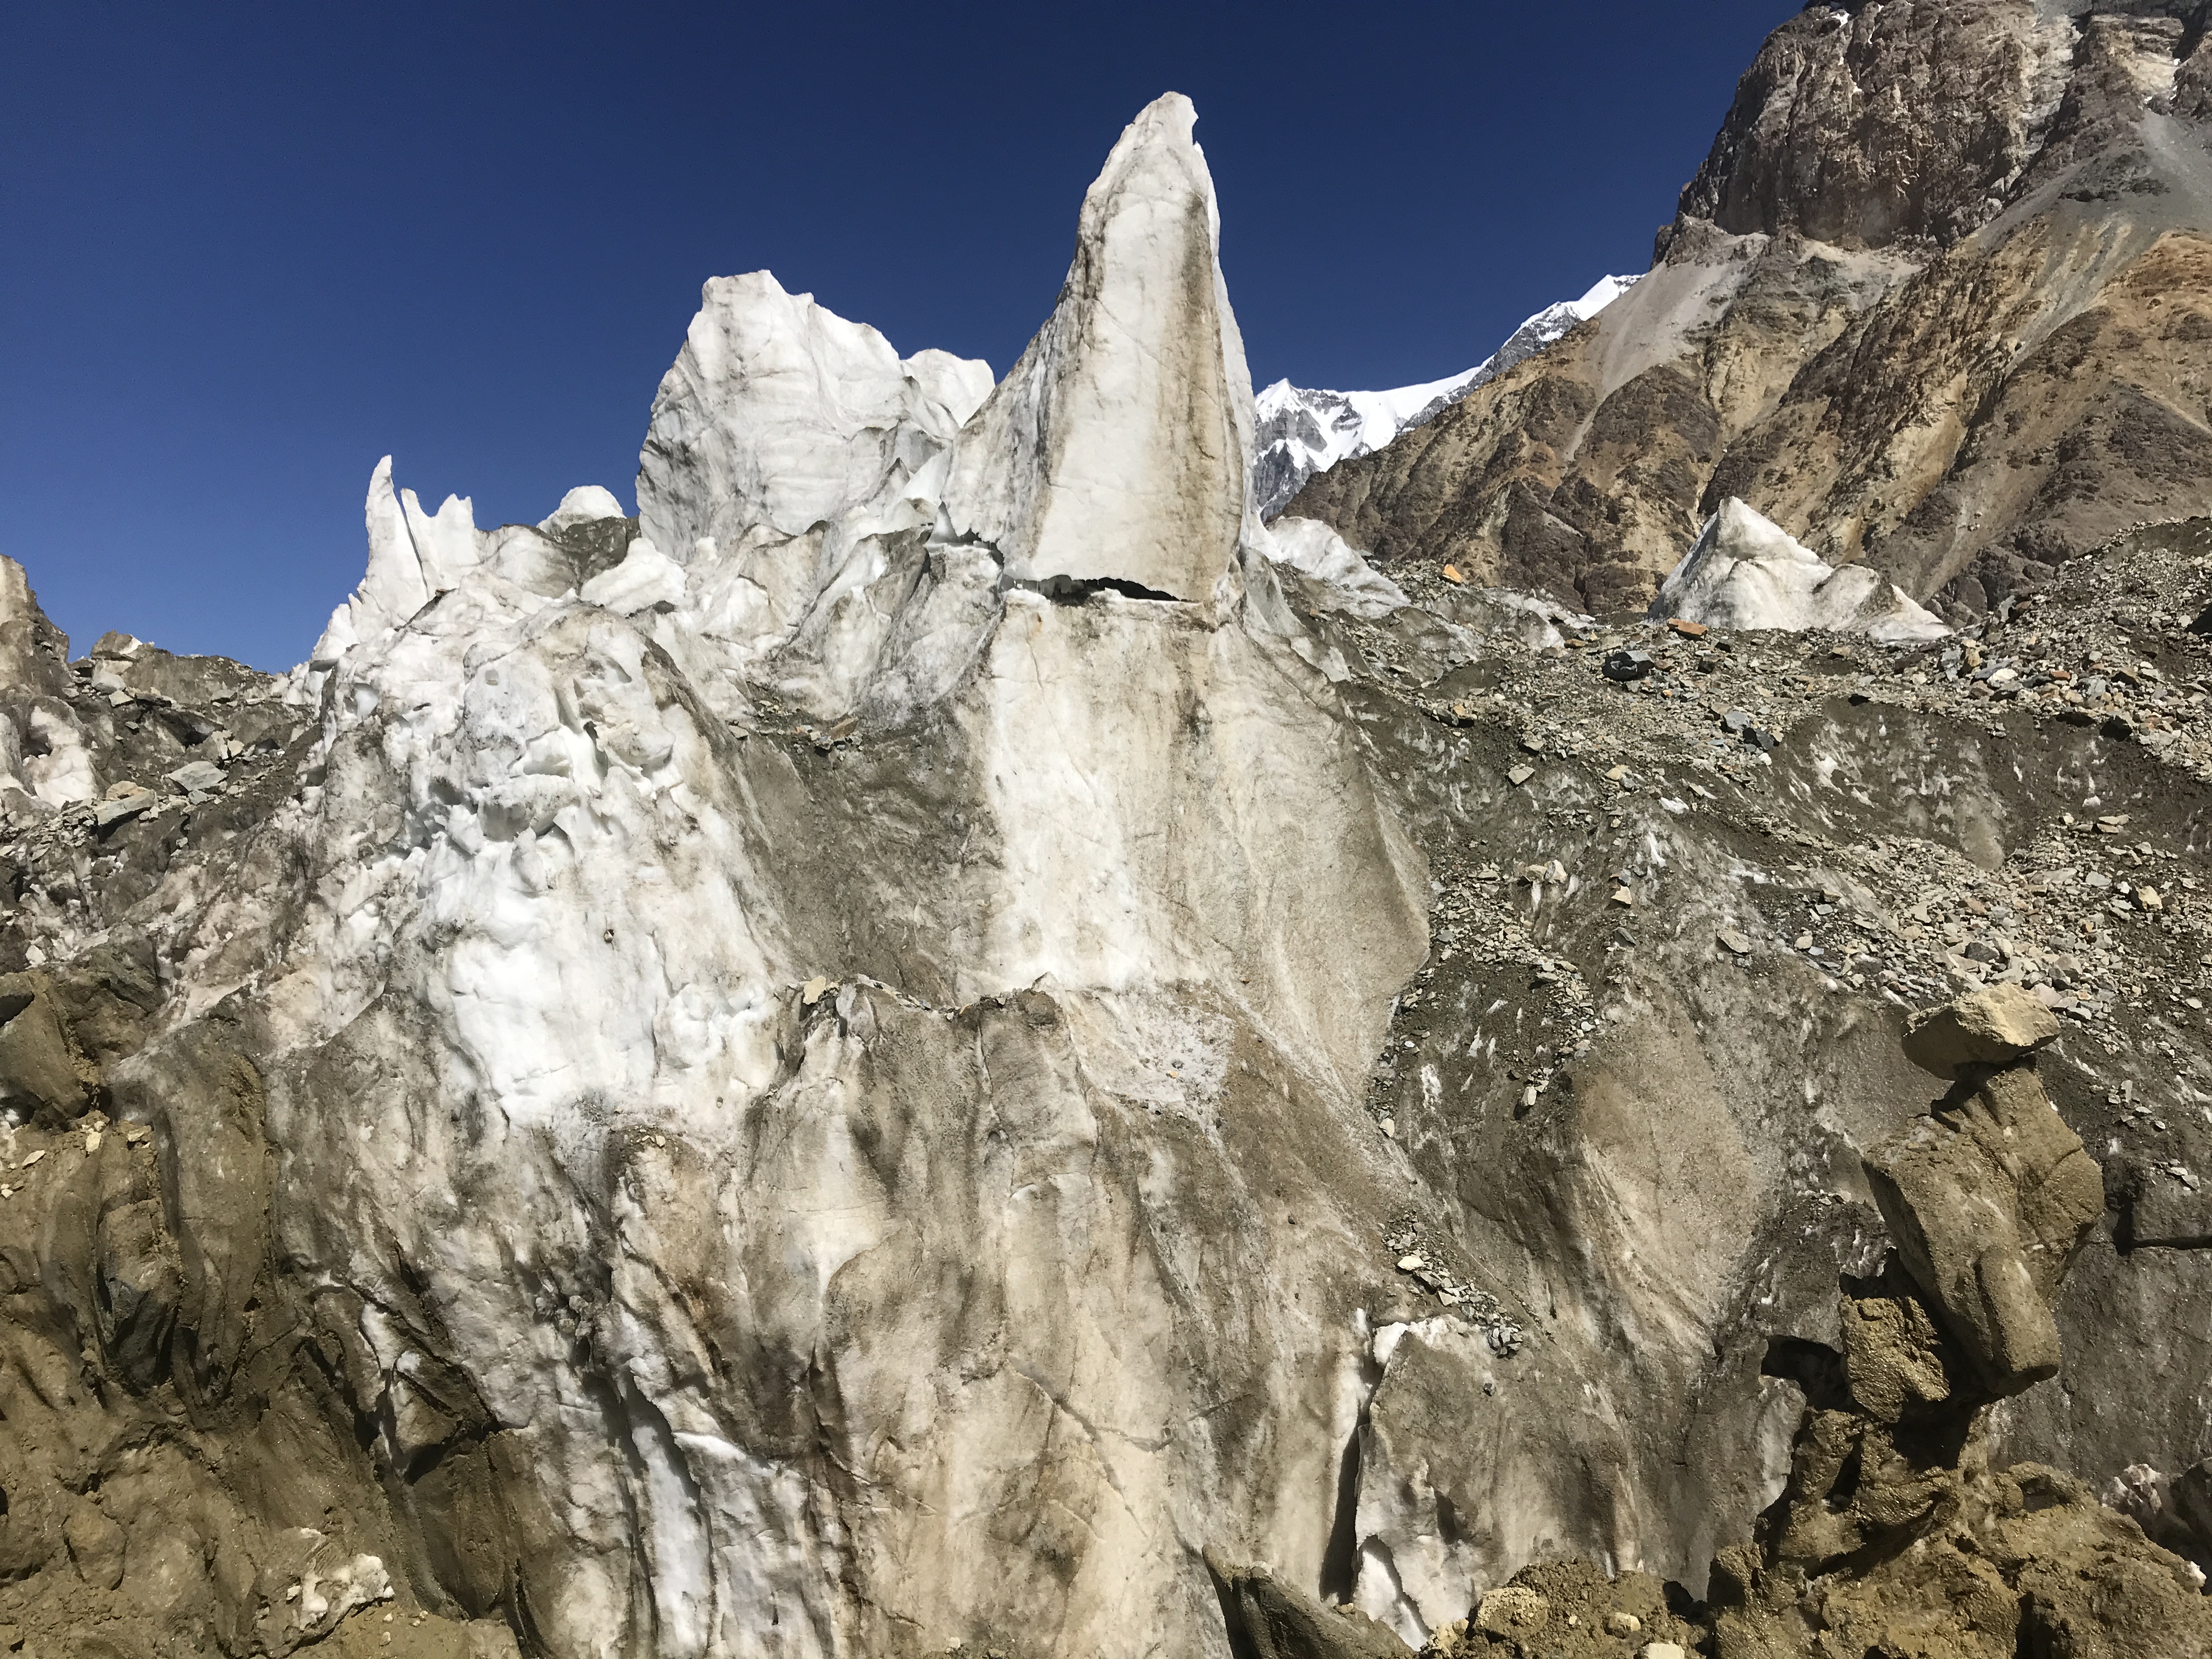
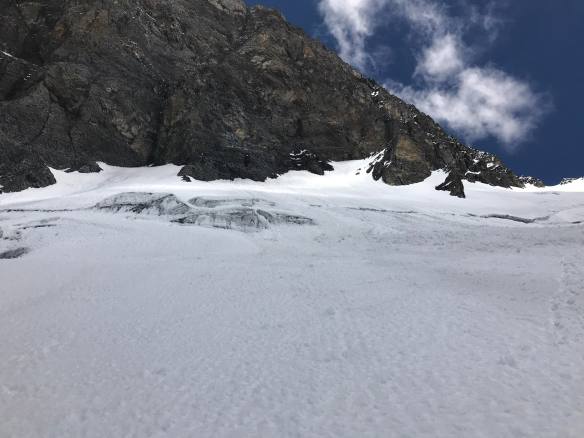
Besides summit day this is the longest section of the route. Immediately outside of basecamp the route crosses a section of glacier. This area melts rapidly in the daytime, and the cleanest route through will change day by day. While crampons aren’t needed, it is well advised to mark one’s path with cairns or wands. There will be a variety of easy ways through to the other side, and it is best to route find rather than waste time climbing vertical ice walls.

Crossing the glacier.

Crossing the glacier.

Crossing the glacier.
On the other side a well worn footpath switchbacks up grassy hills. The route continues to be well marked as it crosses a section of river. The boot track soon transitions onto rock, and while the direction should be mostly obvious one should keep an eye open for cairns. There are several class 3 moves in this rocky section, as the route gains altitude. After crossing a significant river below a large waterfall the route becomes harder to visualize, but large cairns should still be in sight. Ascending several hundred meters of hideous scree takes one onto a rocky plateau adjacent to an icefall; 5100m Camp 1.
5100m Camp 1 to 5300m Camp 1.5, to 5600m Camp 2
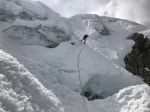
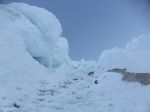
The route out of Camp 1 starts on a visibly worn boot track and is fairly obvious. It ascends an icefall adjacent to a meltwater waterfall, involving several steep sections of glacial ice. Without fixed ropes in place the competent use of crampons and axe are essential for ascending, and this area becomes congested when large groups are on the mountain. Fixed lines were placed along this part of the route in 2018, but the ‘rope’ used was merely unrated ~6mm nylon twine with no sheath. Beware; ropes of this quality, along with their suspect anchors, are not to be fully trusted for hauling body weight on an ascender. This is a steep, slightly technical section.
Above the icefall is a muddy river, and on its bank is 5300m Camp 1.5, a popular alternative to Camp 1. The water here will need to be filtered for debris.
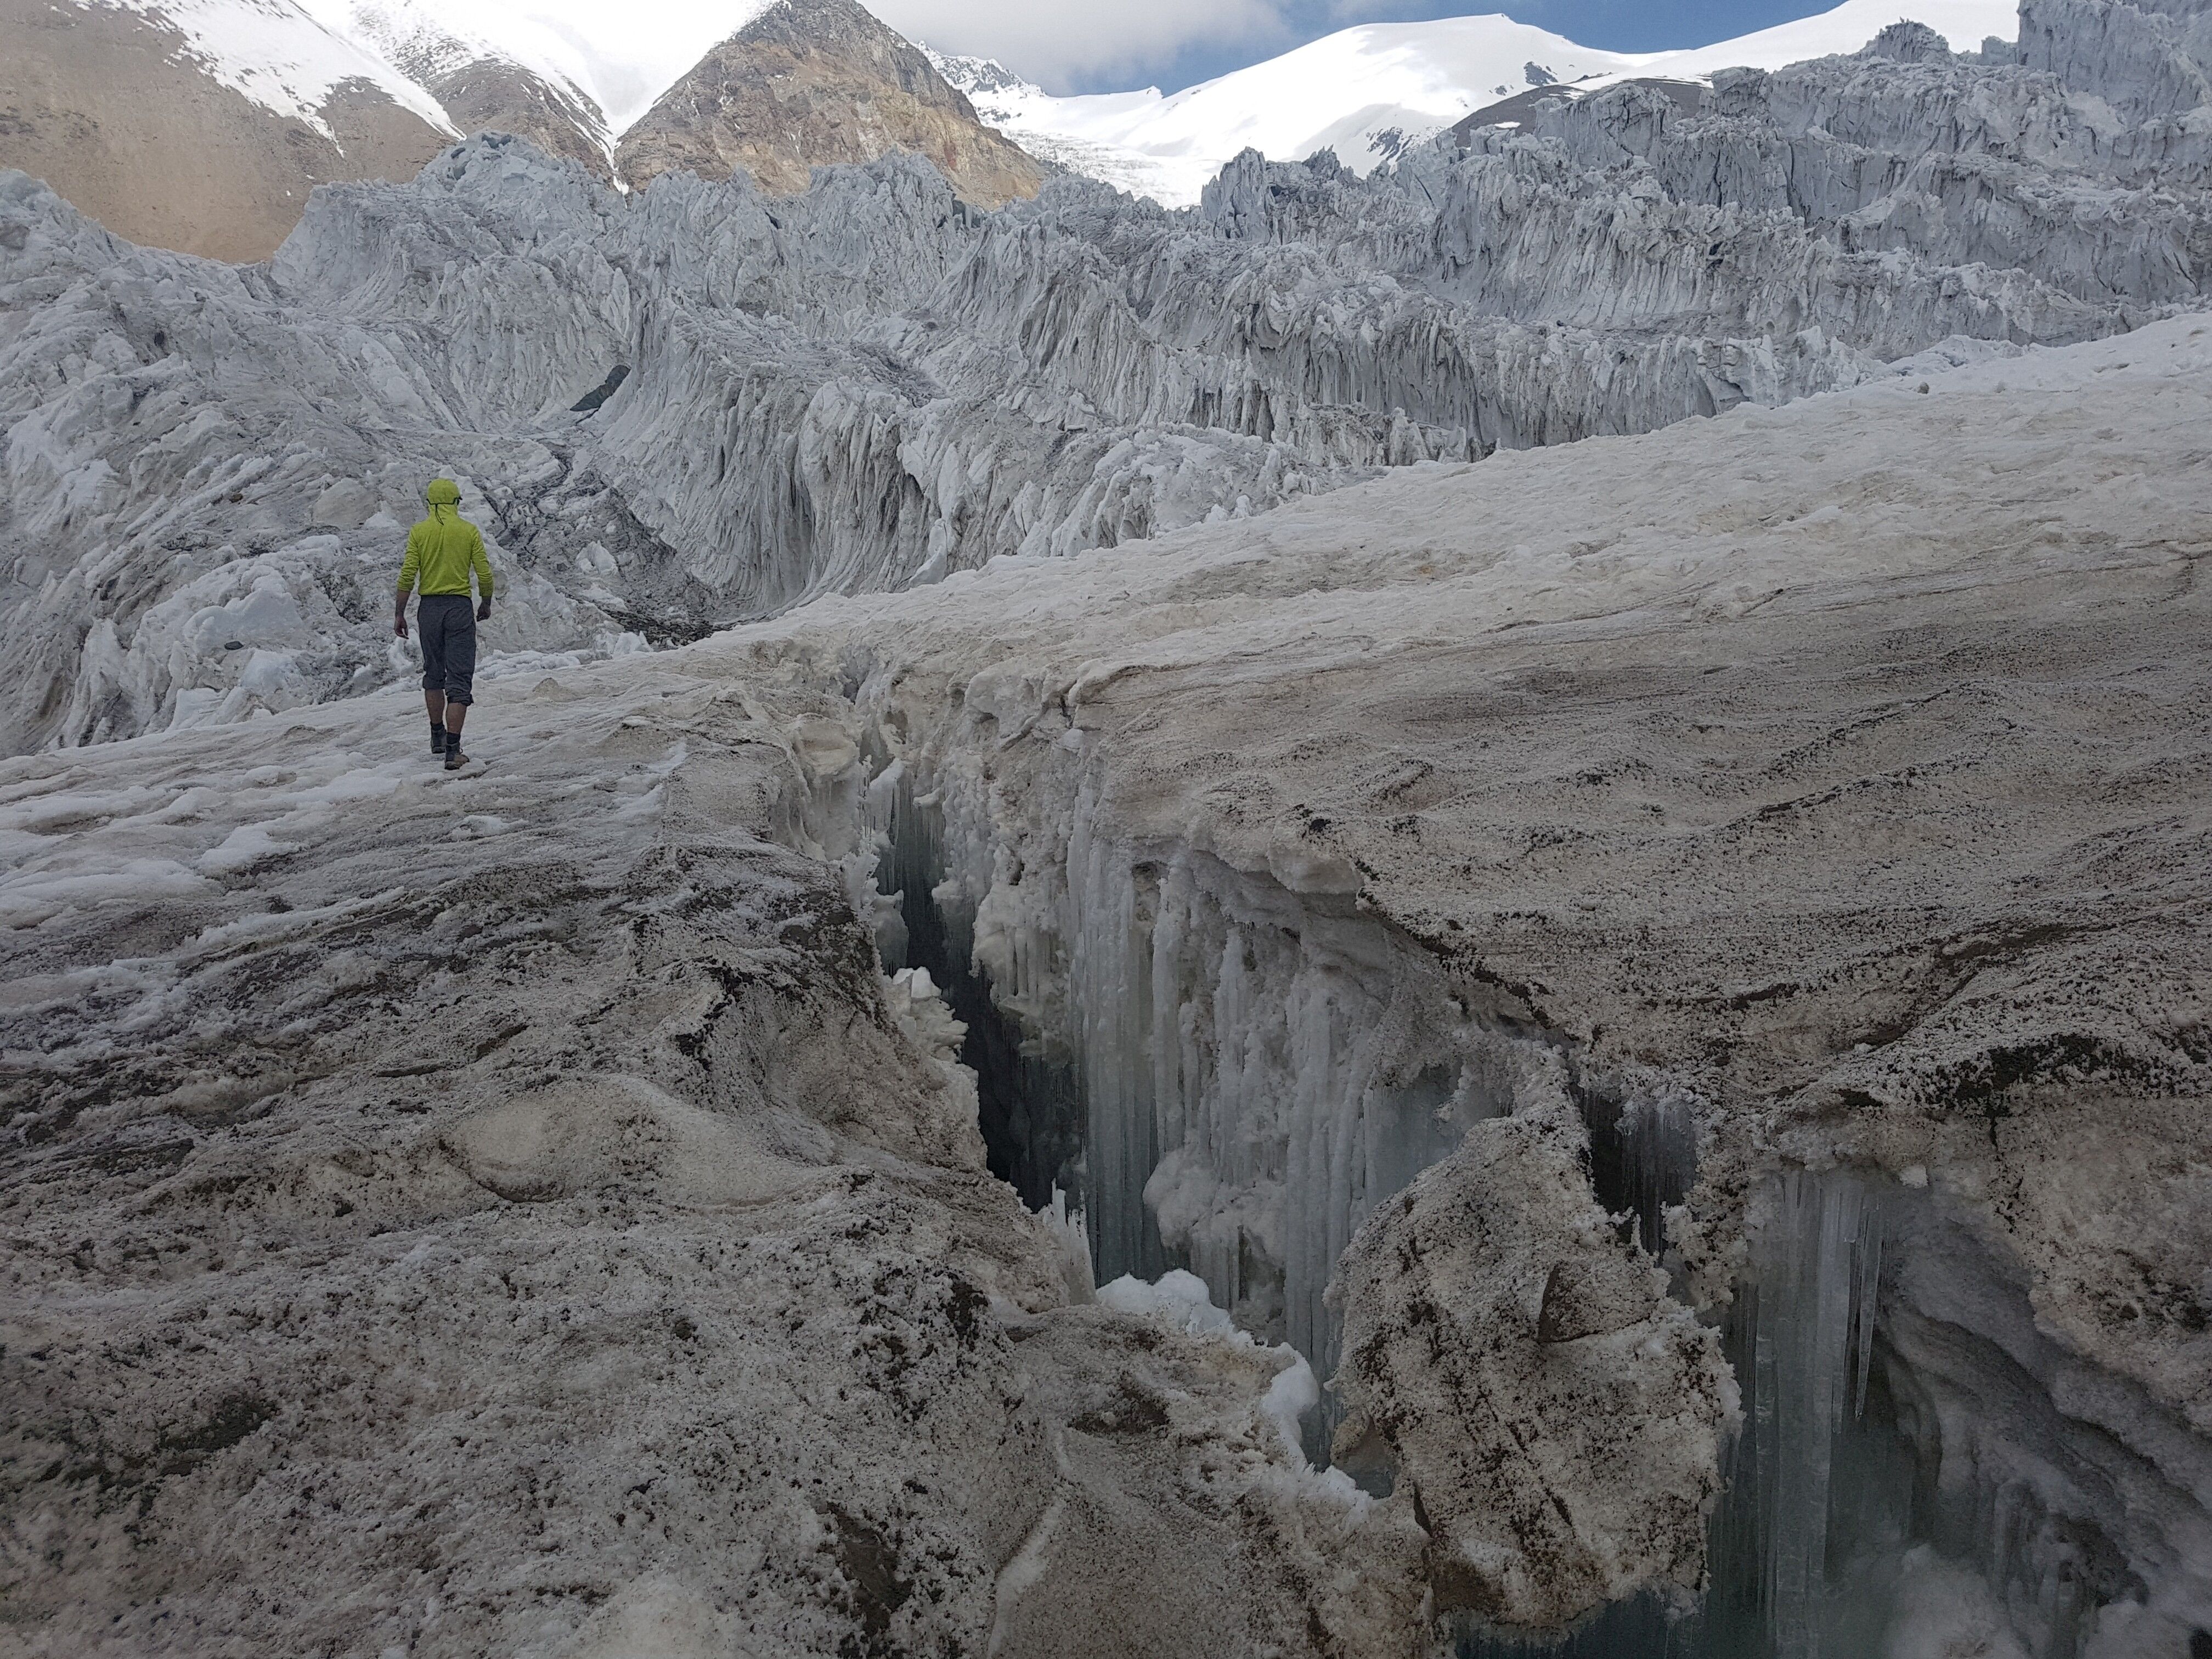
Continuing across the muddy river, the route gains the glacier proper. This section of lower glacier is rapidly melting out and was a hazardous crevasse field in 2018. The cracks are numerous and large, and the snowbridges were changing day by day. Crossing after early morning is ill advised, and crossing at any time of day unroped represents a terribly risky exposure to a bad fall. I watched this section of glacier visibly transform during my time on the mountain, with enormous crevasses opening and forcing rerouting. The old Camp 2 at ~5800m no longer exists, as the glacier has completely receded several hundred meters away from the rock face which the camp used to to sit alongside. 5600m Camp 3 now sits on a flat area of snow, above the worst of the crevasses.
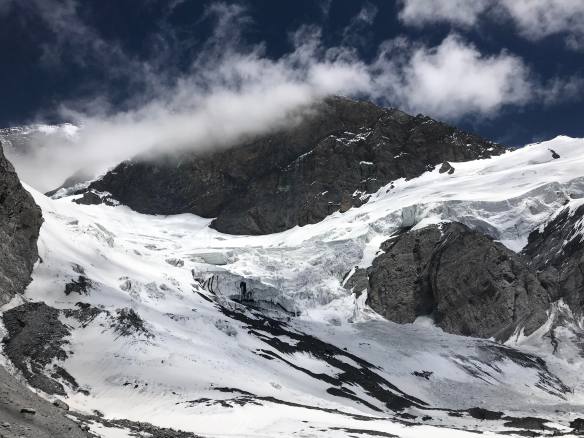
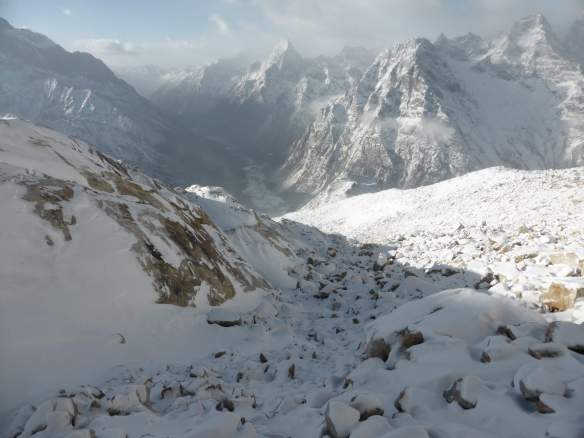
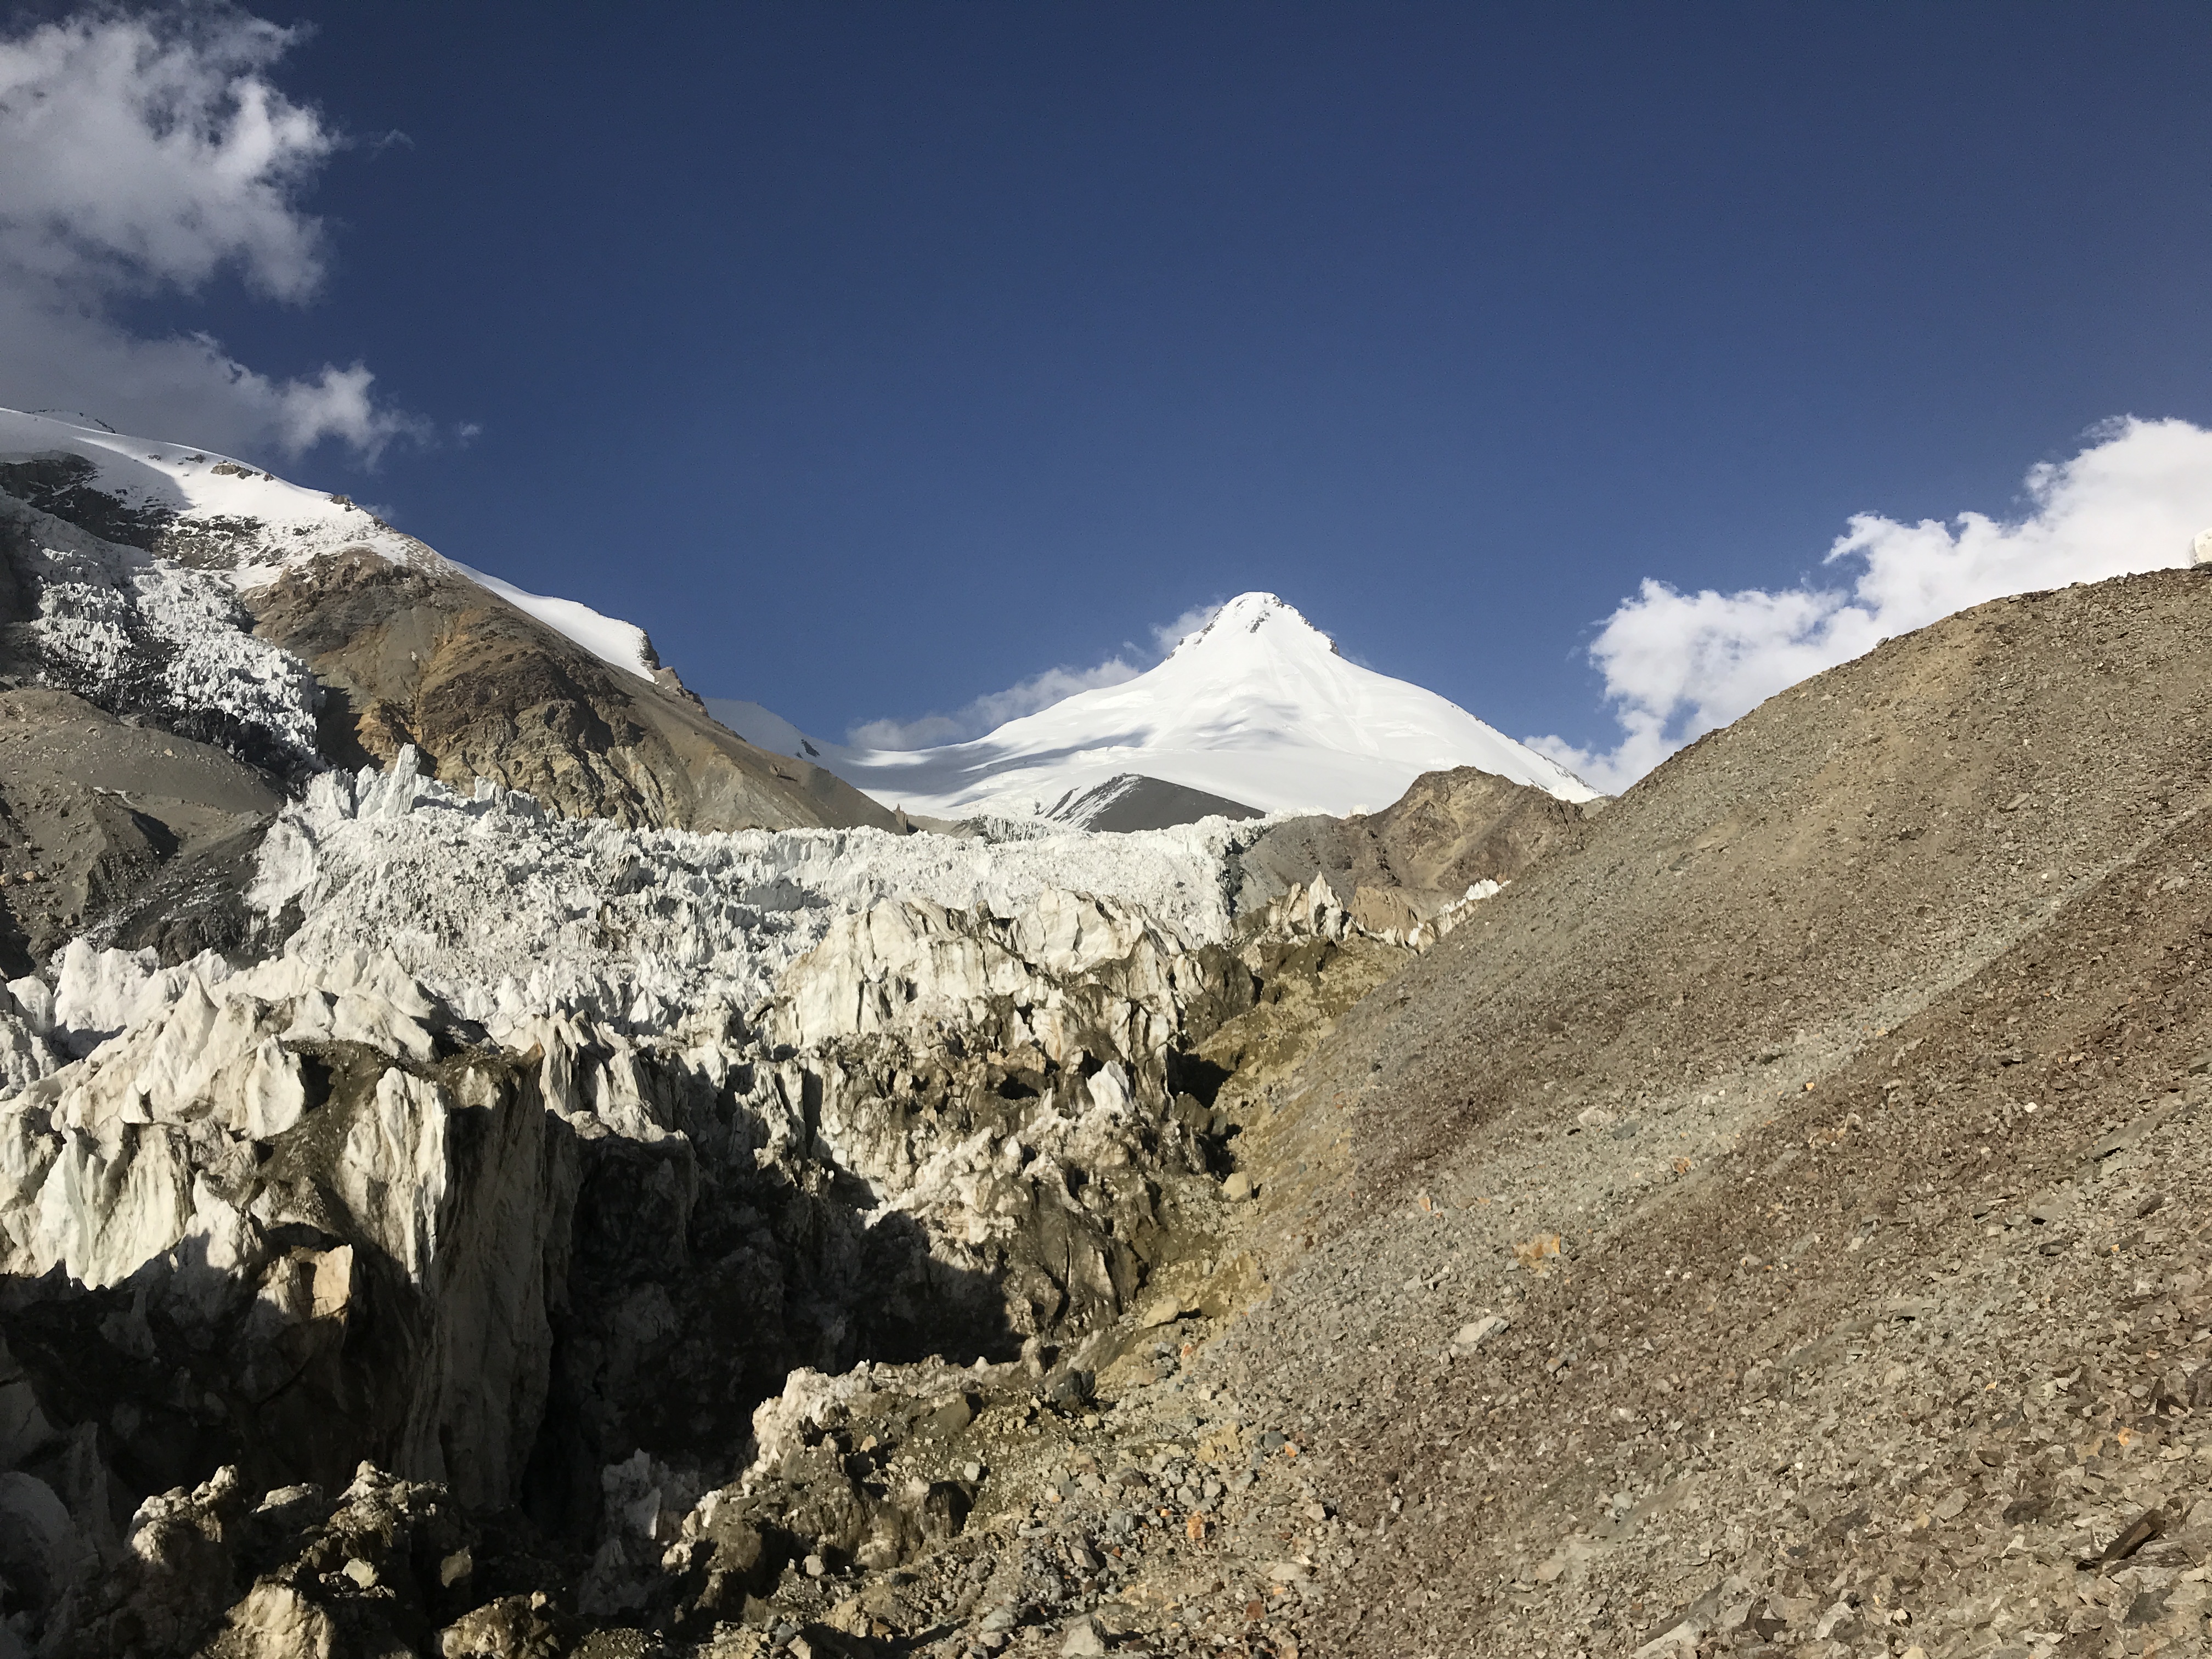
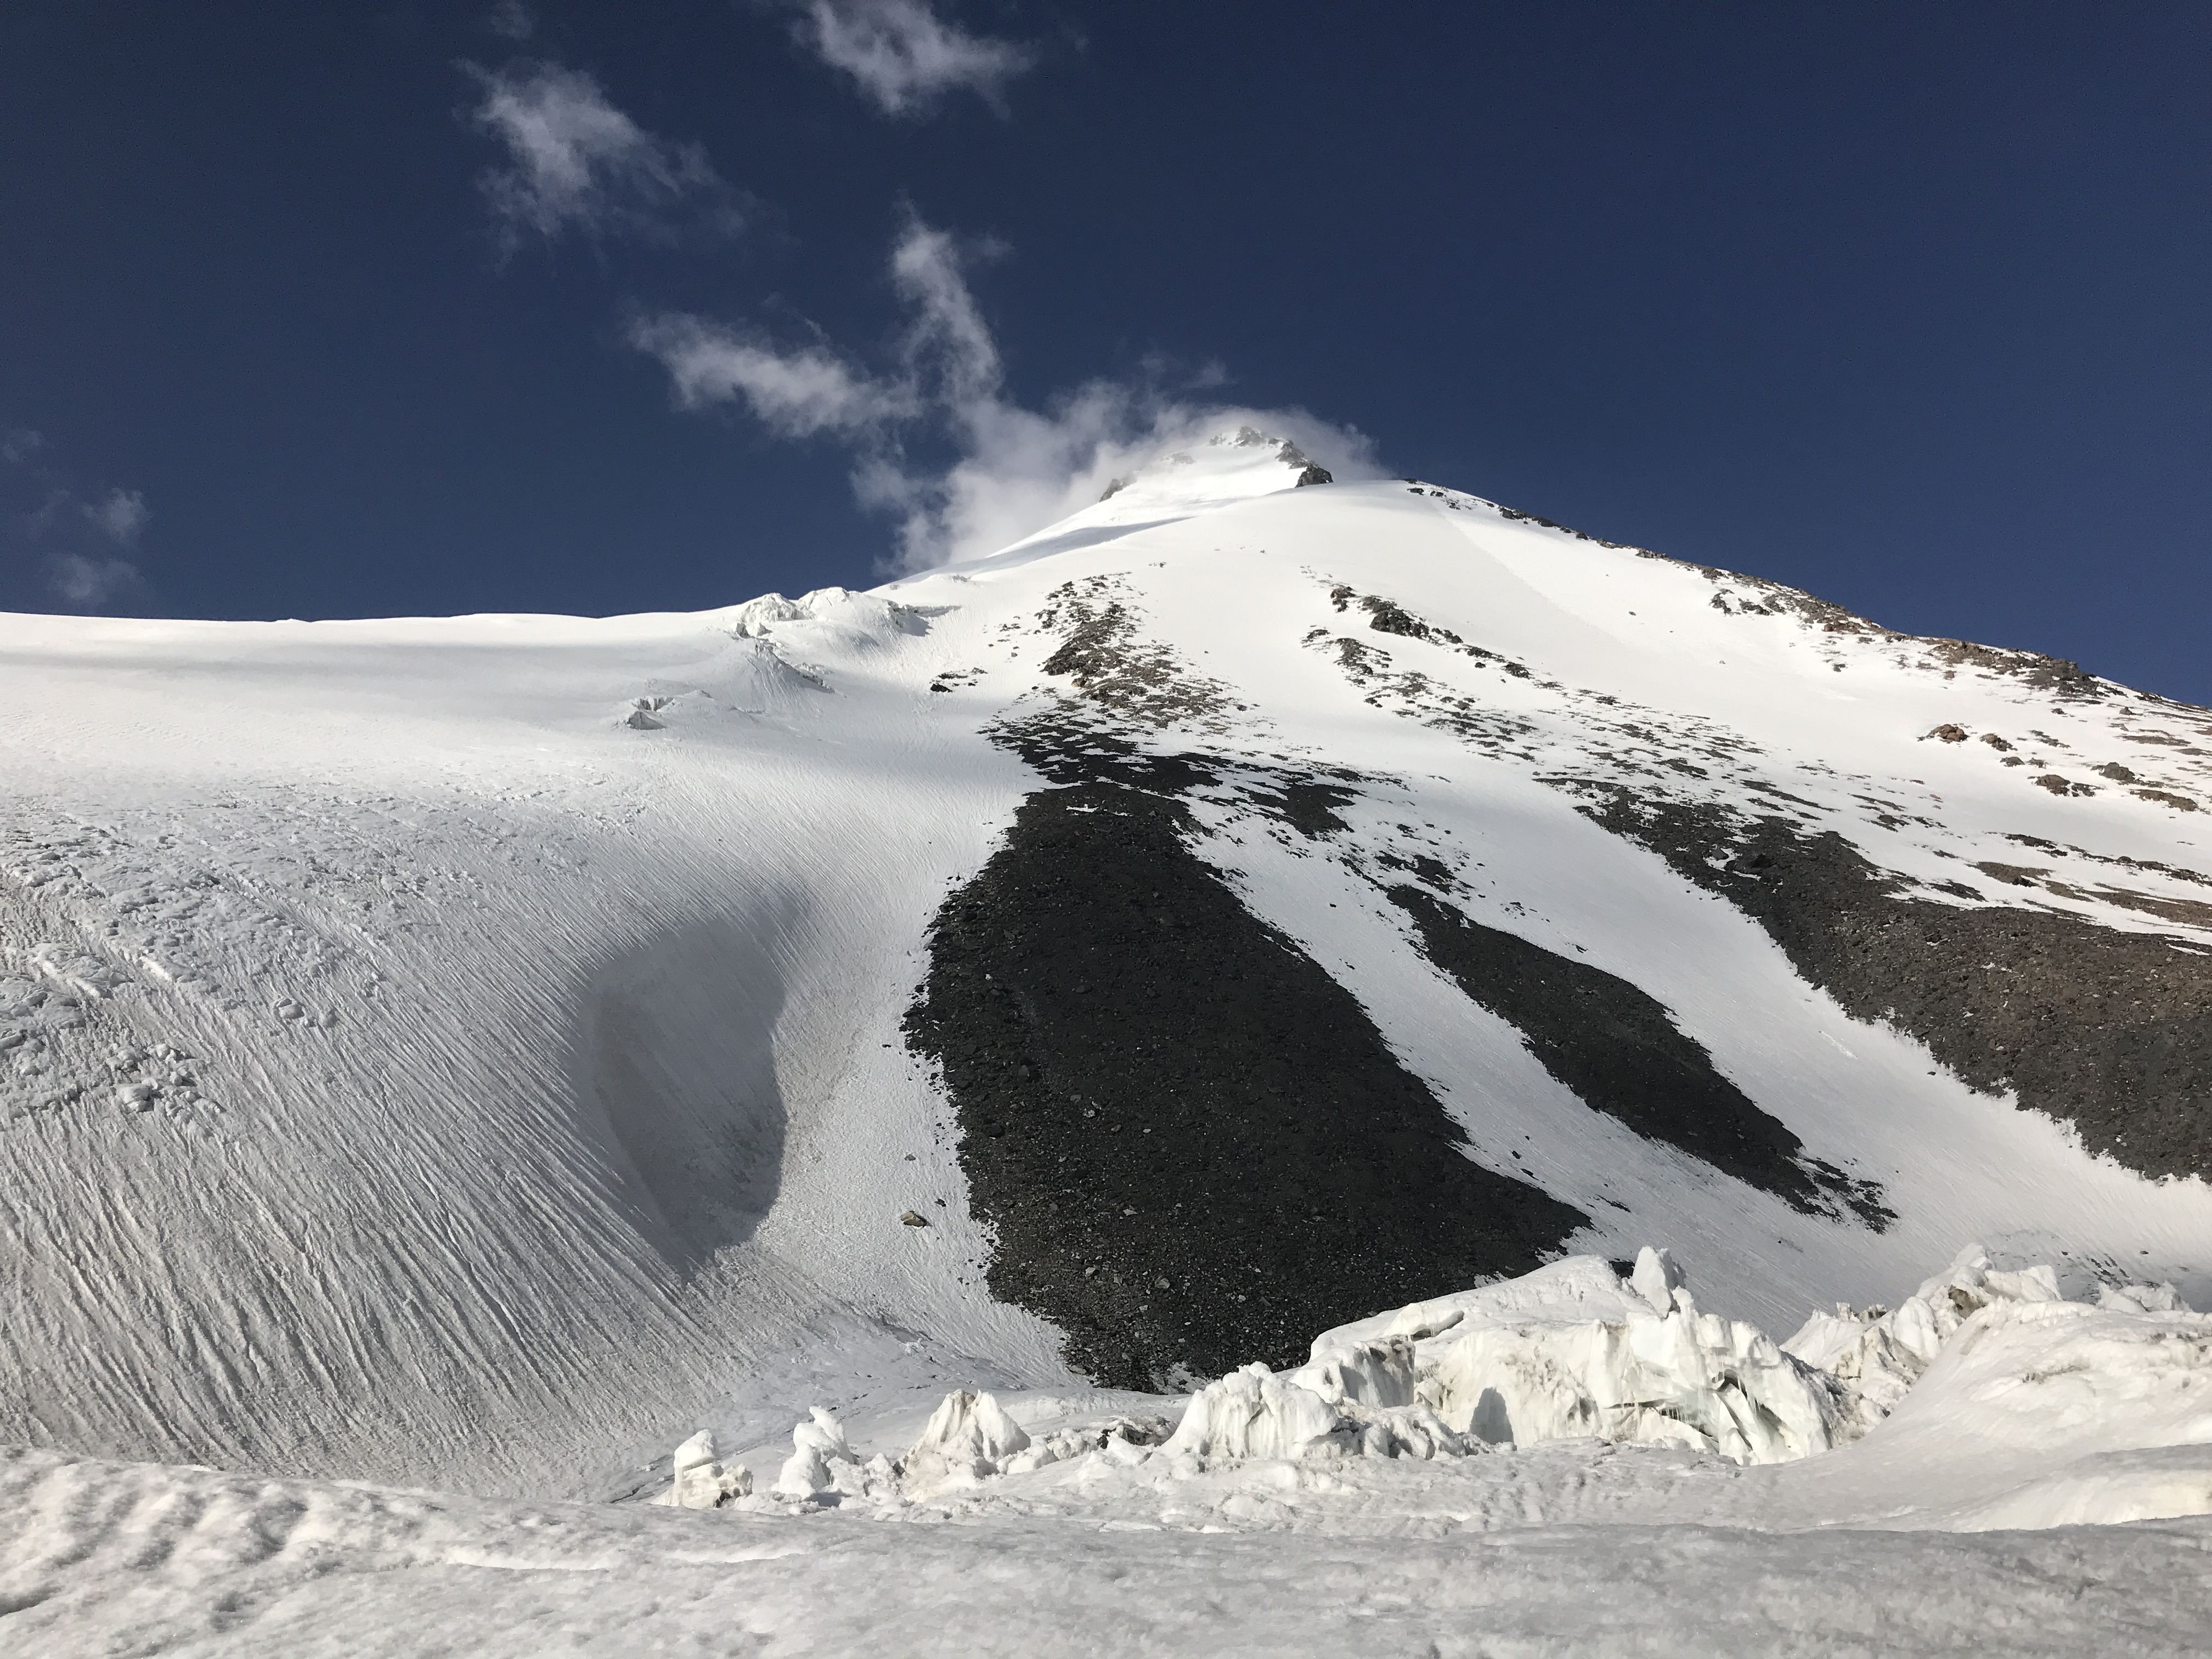
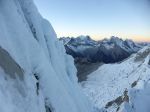
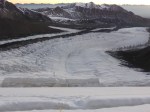
Looking up the lower glacier towards 5600m Camp 2, from 5300m Camp 1.5. Camp 2 is out of sight, but would be located in the middle-left of this image. 6100m Camp 3 is visible in this image, where the rock meets the snow along the skyline in the upper right of the picture.
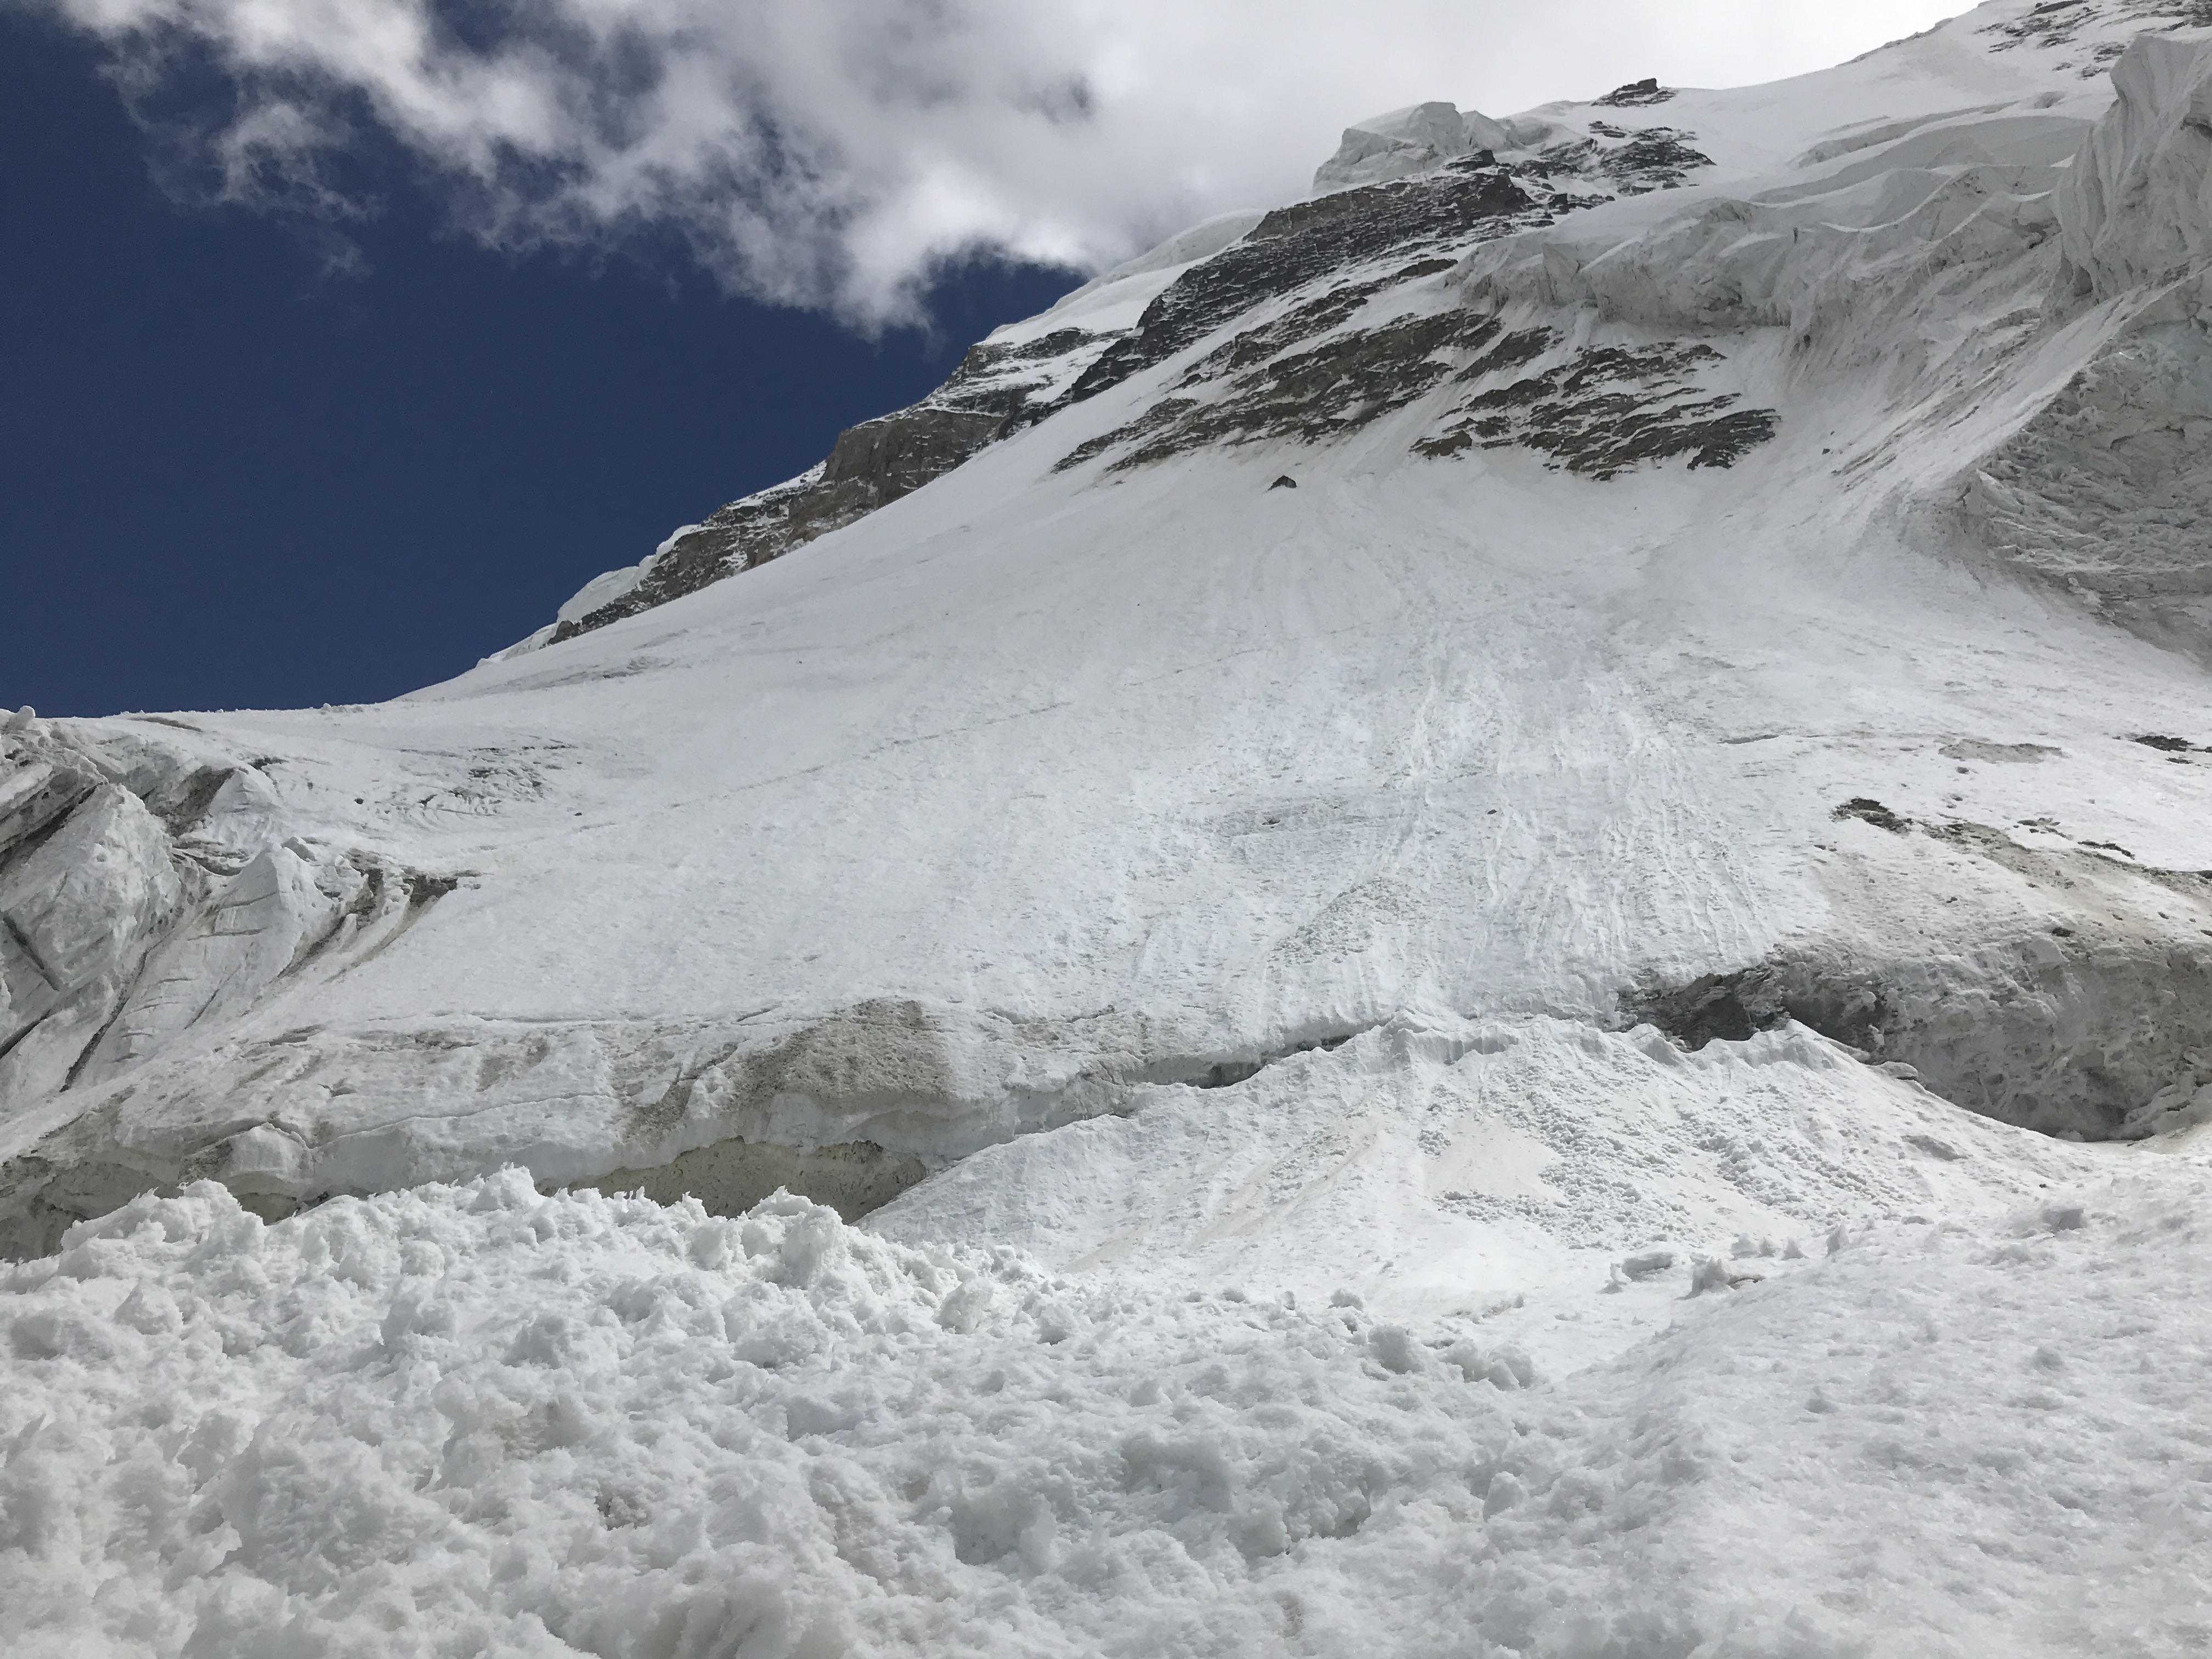
5600m Camp 2 to 6100m Camp 3
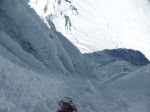
Above 5600m Camp 2 the glacier improves significantly and involves far fewer crevasse hazards. The route continues to ascend the hanging glacier visible in the above image (ascending to the right, in the image above), crossing several slopes of moderate steepness. A bergshrund must be crossed at around ~5900m. This section was fixed with nylon twine in 2018. 6100m Camp 3 sits at the top of the glacier, at the very base of the south ridge, and is visible to climbers as a notch in the rock. It is a small space, and suitable for only 4-5 tent platforms.
The bergshrund. 6100m Camp 3 is visible in this image as a notch of snow against the sky, in the top right corner of the picture.
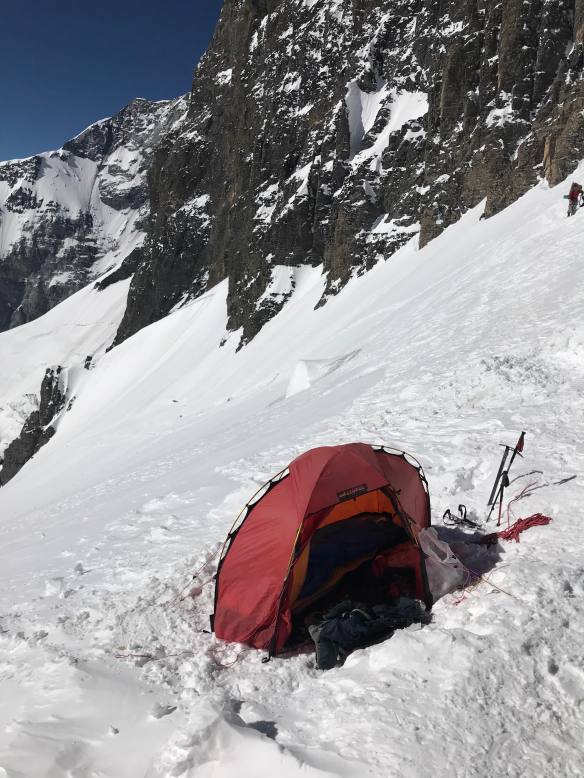
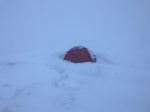
My tent at 6100m Camp 3.
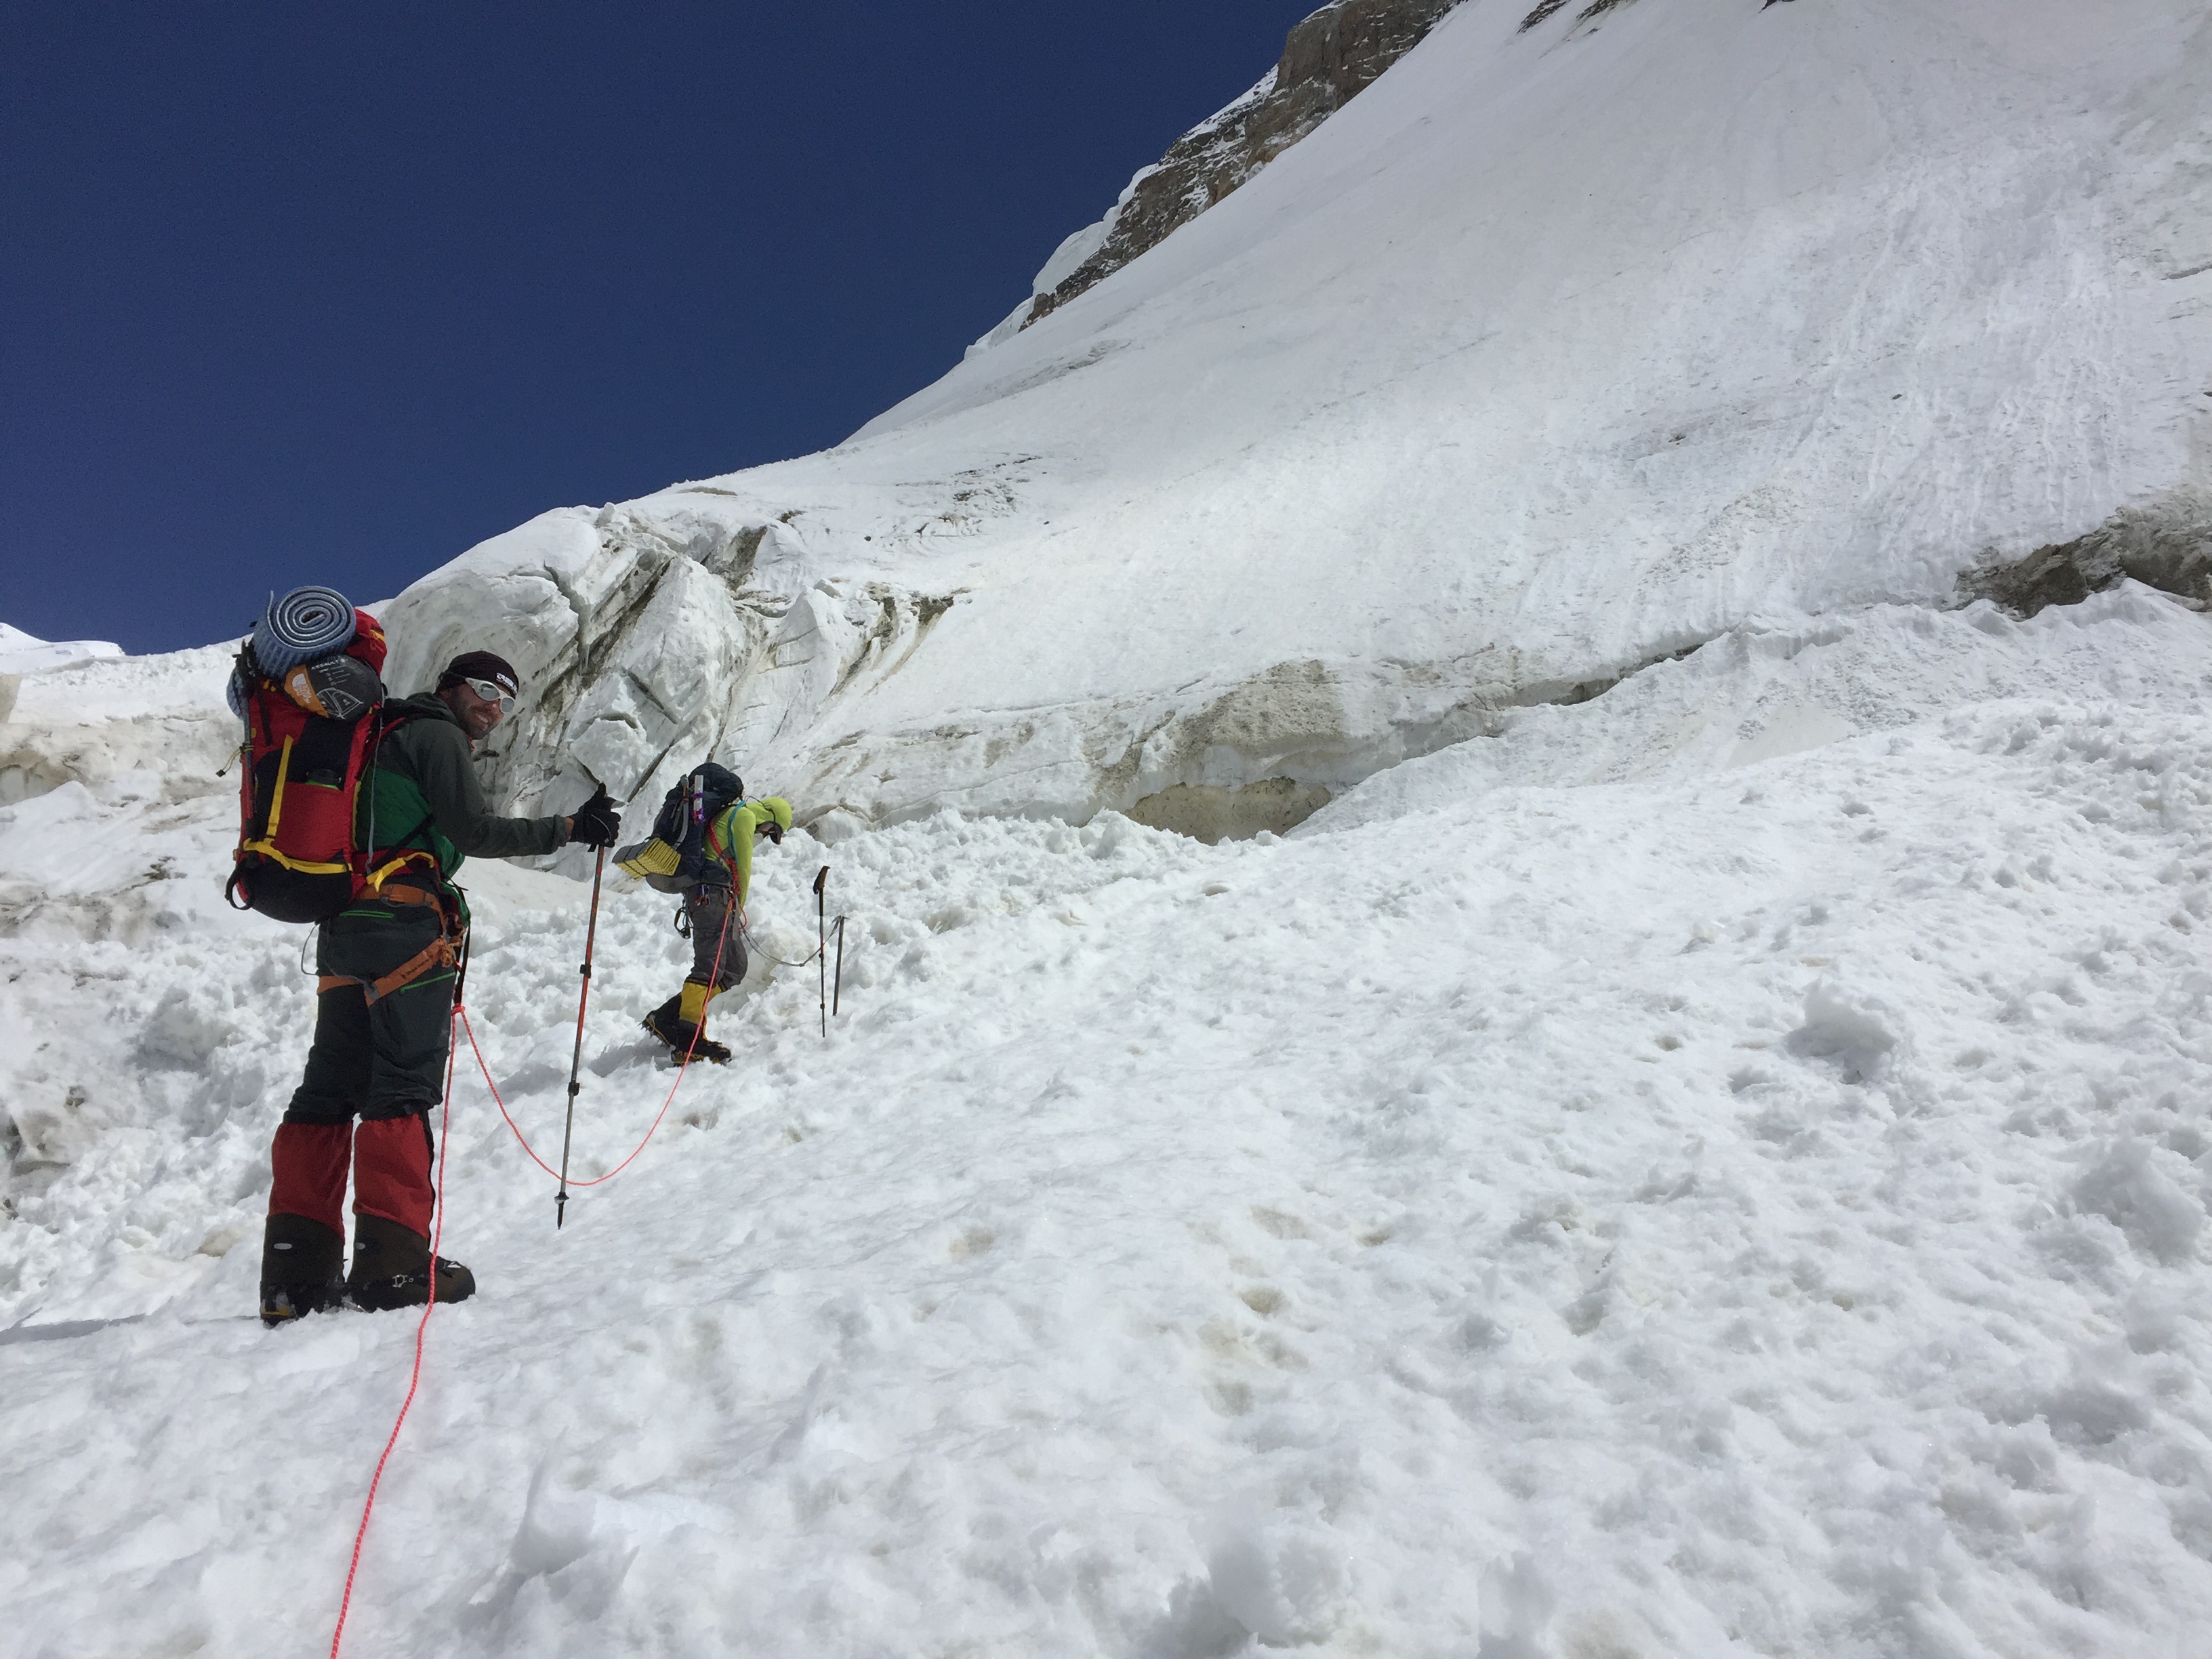
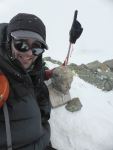
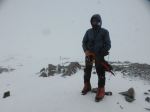
The three photos below are not mine, but are of my partner Pat and I. Credit to Dave from Lithuania for taking such excellent shots of us arriving at Camp 3, and for being so kind in sharing them with me.

Reaching 6100m Camp 3.

6100m Camp 3.

Ascending to 6100m Camp 3.
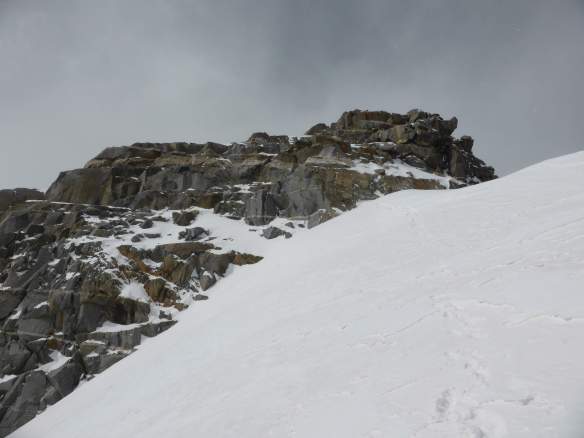
6100m Camp 3 to 6300m Camp 4
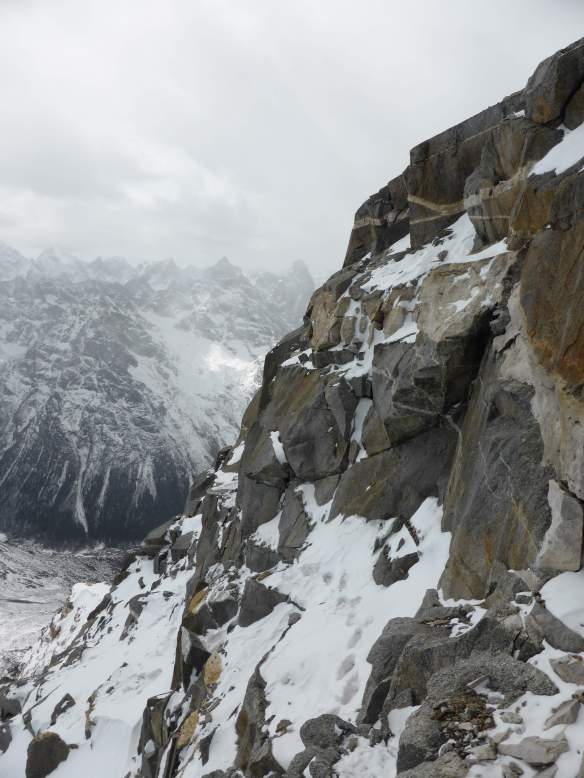
Past 6100m Camp 3 the route ascends roughly ten meters of rotten, low class 5 rock in order to gain the south ridge. Old fixed lines were in place on this section, with good anchors tied off on large boulders. This short rock step is the most technical section of the entire climb, but is made trivial by fixed ropes. Above the rocks one must ascend a section of narrow, exposed ridgeline before gaining the nicely sized plateau of 6300m Camp 4.

6300m Camp 4, Pik Somoni in the distance.

Ridge between Camp 3 and Camp 4.

Rock section above Camp 3.
6300m Camp 4 to 7105m Summit
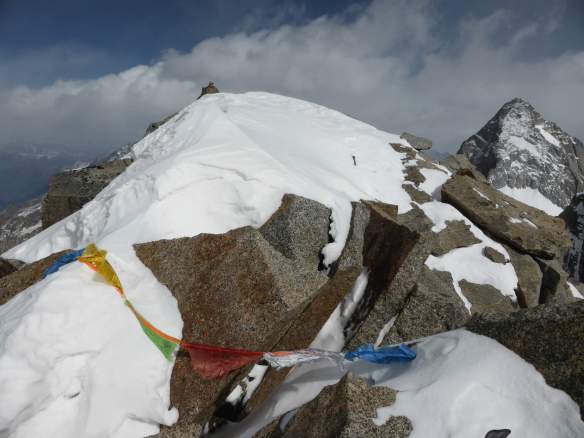
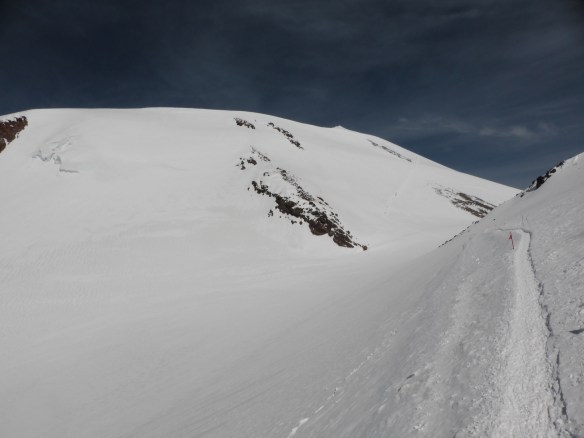
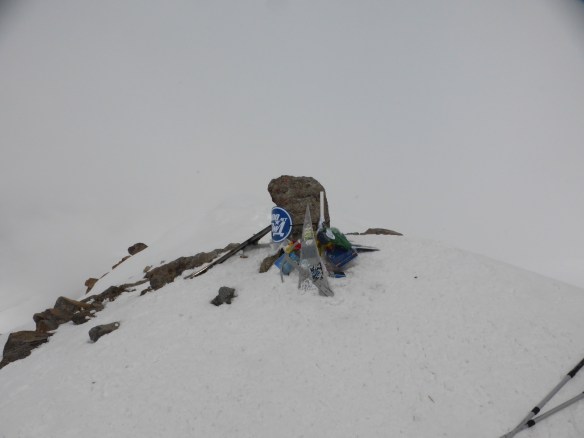
The route to the summit is delightfully direct, and follows the ridge line straight to the base of the summit pyramid. The ridge is very exposed in places, and involves several short slopes up to ~65 degrees. One of these slopes was iced over on my ascent, and I fixed my 30m rope on it. The route steepens at the base of the summit pyramid, but there were sturdy old fixed lines in place. The flat, broad summit was marked with only a single tent pole.
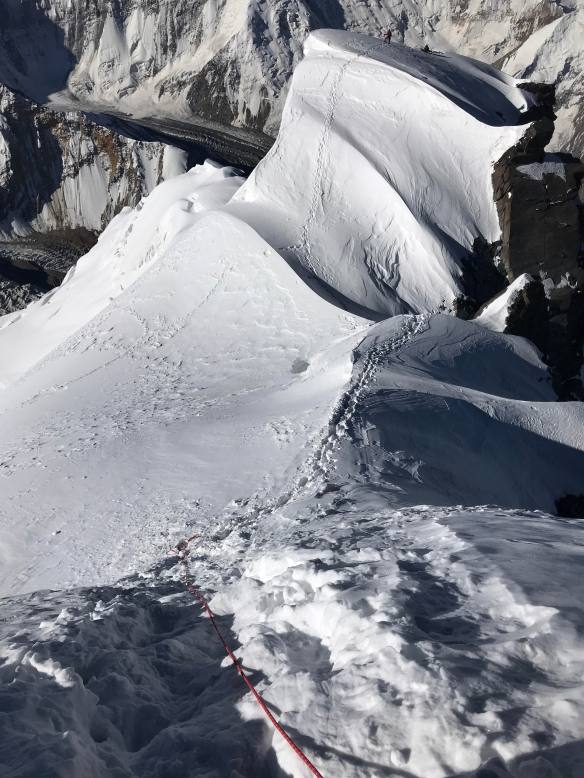
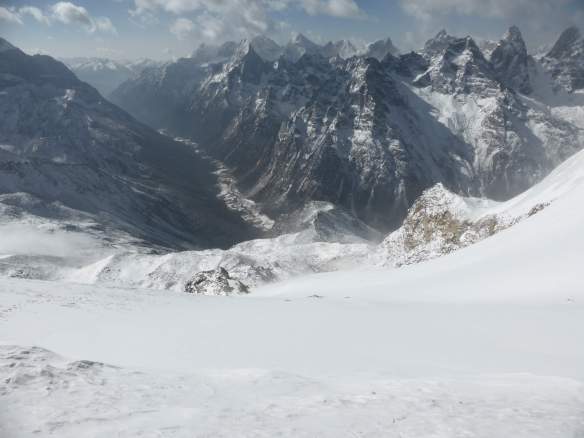
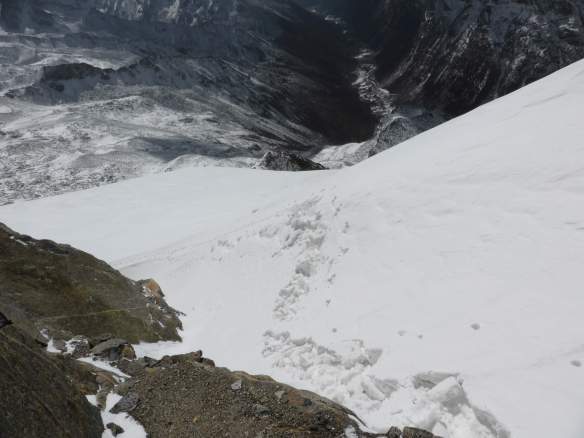
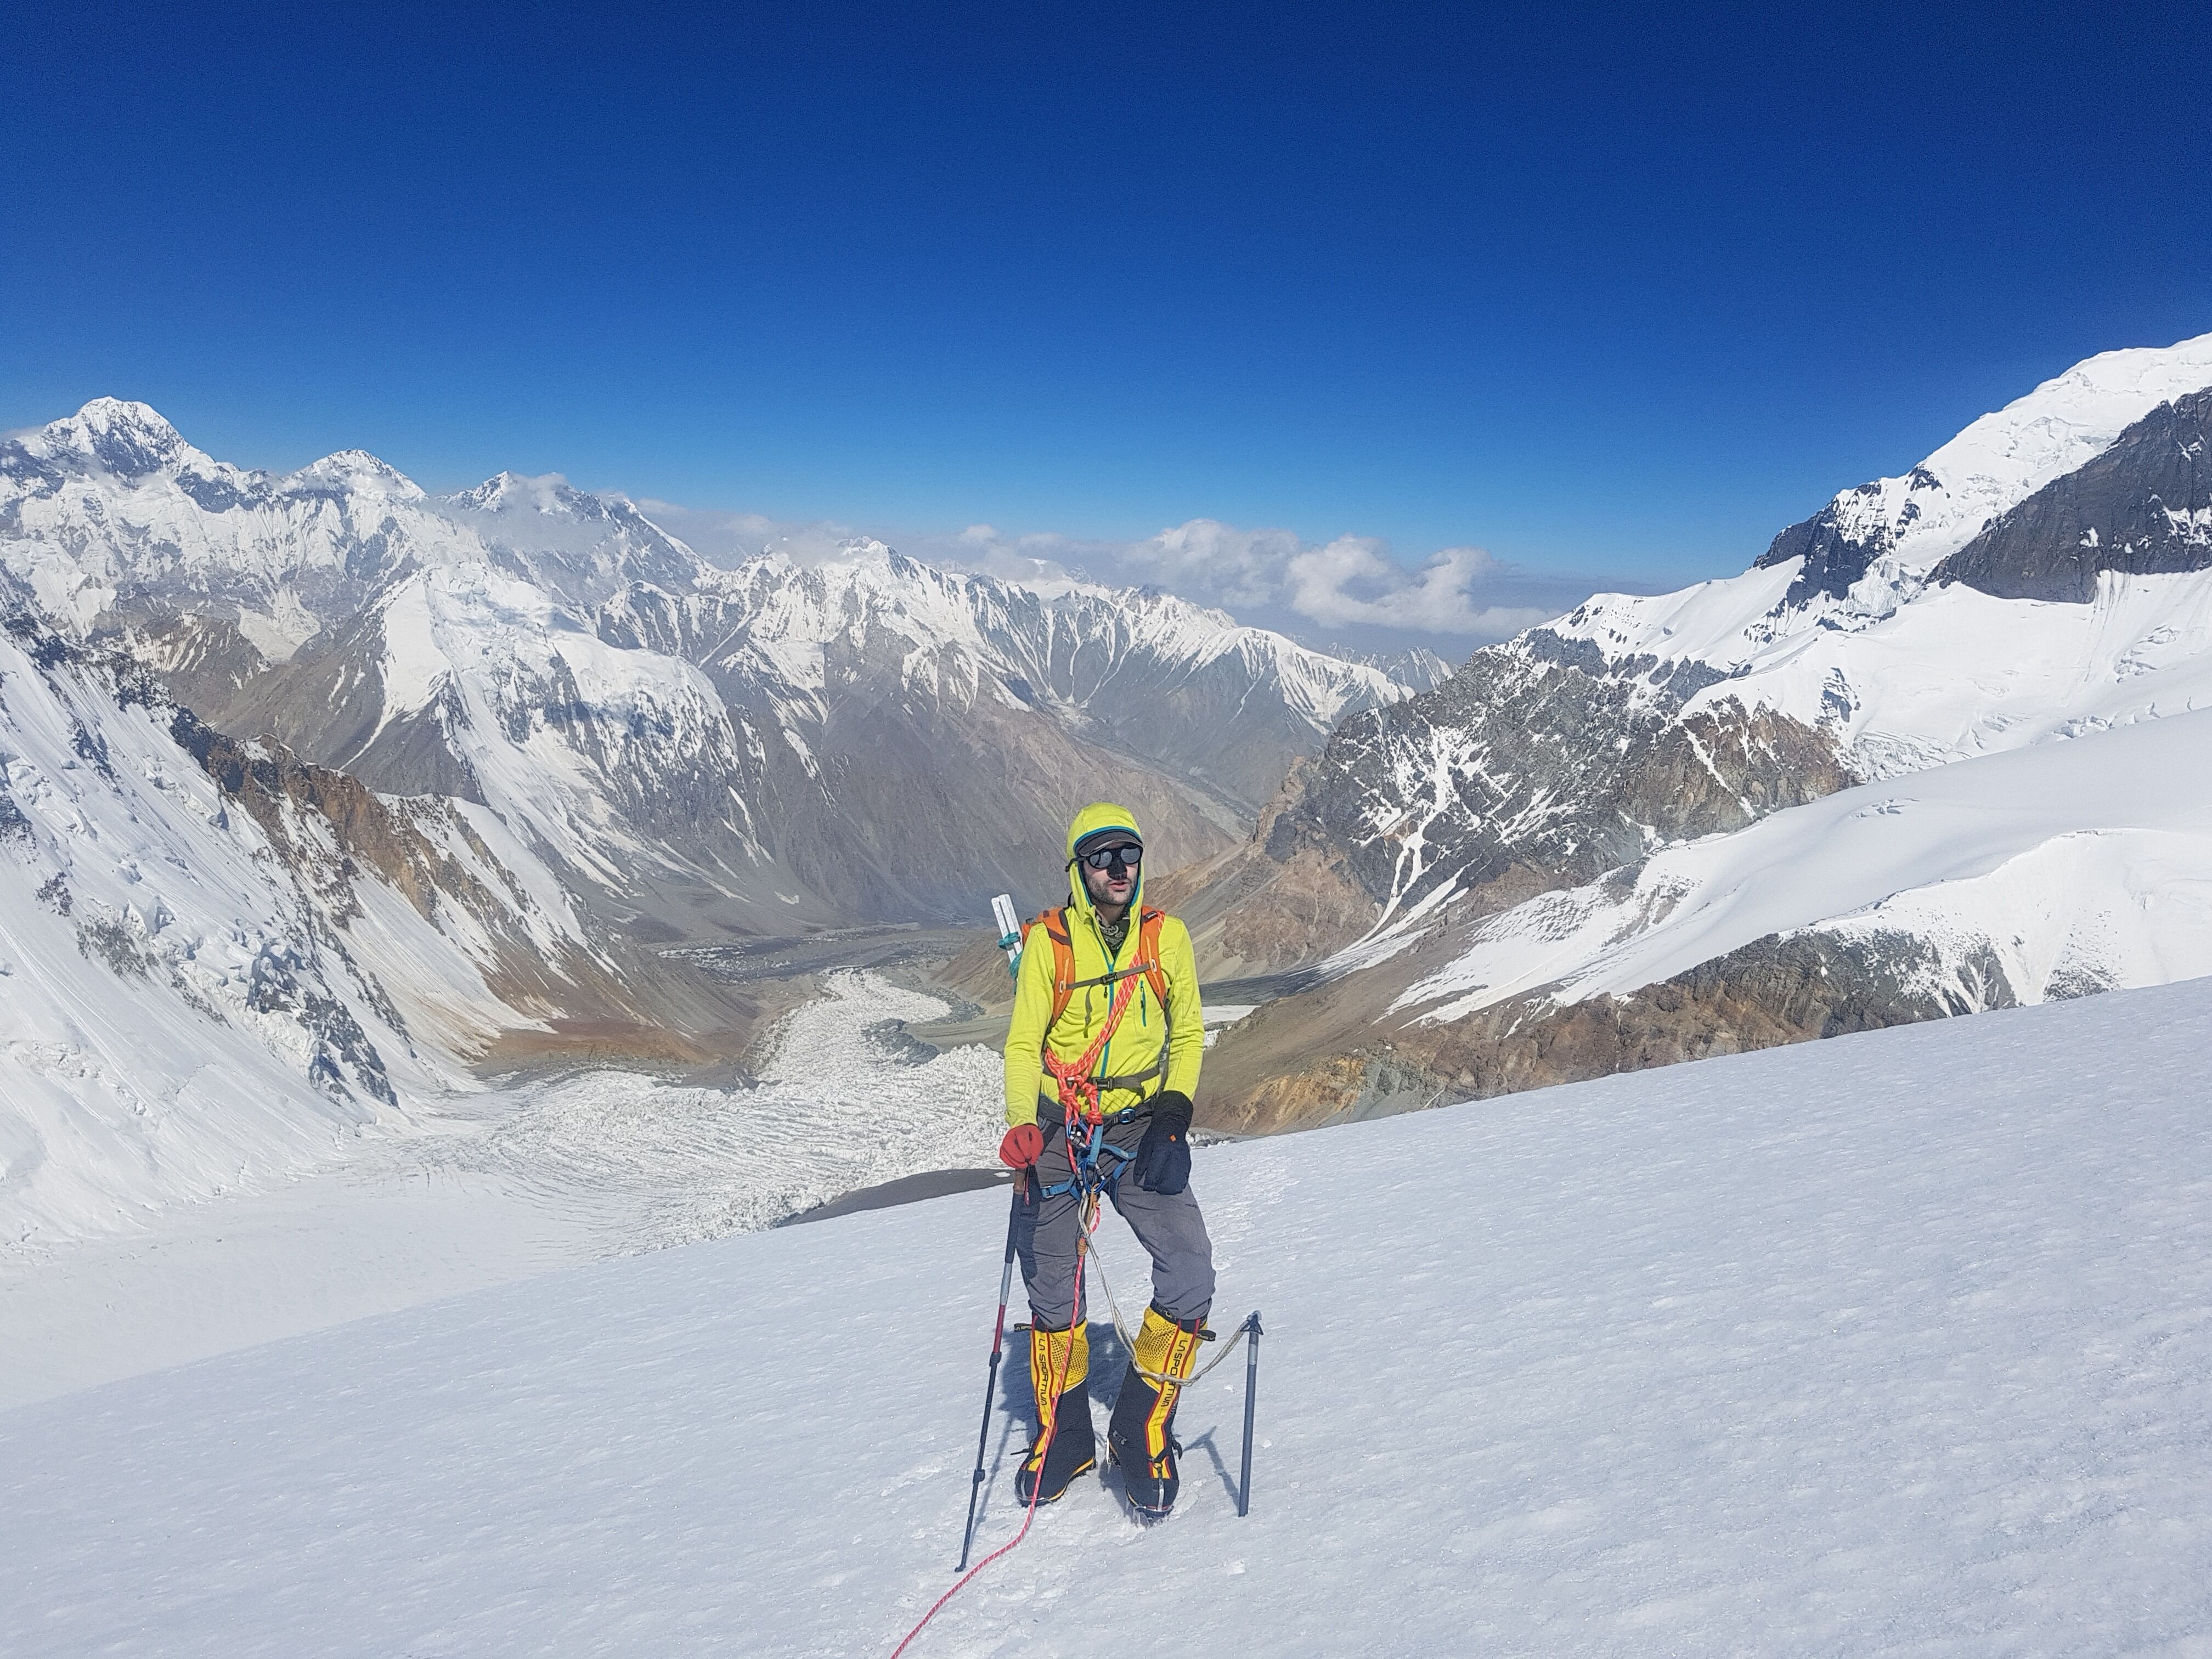
Looking down the south ridge after fixing my line, en route to the summit.

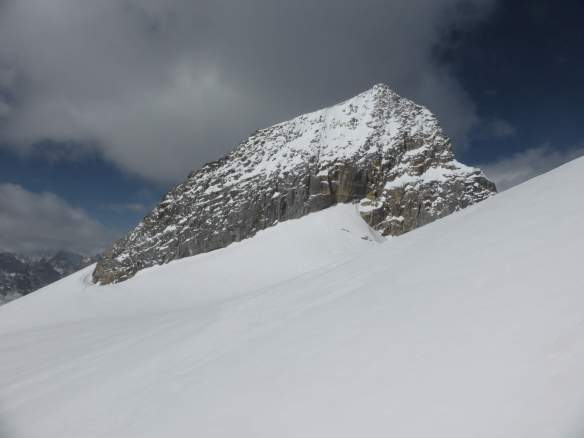
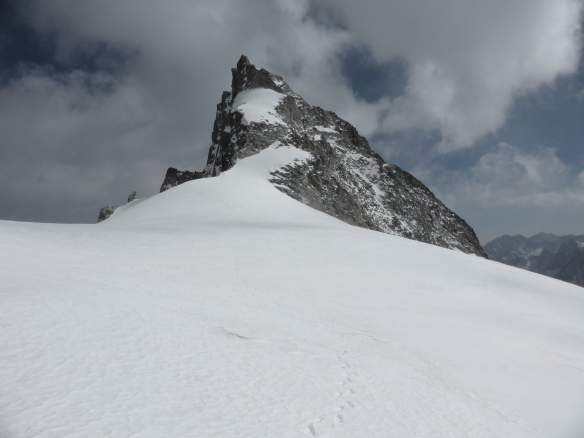
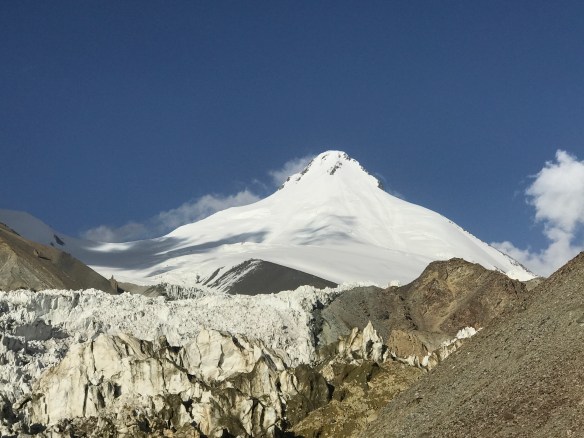
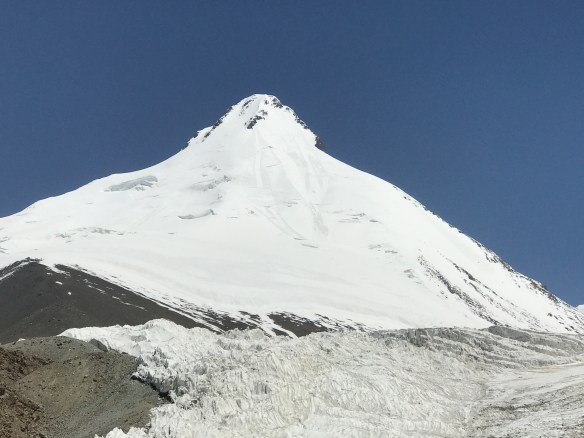
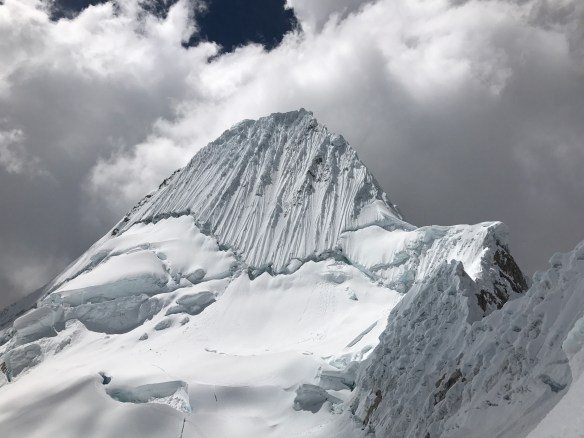
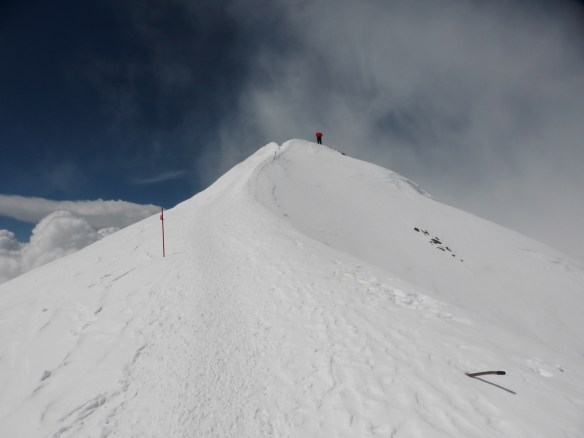
The summit pyramid.

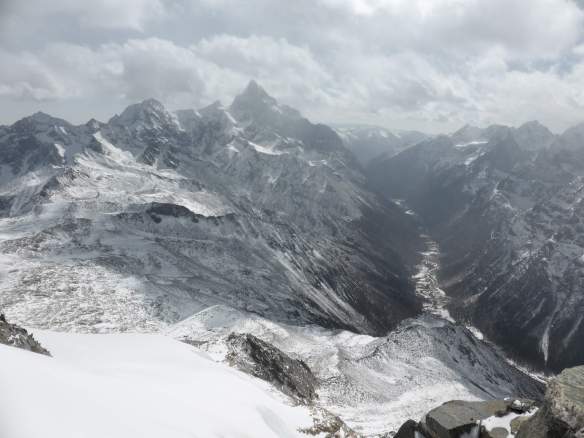
Summit view.

Looking down the south ridge.

Looking down the south ridge.

Looking up the south ridge.

The south ridge.
Schedule and Trip Report
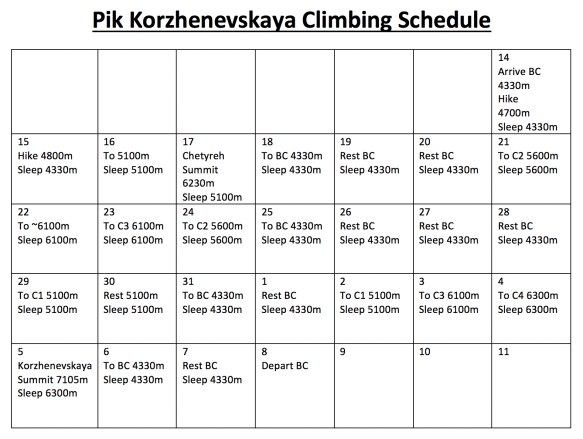

Acclimation near Dushanbe
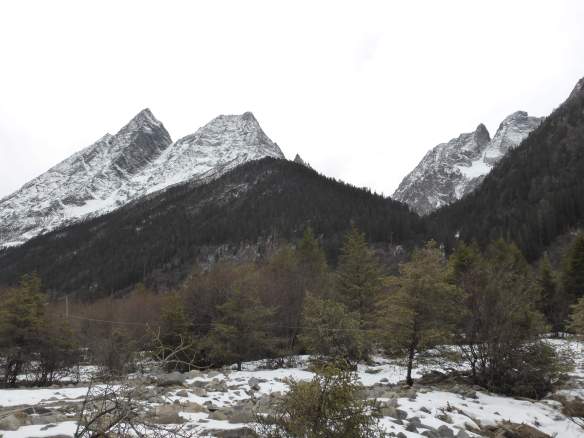
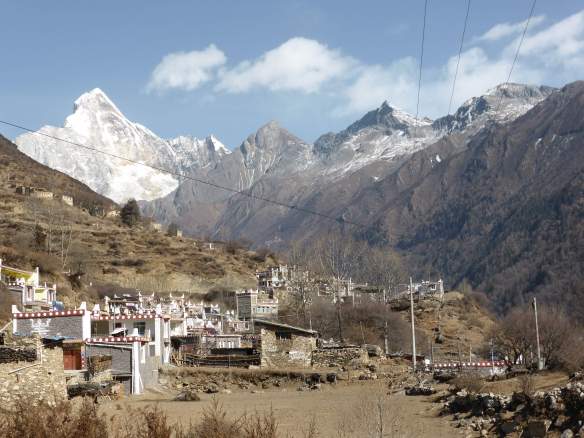
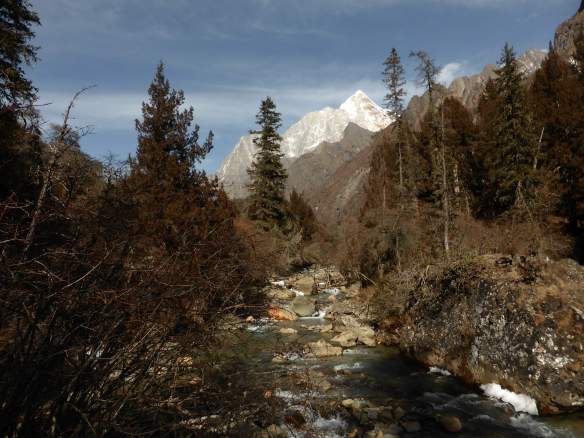
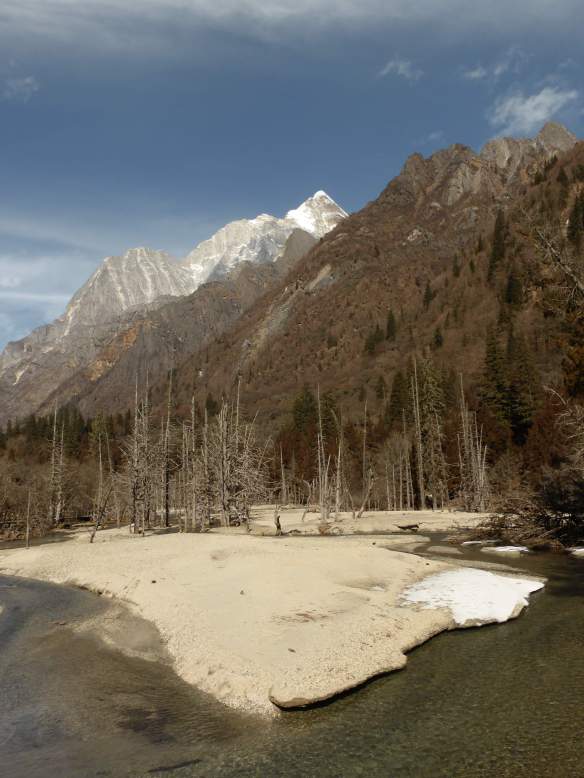
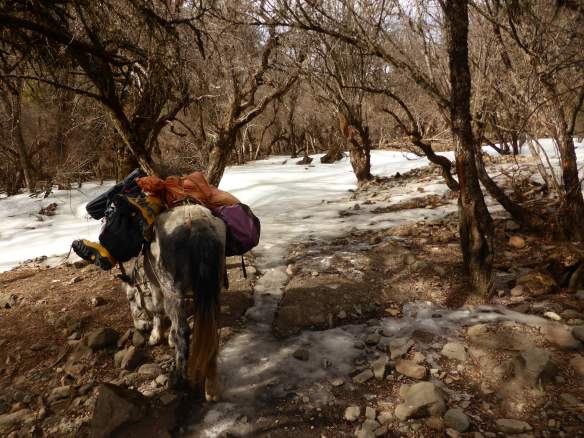
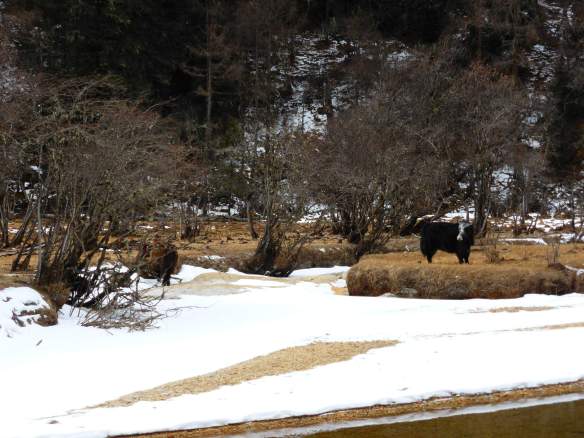
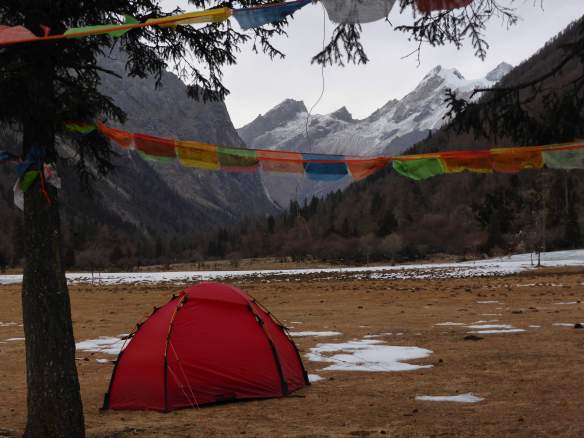
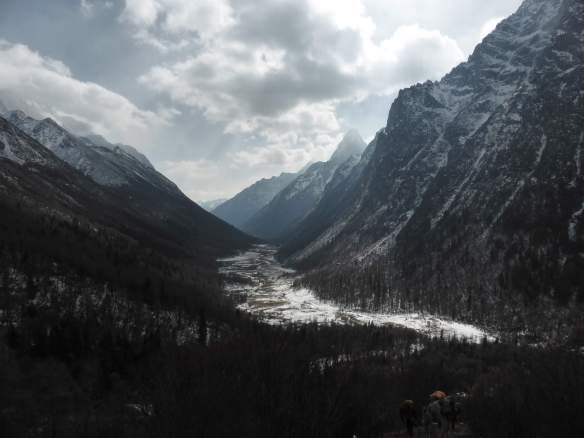
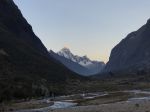
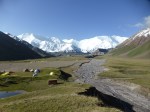
Prior to flying into the Moskvina Glades basecamp and beginning Pik Korzhenevskaya, I spent five days hiking in mountains nearby Dushanbe with Estonian friends. The hike was very pretty, and served as a great warmup. I do not know the name of the range which we hiked in, but do know that it wasn’t the Fan Mountains! We reached a high point of around ~3,500m and spent a night above 3,000m for acclimation. A few days spent between 2,000m-3,000m made a significant difference in providing some pre-acclimation to make for a smoother transition higher.

Mountains near Dushanbe.

Mountains near Dushanbe.

Mountains near Dushanbe.

Estonian friends and I.

Mountains near Dushanbe.
July 14th
Arrive 4330m Moskvina Glades basecamp.
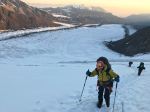
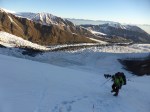
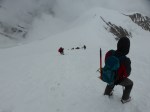
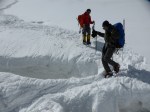
Acclimation hike to 4700m.
Helicopter into basecamp with Estonian friends. Acclimation hike to 4700m along the approach to Pik Chetyreh.
July 15th
Acclimation hike to 4800m.
Carried 10kg of equipment to ~4800m in preparation for an attempt on Pik Chetyreh. Lots of scree and loose rock on this section of the approach.
July 16th
Move to 5100m.
Left Moskvina at 9:30 a.m., arrived at 5100m Pik Chetyreh basecamp at 4:30 p.m., 7 hours. See my Pik Chetyreh trip report for more details of this climb.
July 17th
Ascend 6230m Pik Chetyreh, sleep 5100m.
5:30 a.m. start, 2:30 p.m. at 6230m Pik Chetyreh summit (likely main summit, possibly a sightly lower sub-summit; see trip report), 7:00 p.m. back in tent. 13.5 hour day.
July 18th
Descend to 4330m basecamp.
7:30 a.m. depart Pik Chetyreh basecamp, 10:00 a.m. arrive Moskvina. Descent on scree was unpleasant with a heavy bag.
July 19th-20th
Rest days at 4330m basecamp.
Two full rest days.
July 21st
Move to 5600m Camp 2.
My friend Pat and I departed Moskvina Glades basecamp at 6:20 a.m., making the long approach hike to 5100m Camp 1 in just over 4 hours and arriving at 10:40 a.m. At Camp 1 we spent some time arranging equipment and changing boots for the next leg of the climb on snow and ice. We ascended the icefall/waterfall past Camp 1 and reached 5300m Camp 1.5 at around 1:00 p.m. After a short rest and some conversation with other climbers staying at the camp we continued onto the hideous lower glacier. The snow was melting out in the early afternoon sun, and conditions were miserable. Knowing what we were getting into when planning to climb from basecamp to Camp 2 in one push, we had agreed that we’d turn around if afternoon conditions were too unsafe. With care and a steady pace we made good progress across the sketchy terrain, and arrived at 5600m Camp 2 at 3:00 p.m.
July 22nd
Move to 6000m.
We departed Camp 2 at 11:00 a.m. – in hindsight far too late in the day and a costly mistake. Snow conditions were predictably terrible in the afternoon heat and slowed our progress significantly. No climbers had been further then just above the bergshrund, or roughly ~5900 on the route, and below the bergshrund we found ourselves slogging through mostly unbroken mush. Crossing the bergshrund itself was tricky due to the soft snow, and above we realized that a significant traverse across a steep slope made unstable by melt separated us from the proper location for Camp 3. Late in the day, and tired from breaking trail through slush, we opted to ascend the rock ridge directly above the bergshrund. We pitched it into two 20m pitches of rotten ice and loose rock, with a single screw and a picket for protection. Atop the ridge at ~6,000m we dug a tent platform and hunkered down for the night. Had we departed Camp 2 earlier, or had I been willing to take on the full traverse in the slushy conditions, we likely could have moved to the proper 6100m Camp 3.
July 23rd
Move to 6100m Camp 3.
Starting early, we packed up and completed the traverse to the normal 6100m Camp 3. The traverse only took about an hour and made me question whether or not my call to camp atop the ridge the day before had been wise – we likely could have completed the traverse the day prior in roughly the same amount of time, albeit with terrible, soft snow conditions. At 6100m Camp 3 we met six other climbers who had ascended from 5600m Camp 2 that day. We dug a good platform for our tent, and spent the remainder of the day resting.
July 24th
Descend to 5600m Camp 2.
Moderate wind, snowfall, and cloud cover made for a thoroughly uninviting looking summit ridge. All eight of us agreed that a summit push would be ill advised in the conditions, especially given that we would be breaking trail and opening the route for the season. Two of the other climbers decided that they would head higher in the afternoon to check, and if necessary replace, the fixed lines on the rock step above camp. After breakfast Pat climbed up to the base of the ridge, breaking trail to scope out the rock. When he returned, we discovered that we were almost out of propane – we had packed for four days, and had used most of our supplies. Facing more inclement weather for the next few days, we opted to pack up and descend immediately rather than try to wait a day or two for a summit shot. The six other climbers stayed and all summited the next day, the first of the season, albeit in very poor, difficult conditions.
Pat and I departed at 12 p.m., and reached 5600m Camp 2 in just an hour. Unfortunately, once again arriving in the afternoon, we realized that the glacier below Camp 2 was out of condition for a descent lower; crevasses were open, snow bridges were marginal, and the snow was even softer than our first crossing on ascent. We opted to stay in Camp 2 with what we had, scrounging some spare propane which Pat had stashed earlier. We sat throughout the afternoon with nothing to do but look down over the glacier, and were surprised when, at 3:30 p.m., we saw figures ascending solo and unroped. The first climber, an extraordinarily strong and very experienced Bulgarian named Ivan, made it without incident. Regardless, it was agonizing watching him gingerly ascend the melting death trap of cracks. The second, a Chinese climber whom I’d met earlier in basecamp, wasn’t as fortunate. When his first snowbridge blew, dropping him waist-deep into the monster crevasse below, Pat and I quickly scrambled to rope up and get rescue gear racked; we were certain that we’d need to venture out into the crevasse field to try and recover him from a fall. Luckily, as he went in he was able to struggle, flail, and pull himself out – only to fall through, waist-deep again, on the next bridge. Somehow escaping unscathed after his second punch-through, he greeted us below Camp 2. It turned out that he had ascended with no down parka, no sleeping bag, and no gas or stove. By sharing equipment we devised a rough and ready sleeping situation good enough to keep three people warm, and we spent a cold night huddled together, squatting an empty 3-person guide tent out of necessity.
July 25th
Descend to 4330m basecamp.
Departed 5600m Camp 2 at 6:15 a.m., early so as to ensure stability when crossing the crevasse field below camp. Arrived at 5100m Camp 1 around 8:00 a.m., to find a lot of congestion on the narrow route up the frozen waterfall. Had a very limited supply of water coming from 5600m Camp 2, but was able to fill my bottle with clean, fresh glacial melt at 5100m Camp 1. Thirst quenched, and leaving a large cache at Camp 1, I was able to maintain a brisk pace for the remainder of the hike down. Arrived back in basecamp at 10:30 a.m.
July 26th-28th
Rest days at 4330m basecamp.
Three full rest days.
July 29th
Move to 5100m Camp 1.
Facing a dodgy weather forecast, Pat and I nonetheless decided to ascend to 5100m Camp 1, if only to recover the gear which we had cached there. We left basecamp at 11:00 a.m., and arrived at 5100m Camp 1 at 3:20 p.m.
From around ~4700m onwards deep snow covered the route, and with snow still falling steadily it was clear that the route was out of condition. Descending climbers, many unsuccessful in their summit bids the day prior, reported waist deep snow above 5600m Camp 2. We figured that we would carry on and see conditions for ourselves, and accepted that we might merely be on a gear recovery mission. As we met more people descending, among them climbers we knew, we continued to hear the same description of waist-deep snow conditions on the upper mountain.
At 5100m Camp 1 we pitched our tents and hunkered down, the snow steadily continuing to blanket everything.
July 30th
Rest day at 5100m Camp 1.
It continued to snow. We opted to wait rather than to descend, in the hopes that the weather would shift. The weather didn’t shift.
July 31st
Descend to 4330m basecamp.
As it continued snowing, we gave in to the fact that the weather was not going to cooperate with our plans, and packed our cached equipment for the descent to basecamp. The descent was slow with heavy bags, and the snow covered path made navigating the rock scrambling trickier. We departed at 10:20 a.m. and reached basecamp at 1:20 p.m.
August 1st
Rest day at 4330m basecamp.
Weather remained inclement, and having cleared all of our equipment off of Korzhenevskaya we began to prepare ourselves for an attempt on Pik Somoni.
August 2nd
Move to 5100m Camp 1.
The weather began to improve overnight. Rather than wait another 2-3 days to begin a Pik Somoni attempt alongside Estonian friends, we opted to return to Korzhenevskaya and take another shot. Another Estonian friend, Marie, joined Pat and I. We repacked all the equipment we had brought down two days prior – a psychologically arduous task, knowing that we could have simply left it all at 5100m Camp 1! We took our time, in no rush given our intent to overnight on the rocks at Camp 1, and departed basecamp at 2:20 p.m., reaching 5100m Camp 1 at 6:20 p.m.
August 3rd
Move to 6100m Camp 3.
We departed 5100m Camp 1 early so as to ensure a safe crossing of the crevasse fields below 5600m Camp 2. Left 5100m Camp 1 at 6:20 a.m., arrived at 5600m Camp 2 at 9:10 a.m. The route had changed significantly since my first crossing of this section, and crevasses were fully opened up, snowbridges collapsed. Circumnavigating the cracks made the route longer, and generally not much better than it had been a week earlier.
We took a short rest, and began from 5600m Camp 2 at 10:10 a.m., reaching 6100m Camp 3 at 2:40 p.m. The route above Camp 2 was straightforward enough, and in much better condition that my earlier ascent of it – the recent heavy snowfall had consolidated very nicely. The bergshrund was nicely frozen up, and a smooth climb this time around.
At Camp 3 we dug tent platforms, and began to prepare for a summit bid the following morning.
August 4th
Move to 6300m Camp 4.
We awoke early to discover relatively high winds. We quickly made the decision to go back to sleep and use the day for a move to 6300m Camp 4, from where we would have a shorter shot at the summit. We departed after lunch at 11:50 a.m., and arrived at Camp 3 at 1:30 p.m. The move up wasn’t difficult, gaining the summit ridge via a moderate rock step. Later in the afternoon saw the arrival of two Polish friends, Piotr and Konrad, who would later join us on the climb to the summit.
Camp 3 is a generously sized plateau a few hundred meters up the ridge, with enough space for several tents. We spent the afternoon eating, hydrating, and resting. In my notes I remarked that I “hydrated more than 2L, ate a full meal, lots of snacks, hot cocoa, nuts, gels, granola bars, some oats. Stomach is full, feel very warm and comfortable.” I had a healthy appetite at high camp, and with plenty of time to take the day slowly was able to thoroughly fuel up for the next day’s climb.
August 5th
Ascend 7105m Pik Korzhenevskaya, sleep 6300m.
We planned to start early, but given our good pace in the days prior opted not to push an alpine start so as to avoid the cold of night. I woke up at 3:30 and took my time eating a light breakfast – instant noodles with half a liter of soup broth – drinking coffee, and preparing equipment for the summit push. I brought 1L of hot tea and 1L of hot electrolyte mix in my down parka, along with Honey Stingers gels and crunchy granola bars for snacks. As usual, I carried my storm mitts and down pants in my summit bag.
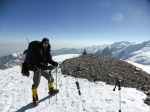
I left my tent at 5:00 a.m., feeling strong. I made a steady pace up the ridge; snow conditions were perfect, there was almost no wind, and overhead the sky was blue and free of clouds. At around 6800m I briefly stopped to fix my rope to an iced over slope which I figured I’d want to rap on descent, but otherwise took only a few hydration breaks. I reached the summit without incident at 11:30 a.m., and spent almost an hour completely alone at the top. Konrad was the first to arrive, and after he helped me to take some photographs I began to descend. I departed the summit at around 12:20 p.m., and was back in my tent at 6300m Camp 4 at around 2:35 p.m. The descent was relatively smooth, although it is notable that several sections of ridge are distinctly ‘no fall zones’ due to the narrow terrain and severe drop-offs.

On the summit of Pik Korzhenevskaya.
August 6th
Descend to 4330m basecamp.
Cleaned camp, packed all equipment into a massive descent bag, and headed down the mountain. I departed 6300m Camp 4 at 9:00 a.m. with Pat and Marie, and reached 5100m Camp 1 at 1:00 p.m., where I stopped to take a rest. I left 5100m Camp 1 at 2:30 p.m. and reached basecamp at 5:30 p.m., in time for a delightful sauna and a dinner of borscht in the mess hall.
August 7th
Rest day at 4330m basecamp.
August 8th
Depart basecamp via helicopter.
I lucked out, and got onto an emergency evacuation helicopter back to Djirgital – there was room for several passengers in addition to the evacuee. This was enormously fortunate, as the helicopter’s normal schedule is infrequent and prone to unexpected delays – Pat remained in basecamp, and would later wait over a week for an exit helicopter after he summited Pik Somoni. A few days after my departure the helicopter crashed, killing five. I spent the remaining 6 days of my trip getting food poisoning and resting in the sweltering heat of summer Dushanbe. I stayed in the City Hostel, an excellent place, and rented the basement out with other climbers who were also waiting for flights home. I was happy to meet my Estonian friends in town when they returned from Moskvina Glades just a day before my departure.
I was delighted to have summited Korzhenevskaya after two false starts, and pleased to have made it up Pik Chetyreh despite our team being woefully underequipped. I felt some sense of personal regret for not having made any attempt whatsoever on Pik Somoni, especially since the loss of time stemming from our decision to halt the first attempt on Korzhenevskaya was largely responsible. I feel strongly that I will return to Moskvina Glades again in a few years time, likely after fully pre-acclimating on another 7000m mountain.