

Zhongyangjian Shan, at right. Nanhuda Shan is the broader peak to the left.
3705m Zhongyangjian Shan, located in one of the most remote sections of central Taiwan, is among Taiwan’s highest. Having viewed the stark, rocky pyramid of Zhongyangjian Shan far in the distance during several other hikes within Taiwan’s central mountains, I had long been eager to hike it.
My three day itinerary.
I had hiked in this area before, and was familiar with the initial leg of the route, which is shared with the Nanhuda Shan trail. Knowing roughly what the terrain was like, I planned a three day trip using a single campsite. Unfortunately, a typhoon had passed over the island the week prior to my hike, damaging sections of the road into the trailhead, and as I would later discover, obstructing the trail itself.

The Nanhuda Shan Trailhead.
Day 0: To get to the trailhead, I first took a bus to Luodong, in Yilan county. Luodong is a convenient starting point for hiking the Nanhuda Shan circuit because it is a popular tourist destination with frequent bus access from Taipei, closer to the trailhead than Yilan, and most importantly, because it is a very easy place to rent a cheap motorcycle. Unfortunately, I learned of the severe road damage when I arrived, and was informed that the trailhead was inaccessible to motorbikes. Undeterred, I found a taxi driver willing to drive me in. By the time we arrived at the trailhead it was 9 p.m., and my driver was not in a good mood – the road was almost destroyed in sections, with numerous landslides making it all but inaccessible in places, and the driving was very slow. I tipped him generously, then pitched a quick camp by the trailhead and turned in for the night. I wouldn’t see another person for the next three days.

My first night’s camp – by the trailhead.
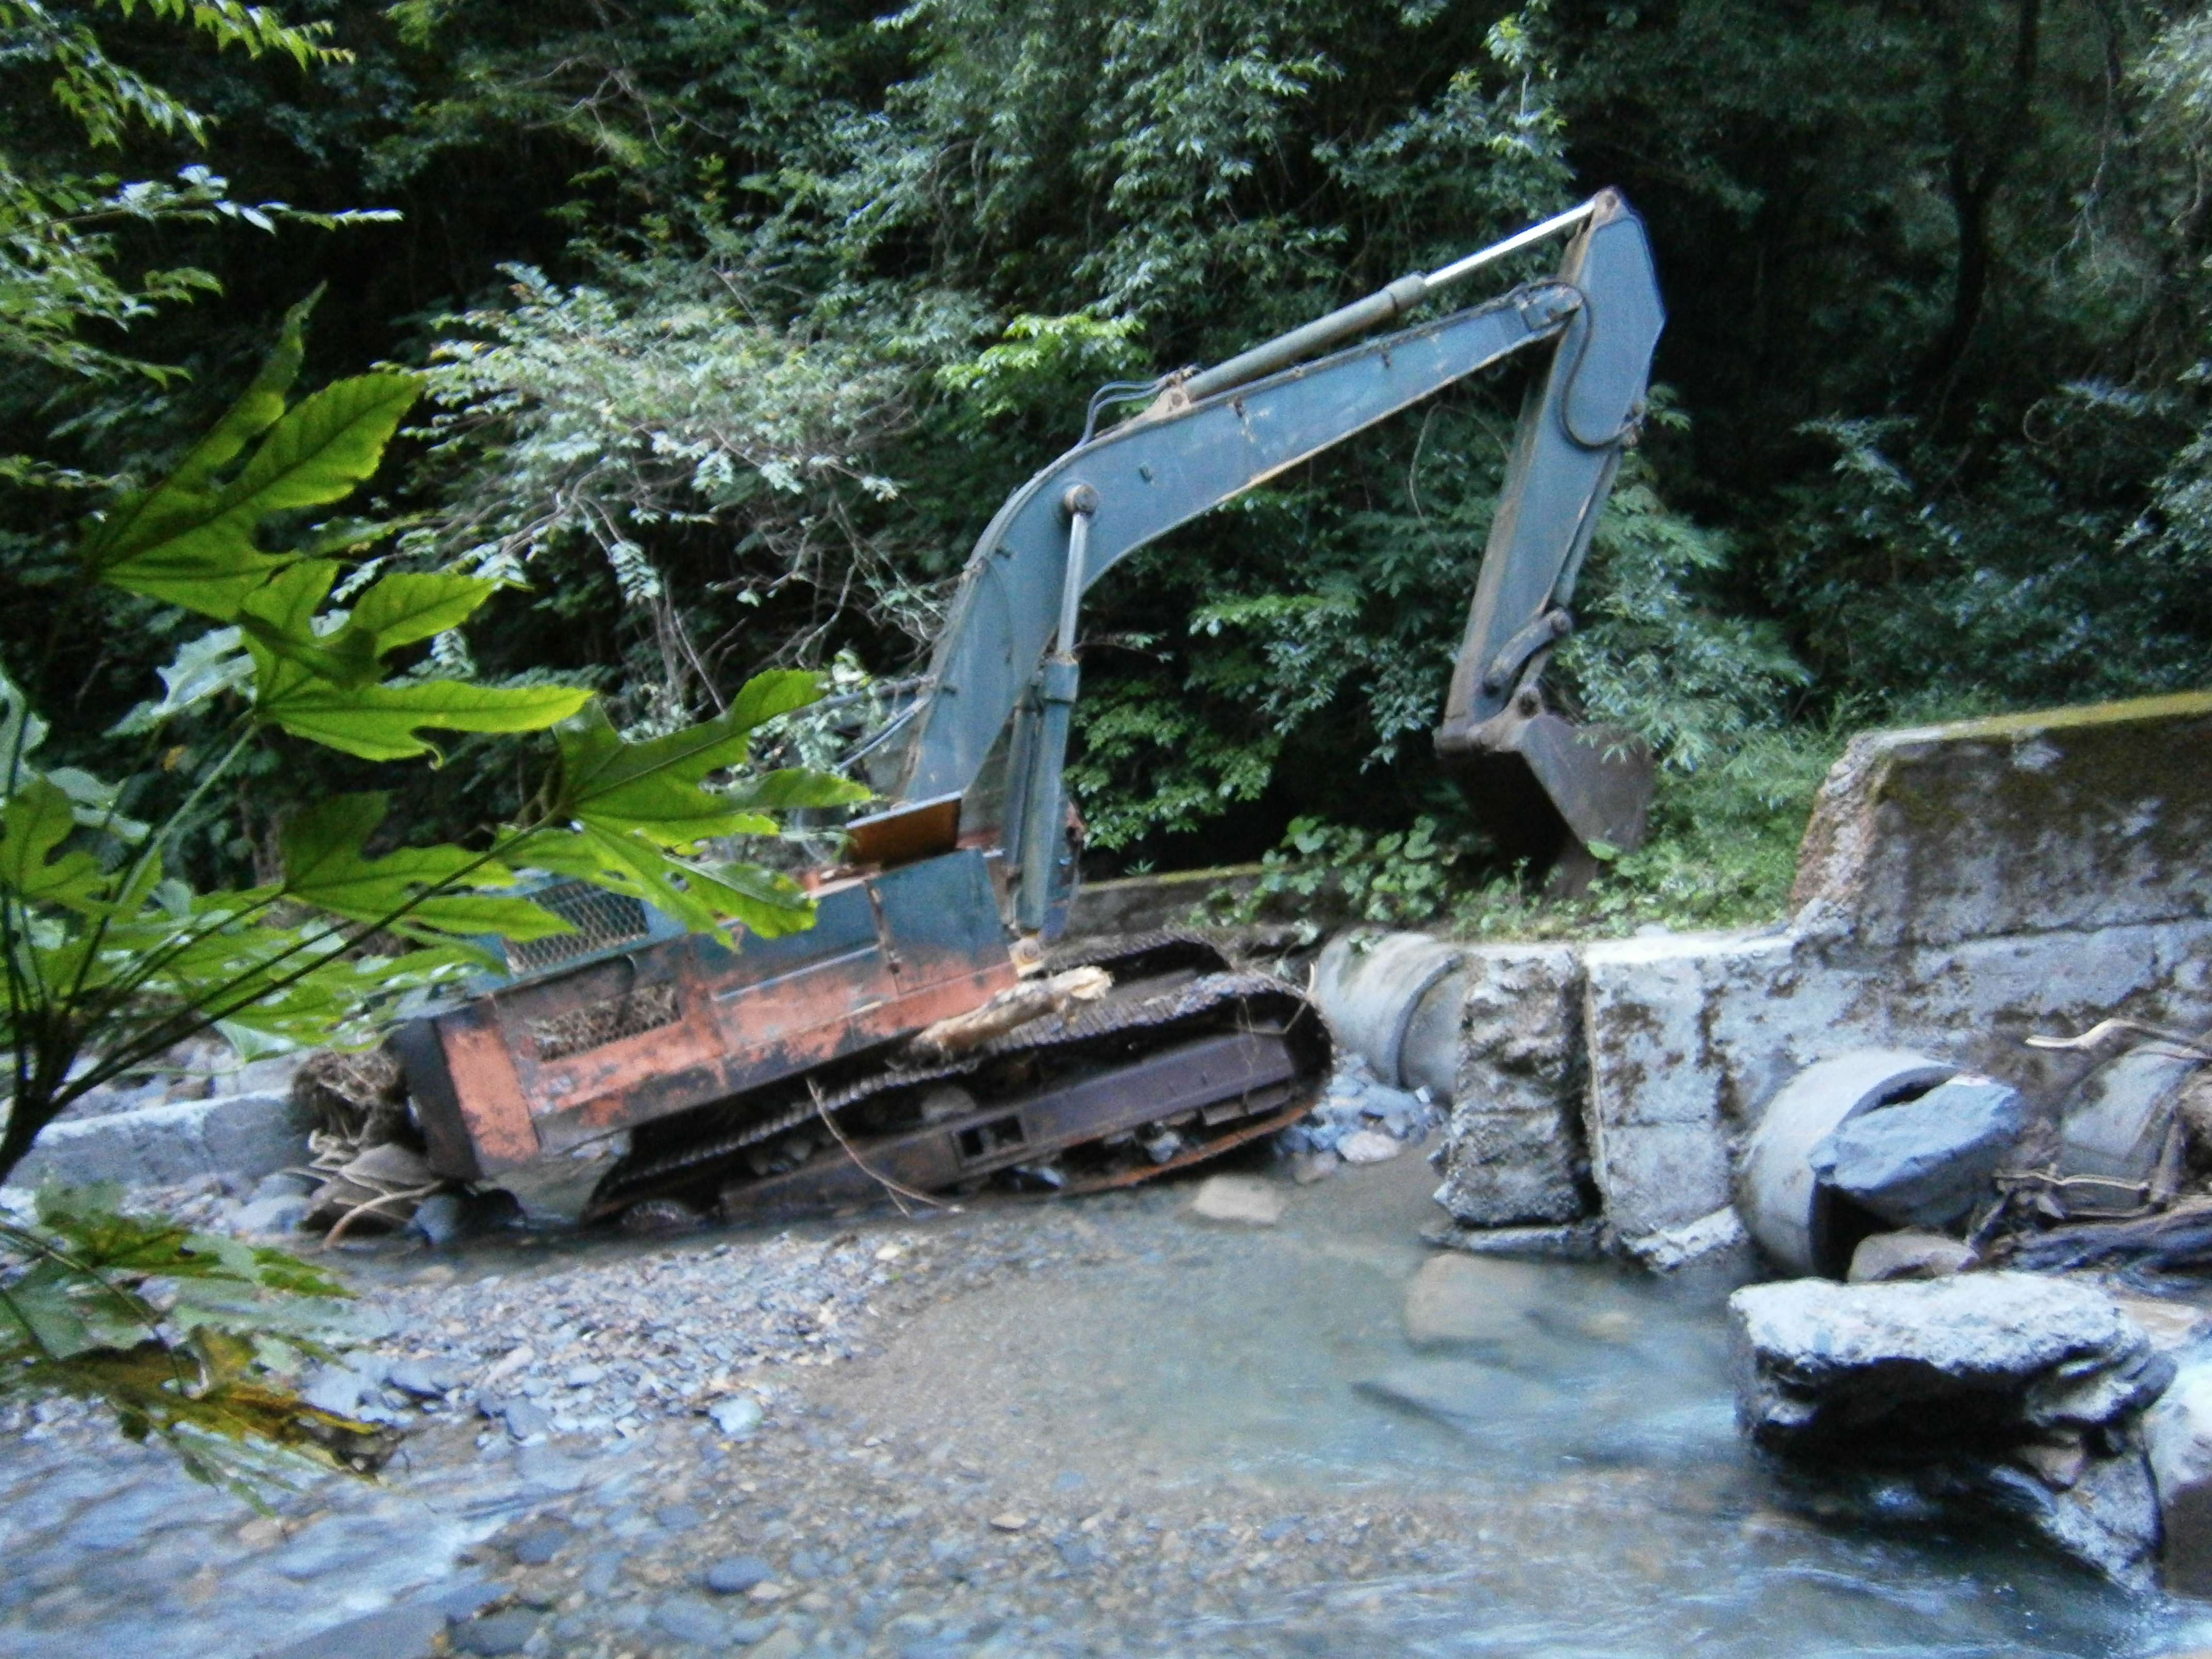
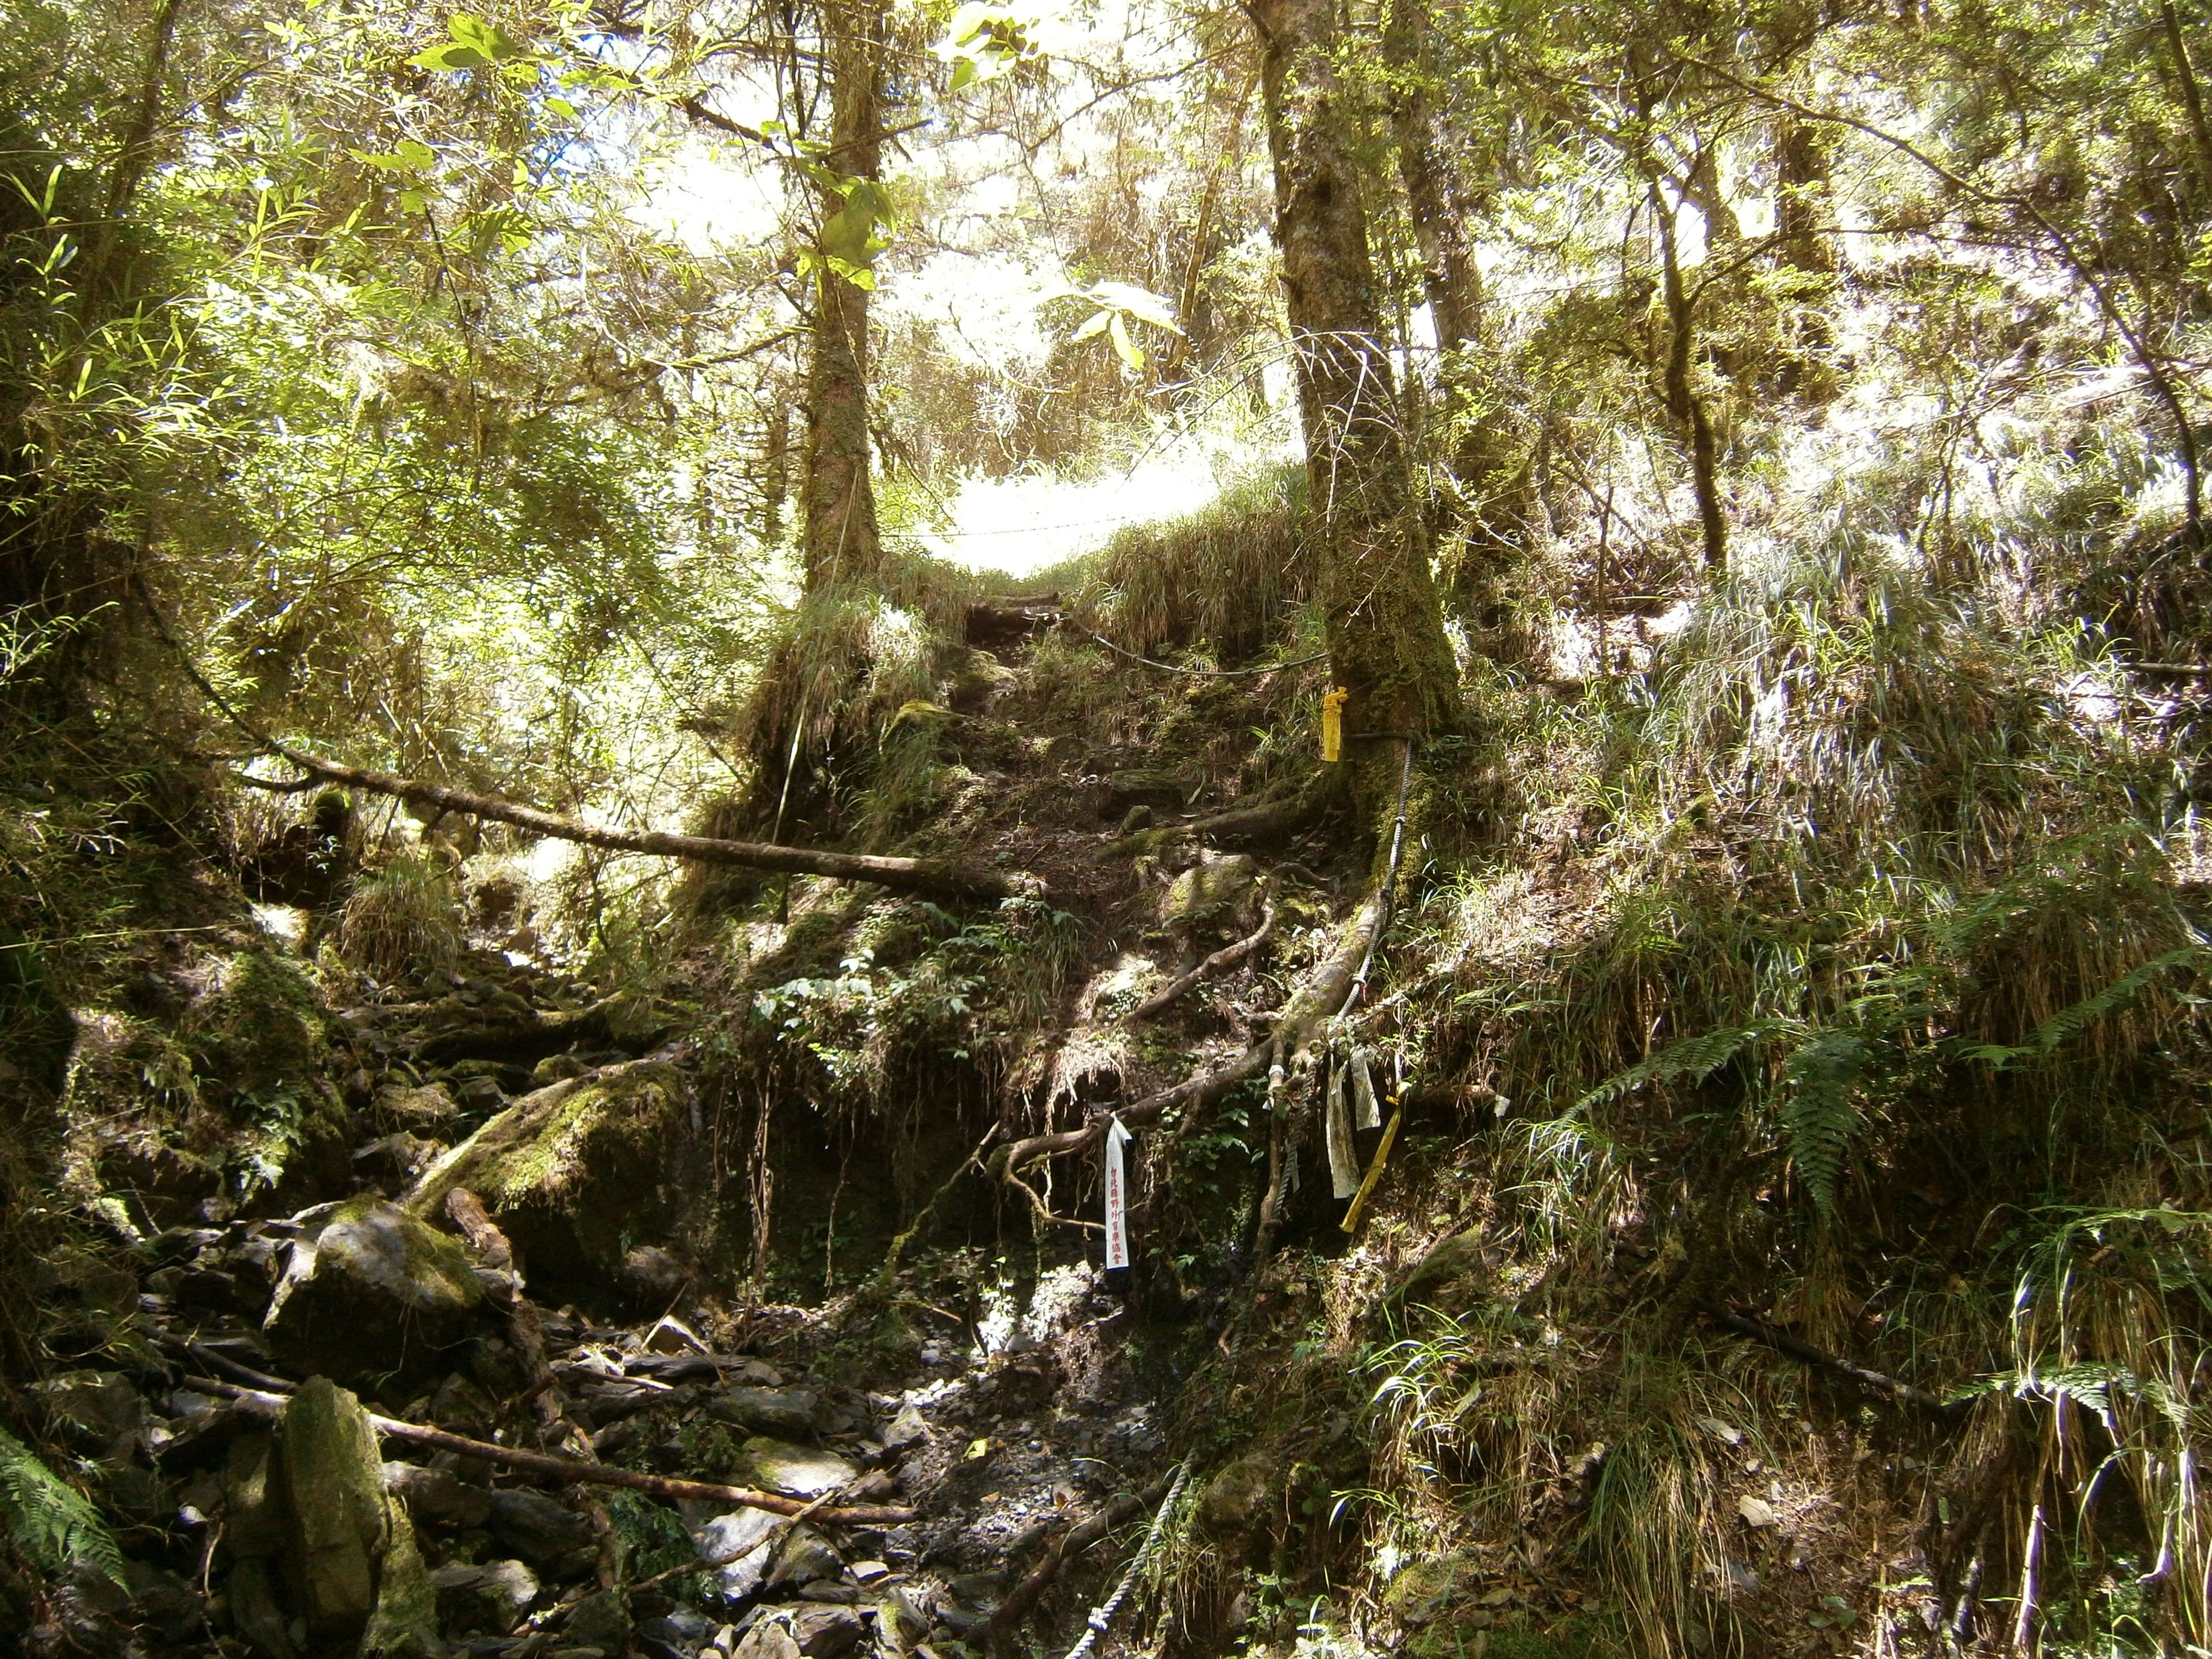
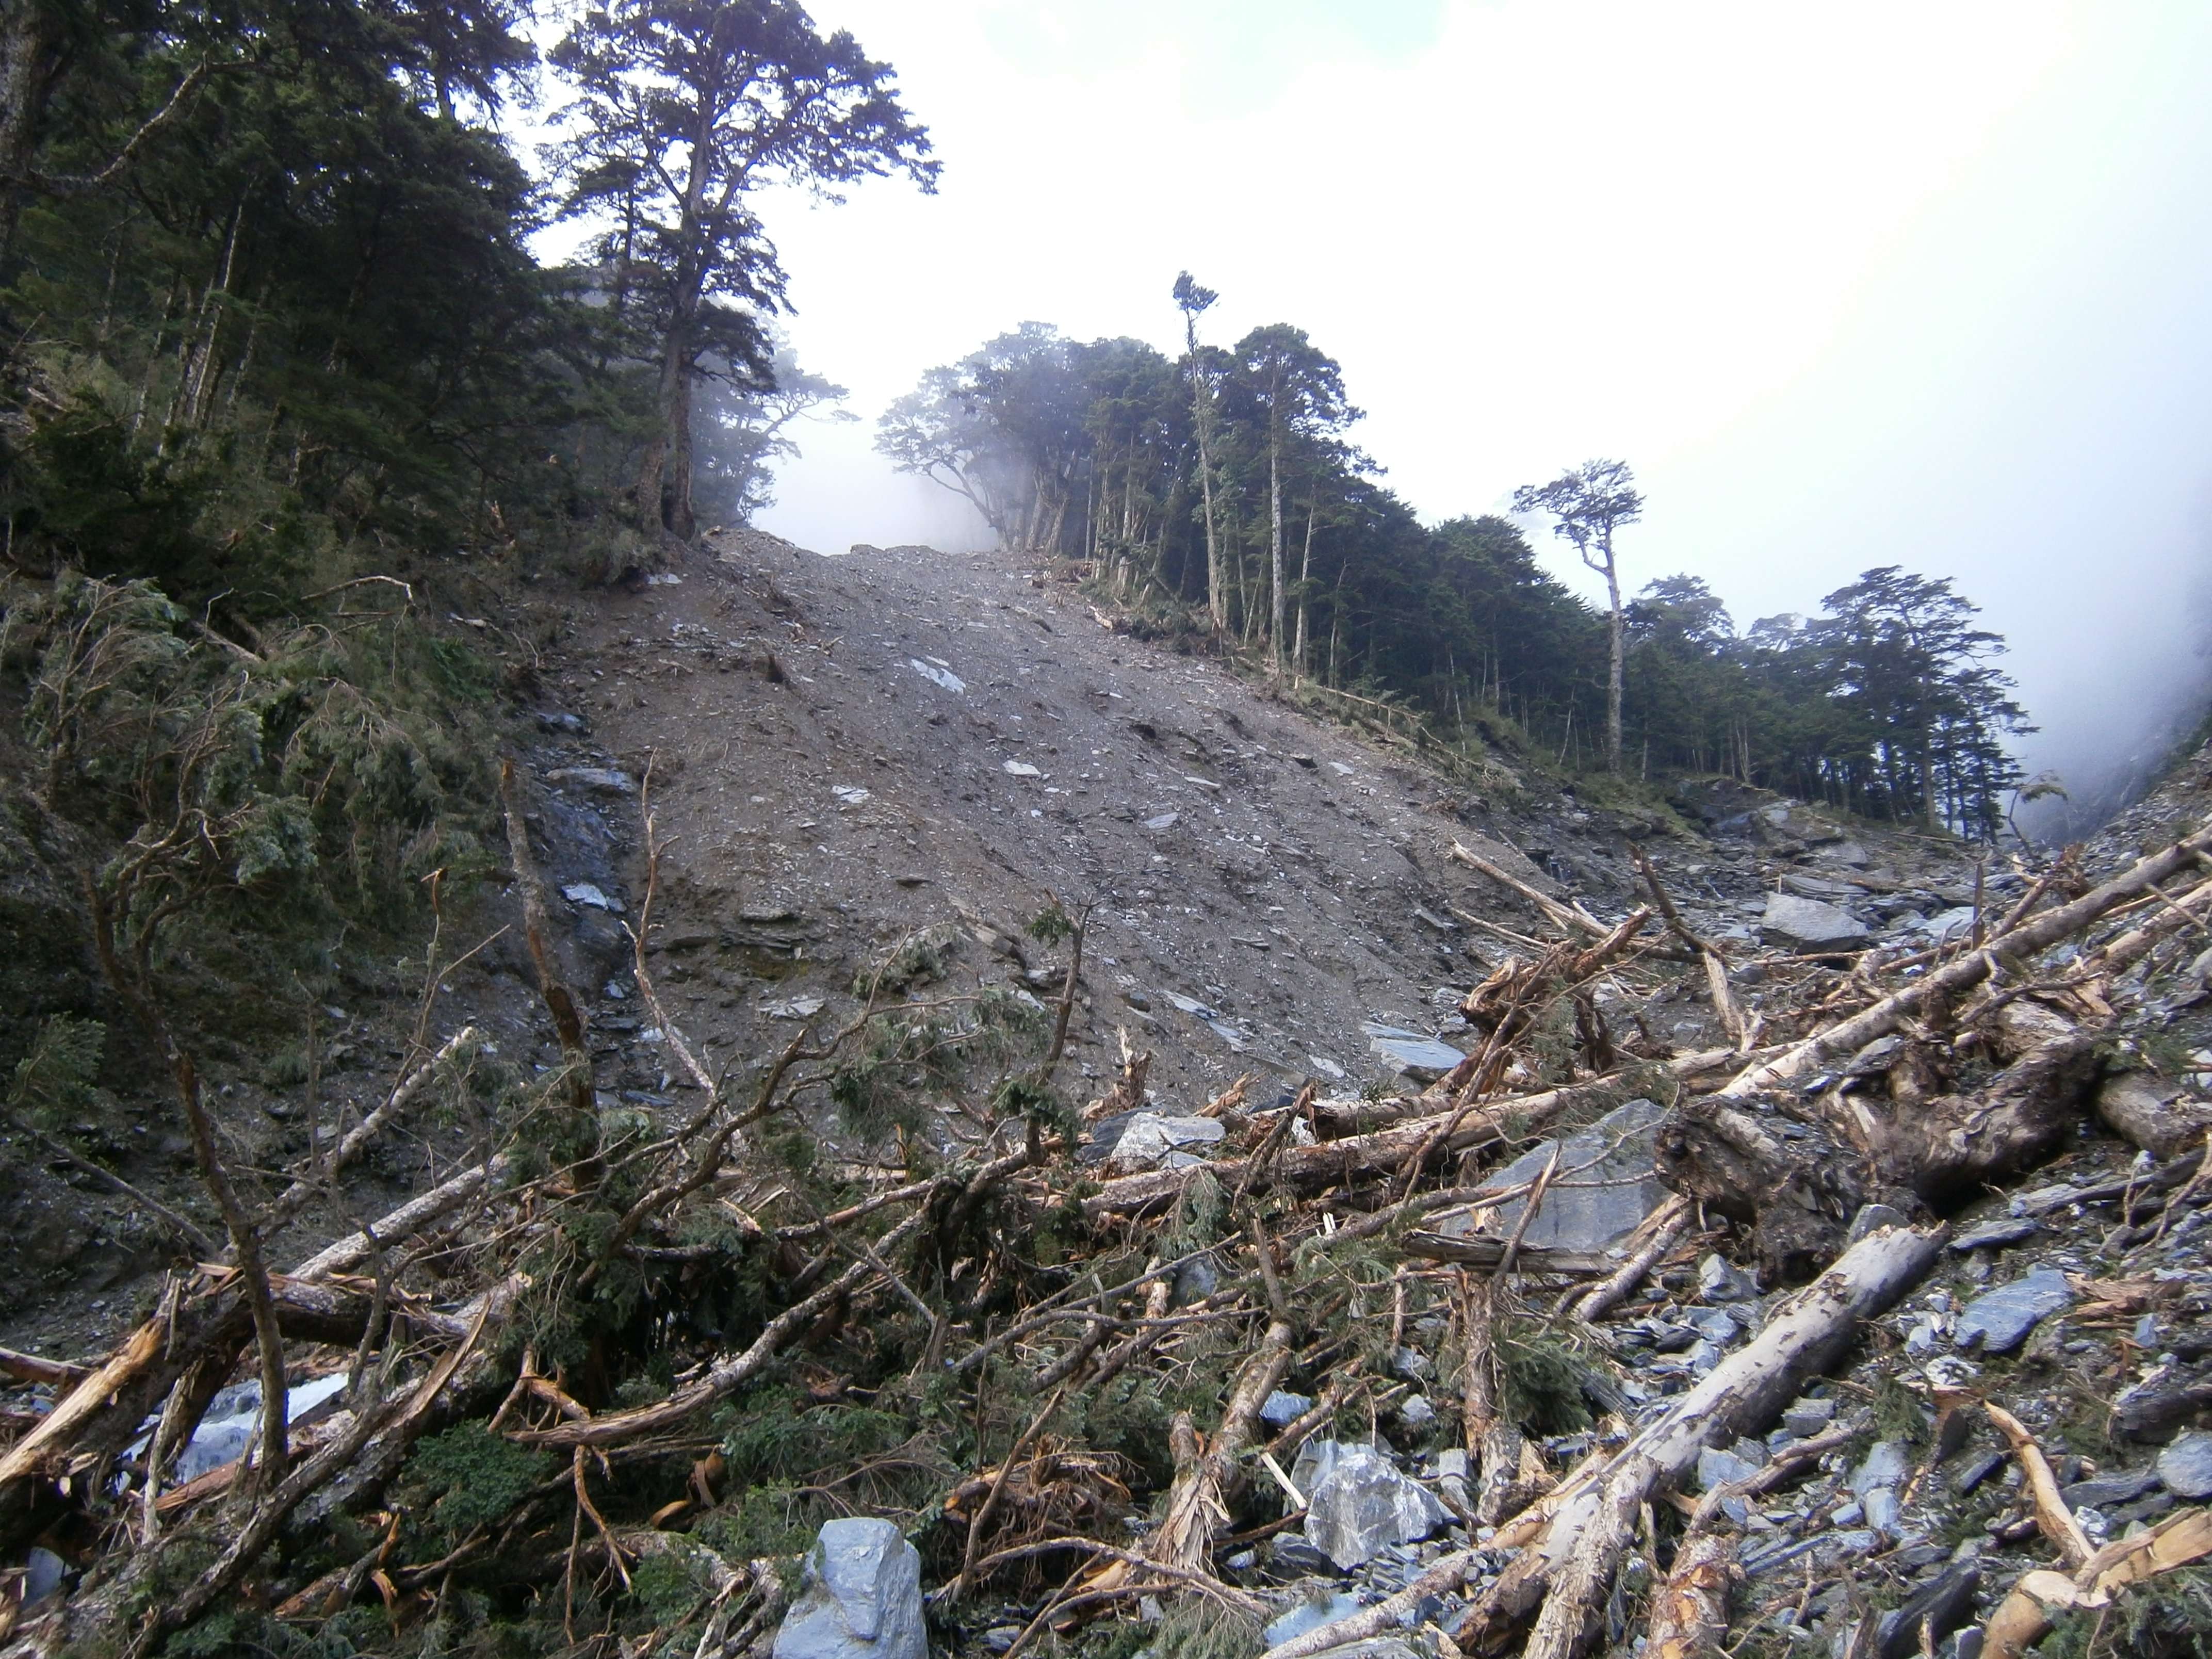
Day 1: Packed up and moving by 6 a.m., I started down the normal Nanhuda Shan route. This follows an old road, long destroyed by typhoons, landslides, and earthquakes. The route was much different than the last time I had hiked it; it was obstructed by several large, fresh landslides. These were unmarked, so I crossed over them carefully.
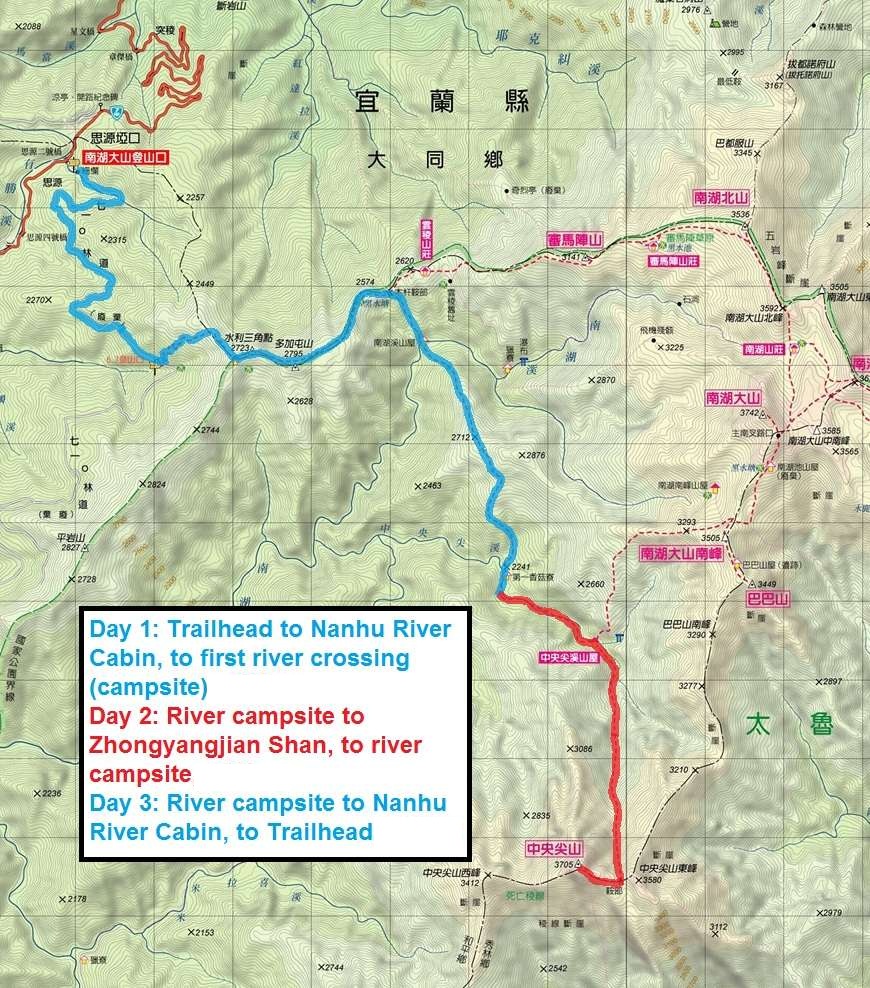
Long abandoned equipment on the old road.

Some big landslides disrupted the first section of the route.
Some of the landslides looked like they had been crossed before, but none of them were marked with tags, and no trails were broken.
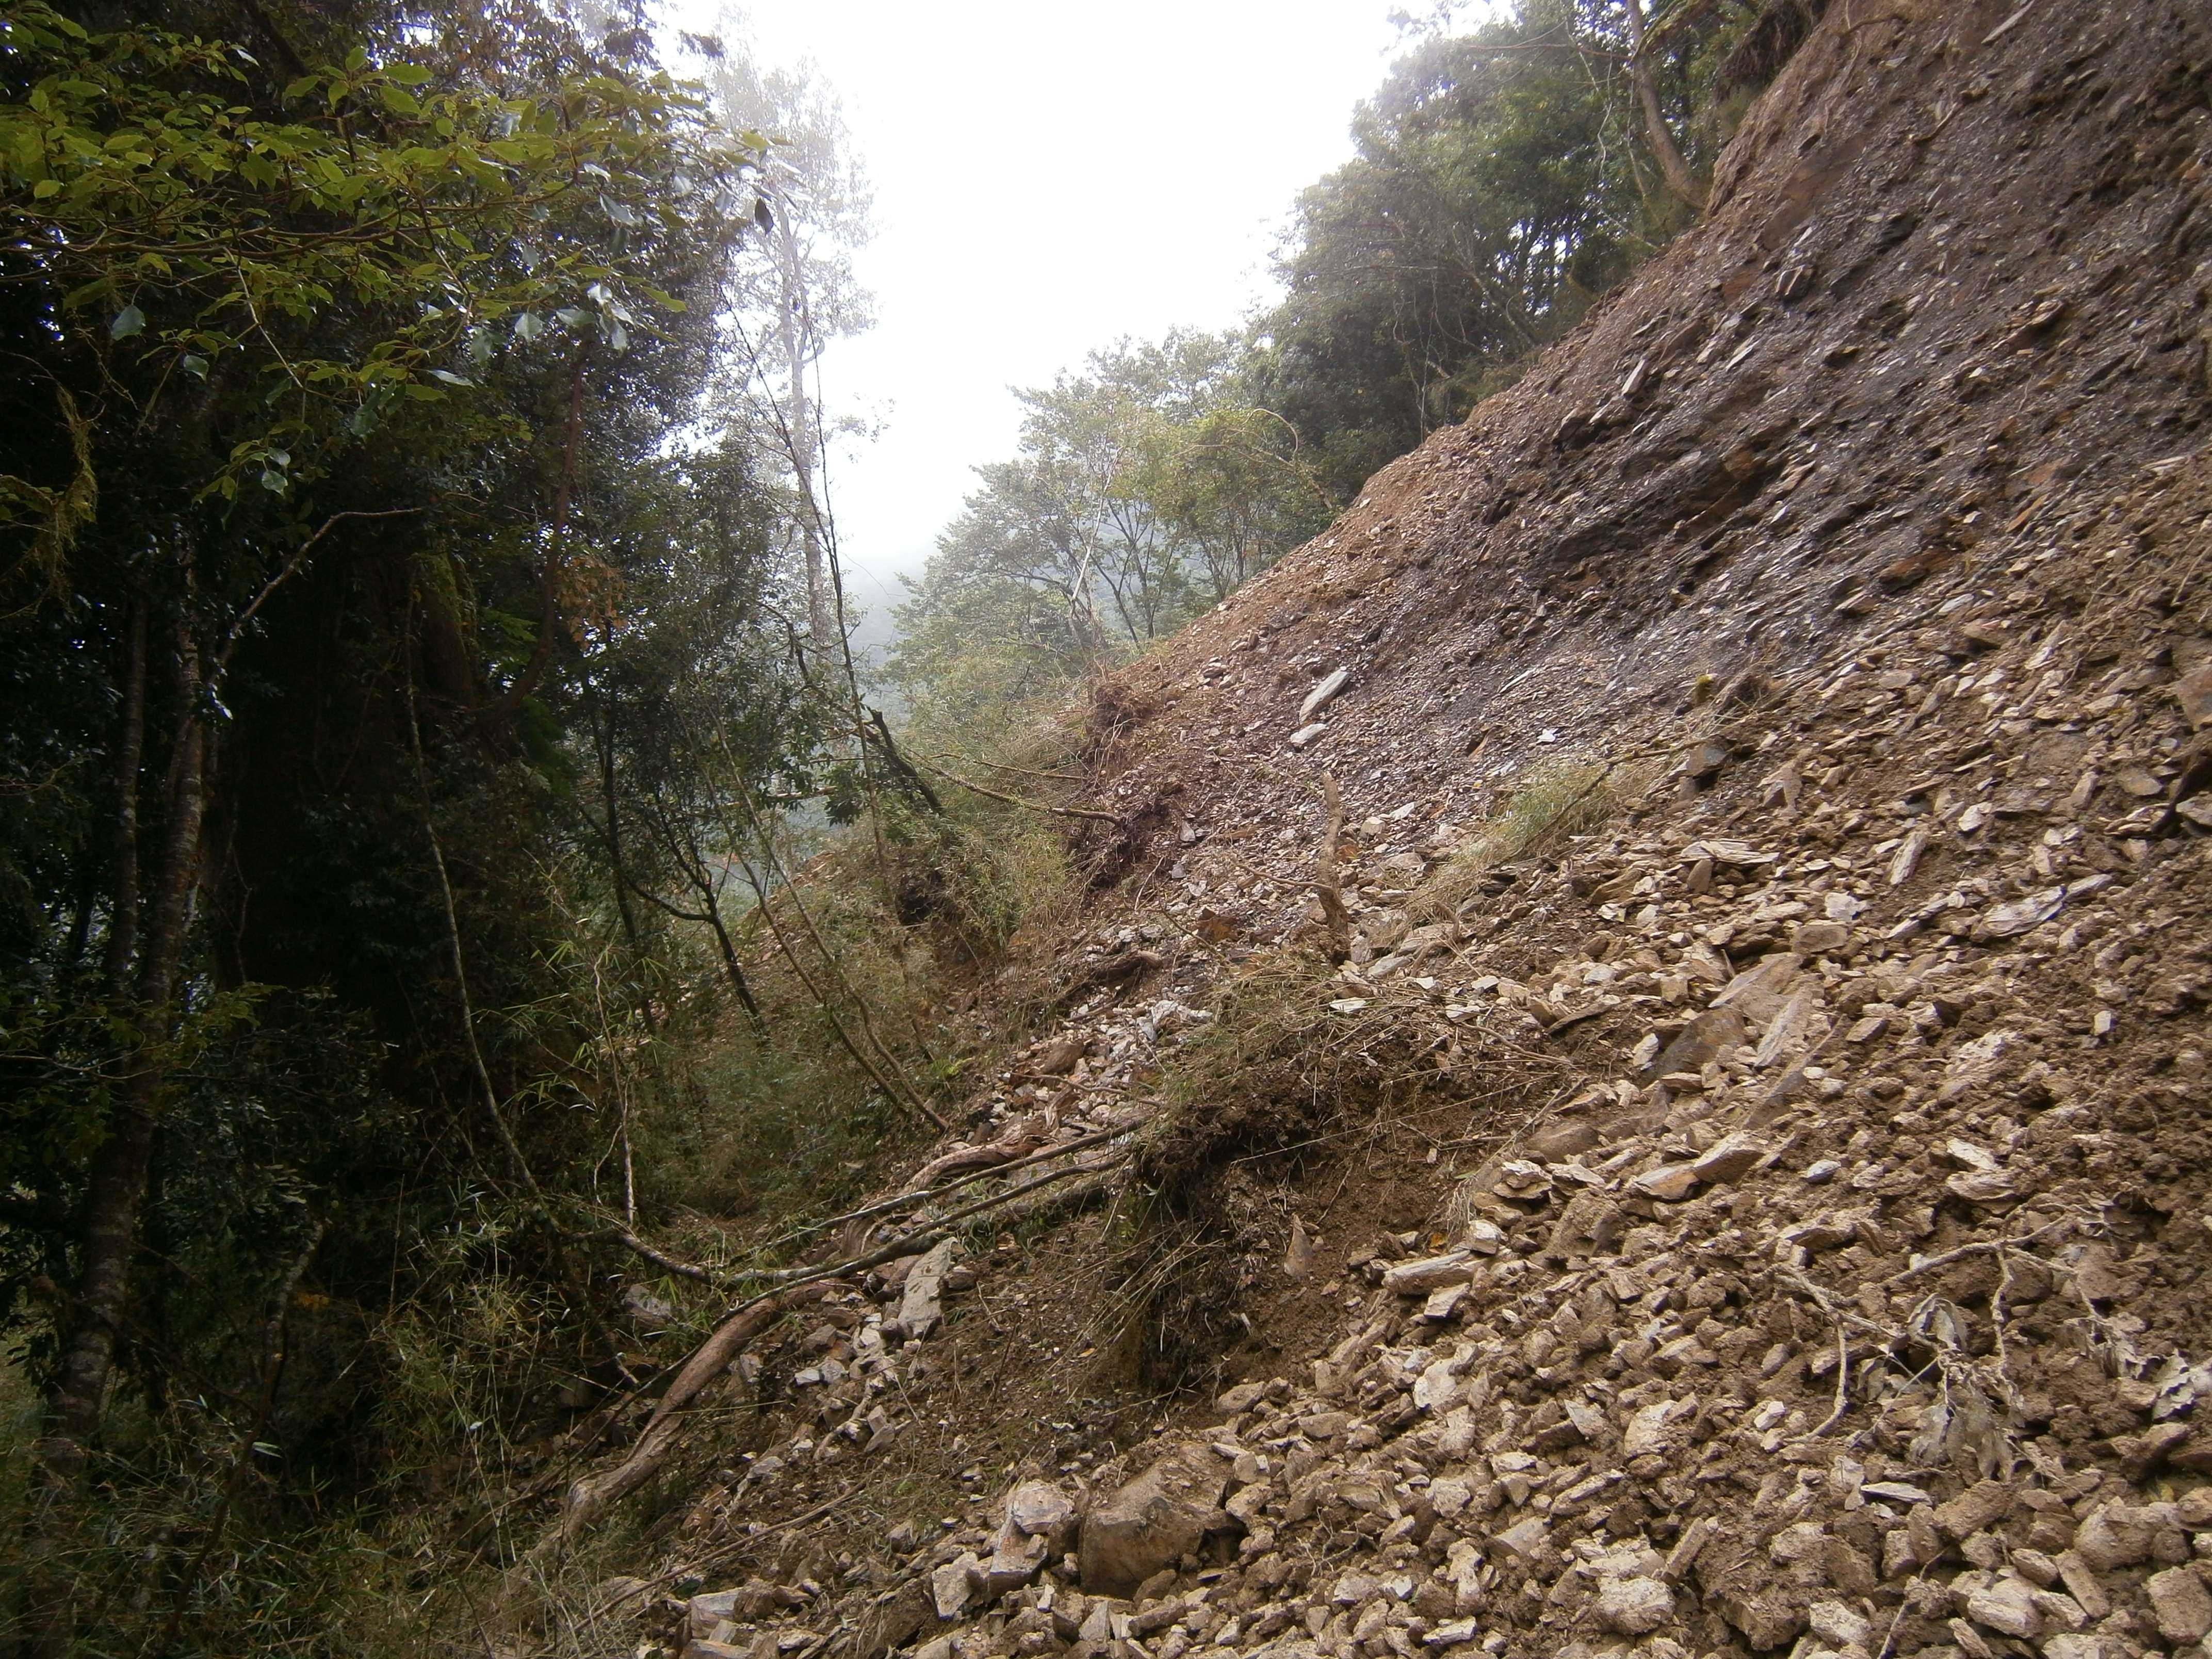
As I continued, I was met with more walls of foliage and soil, brought down by heavy rain.
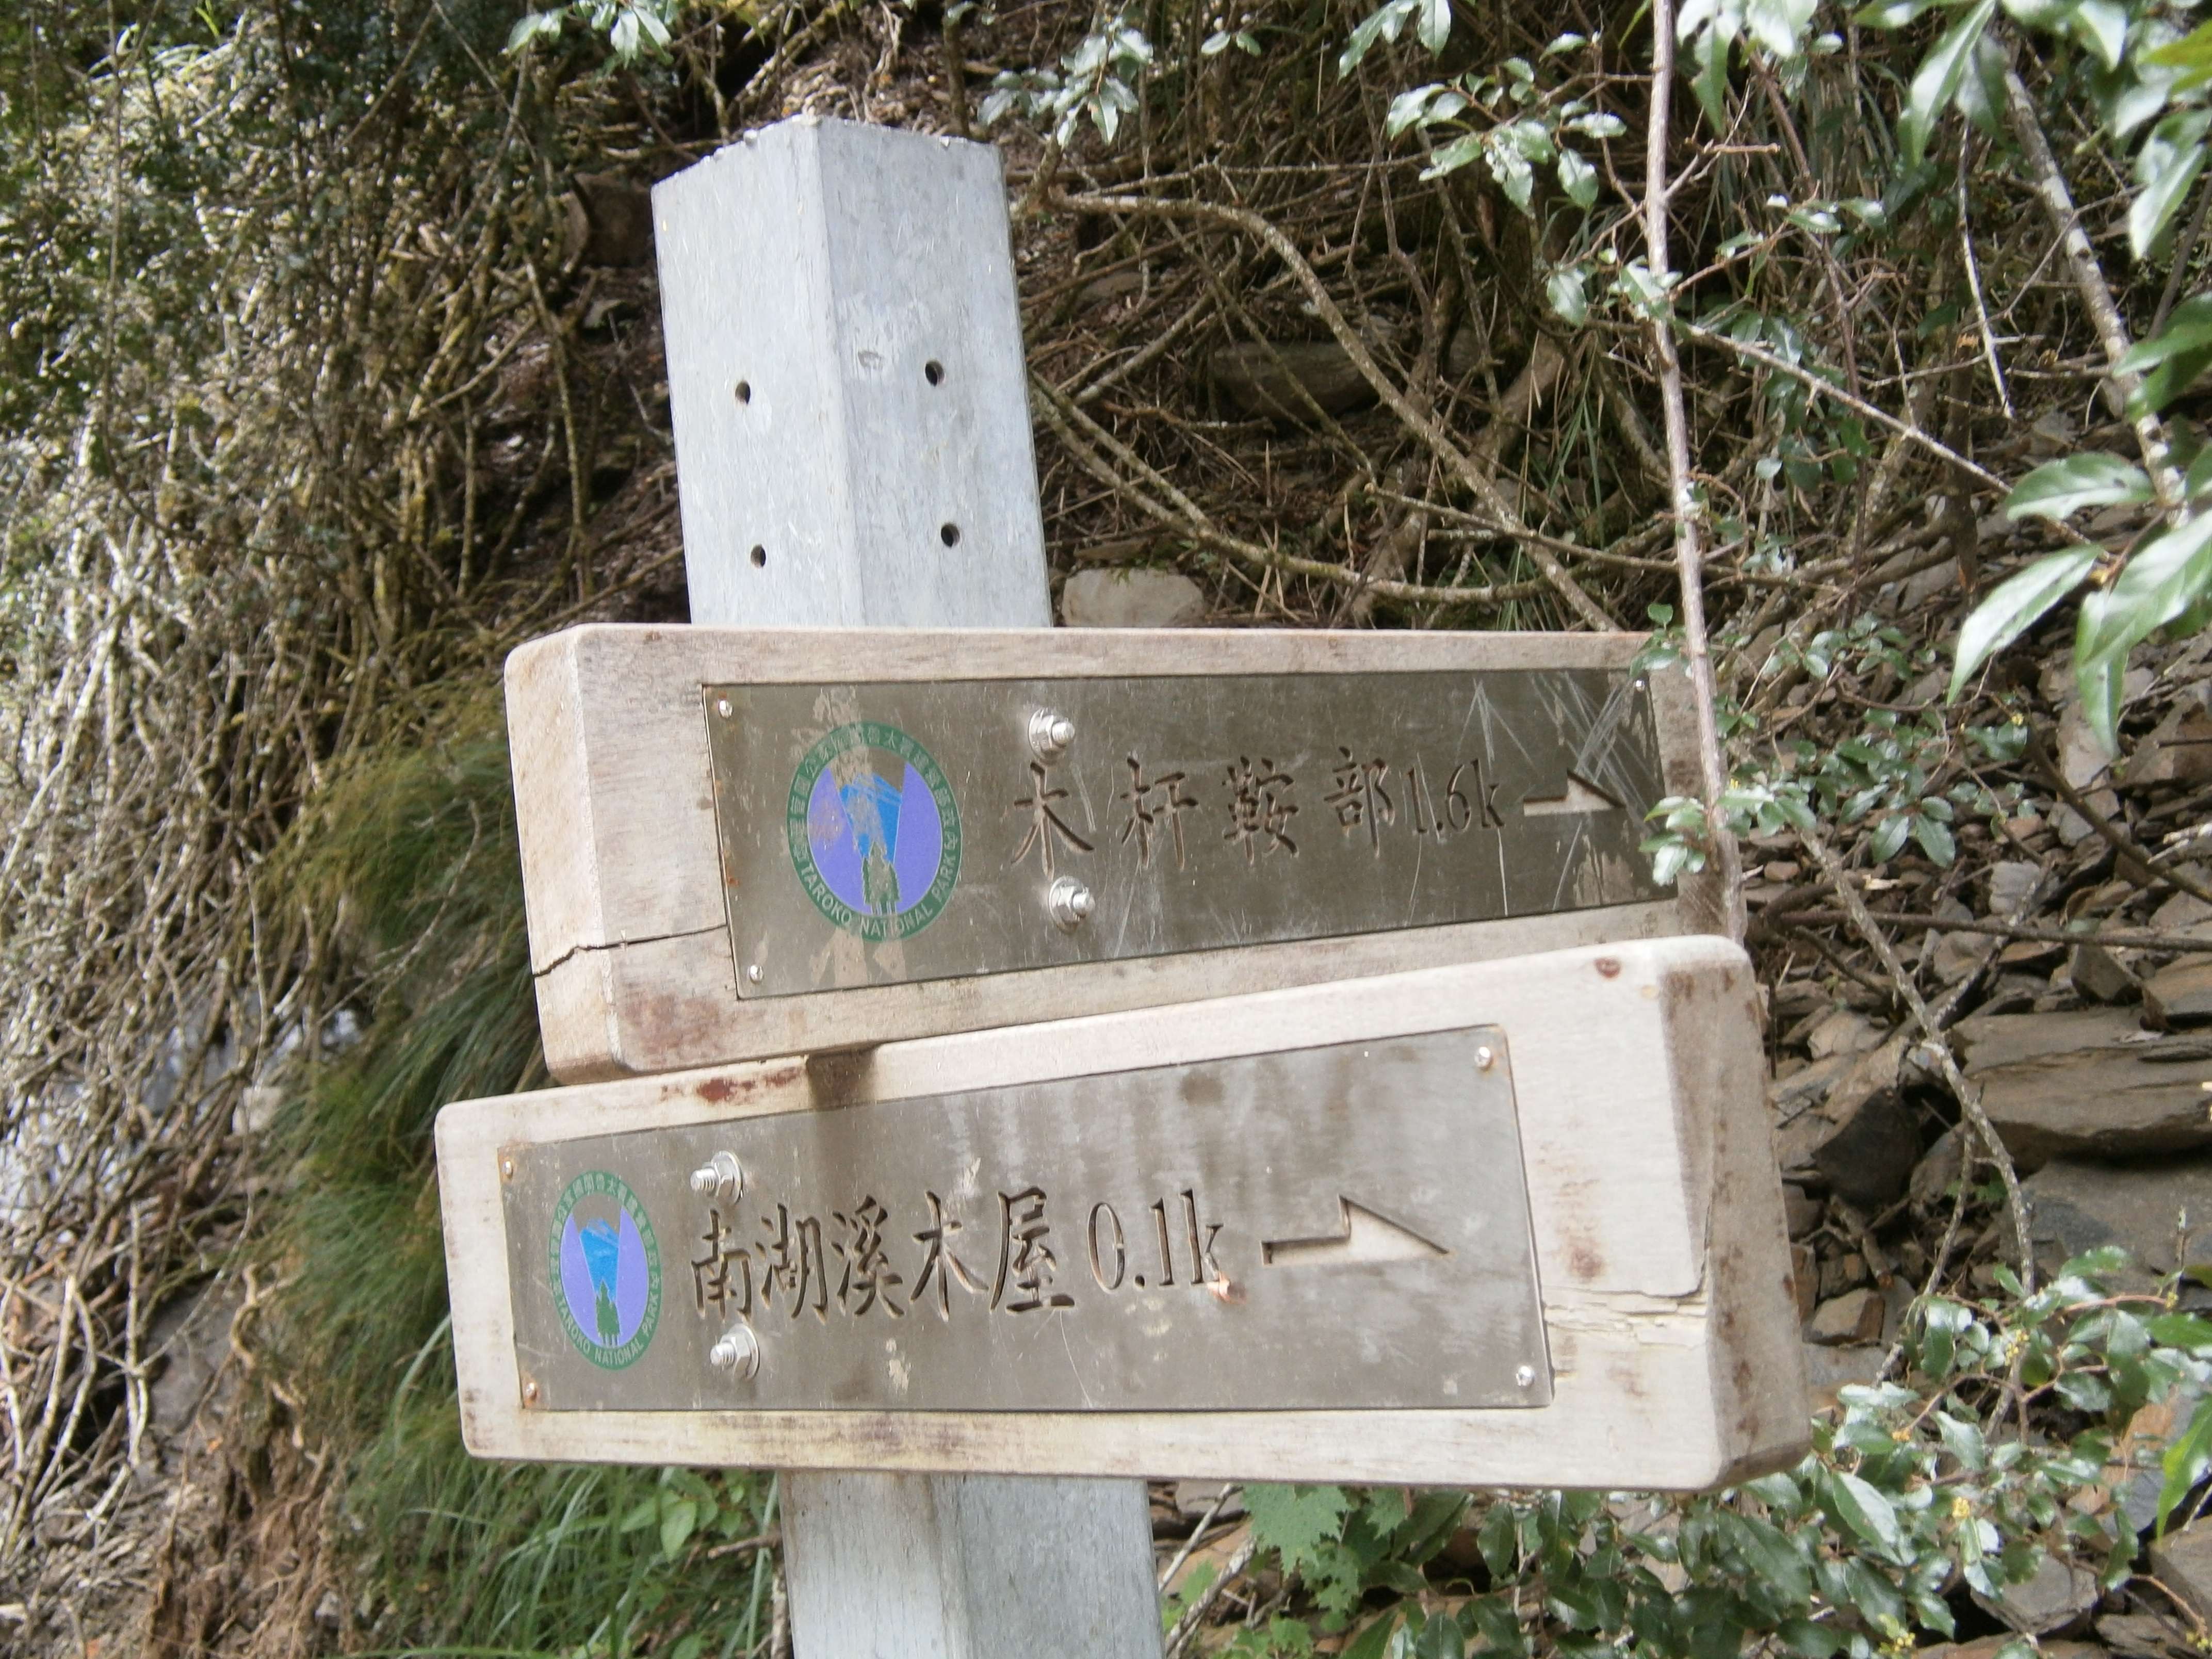
The landslides made this portion of the route grueling and seemingly endless – with my heavy pack, it took several hours to get through it. After this first section I reached the ‘old trailhead’, a large clearing with a drop box for permits and space for several tents. A switchback trail heads upwards, eventually breaking onto a ridge which continues to a junction in the trail. Here a separate path breaks south towards Zhongyangjian Shan. One can continue to the Yunling cabin and Nanhuda Shan, or split towards the Nanhu river cabin (南胡溪木屋) and Zhongyangjian Shan. Clouds over Zhongyangjian Shan obscured the view, although this area is one of the best vantage points of the mountain.

The junction, marking the trail split and 1.7km south to the Nanhu river cabin.
Here the route drops off of the ridge and downhill into a valley through forest, quickly joining a stream. From here to the bottom of the valley there is no longer a trail, and the route follows the rocks of the stream. Going is slow along this section, as the route is slippery.
Trail markers were abundant, along with the odd rope.
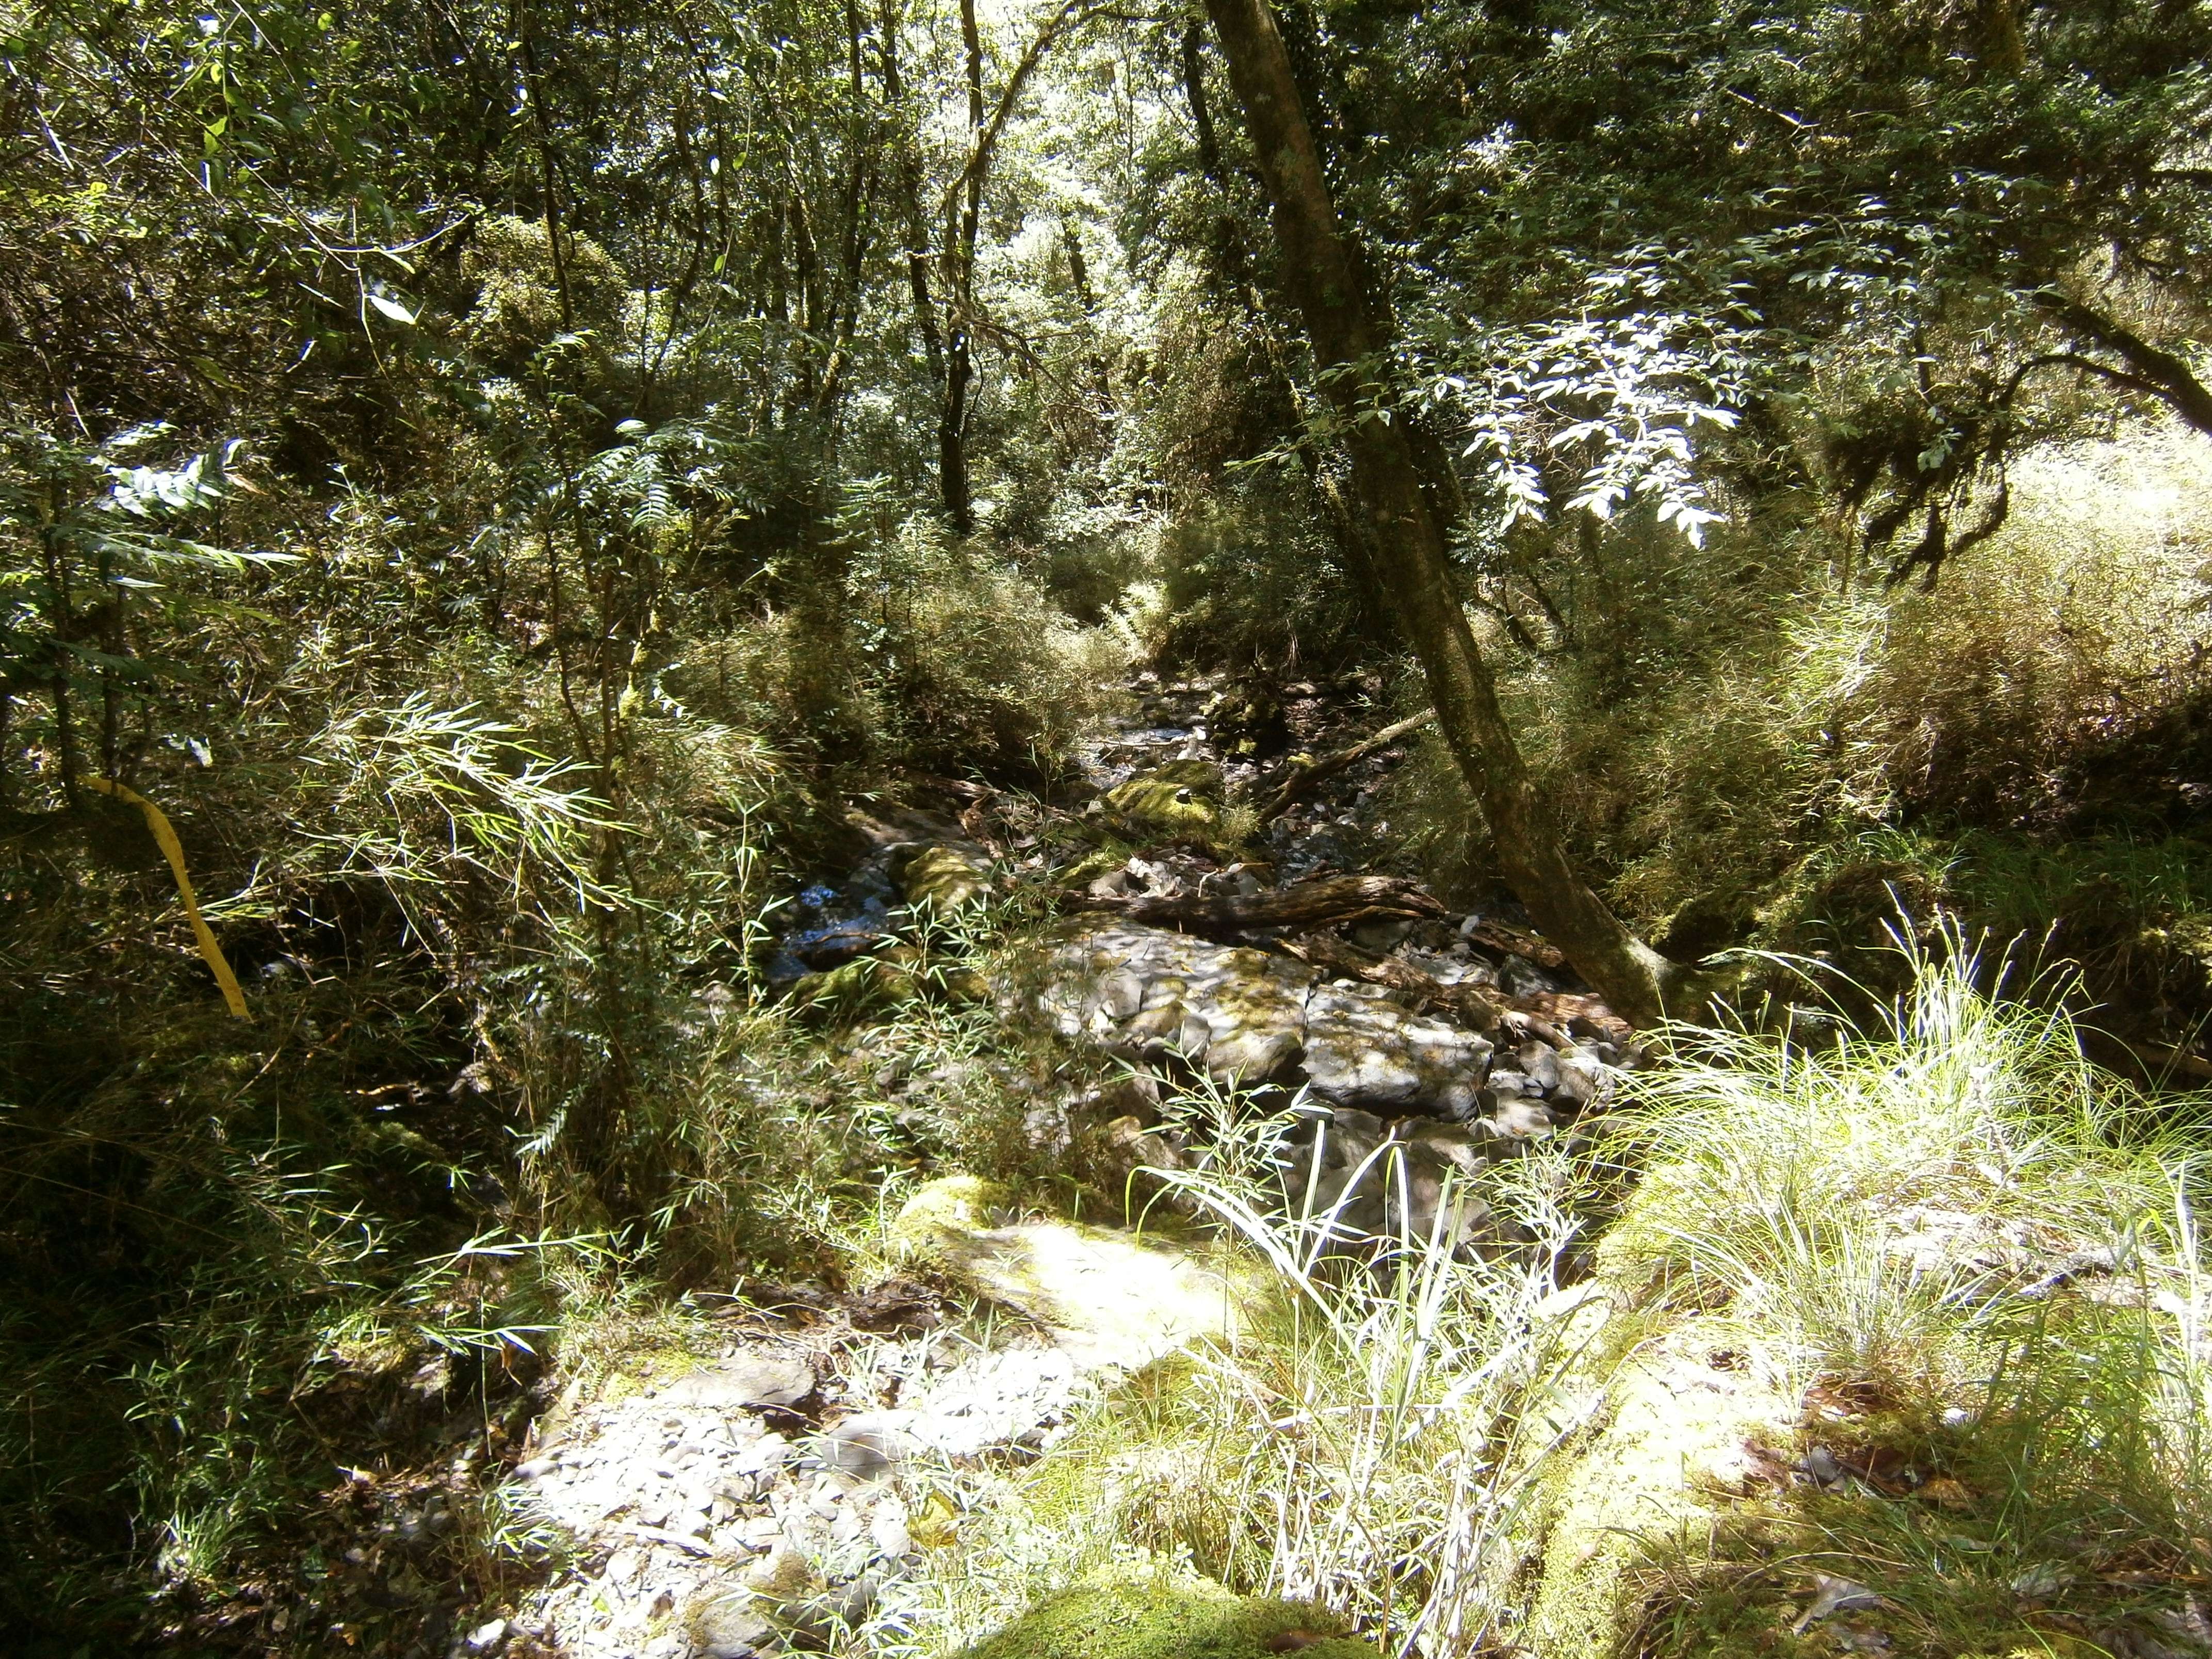
Eventually the trail disappears, and the route continues along the side of the stream.
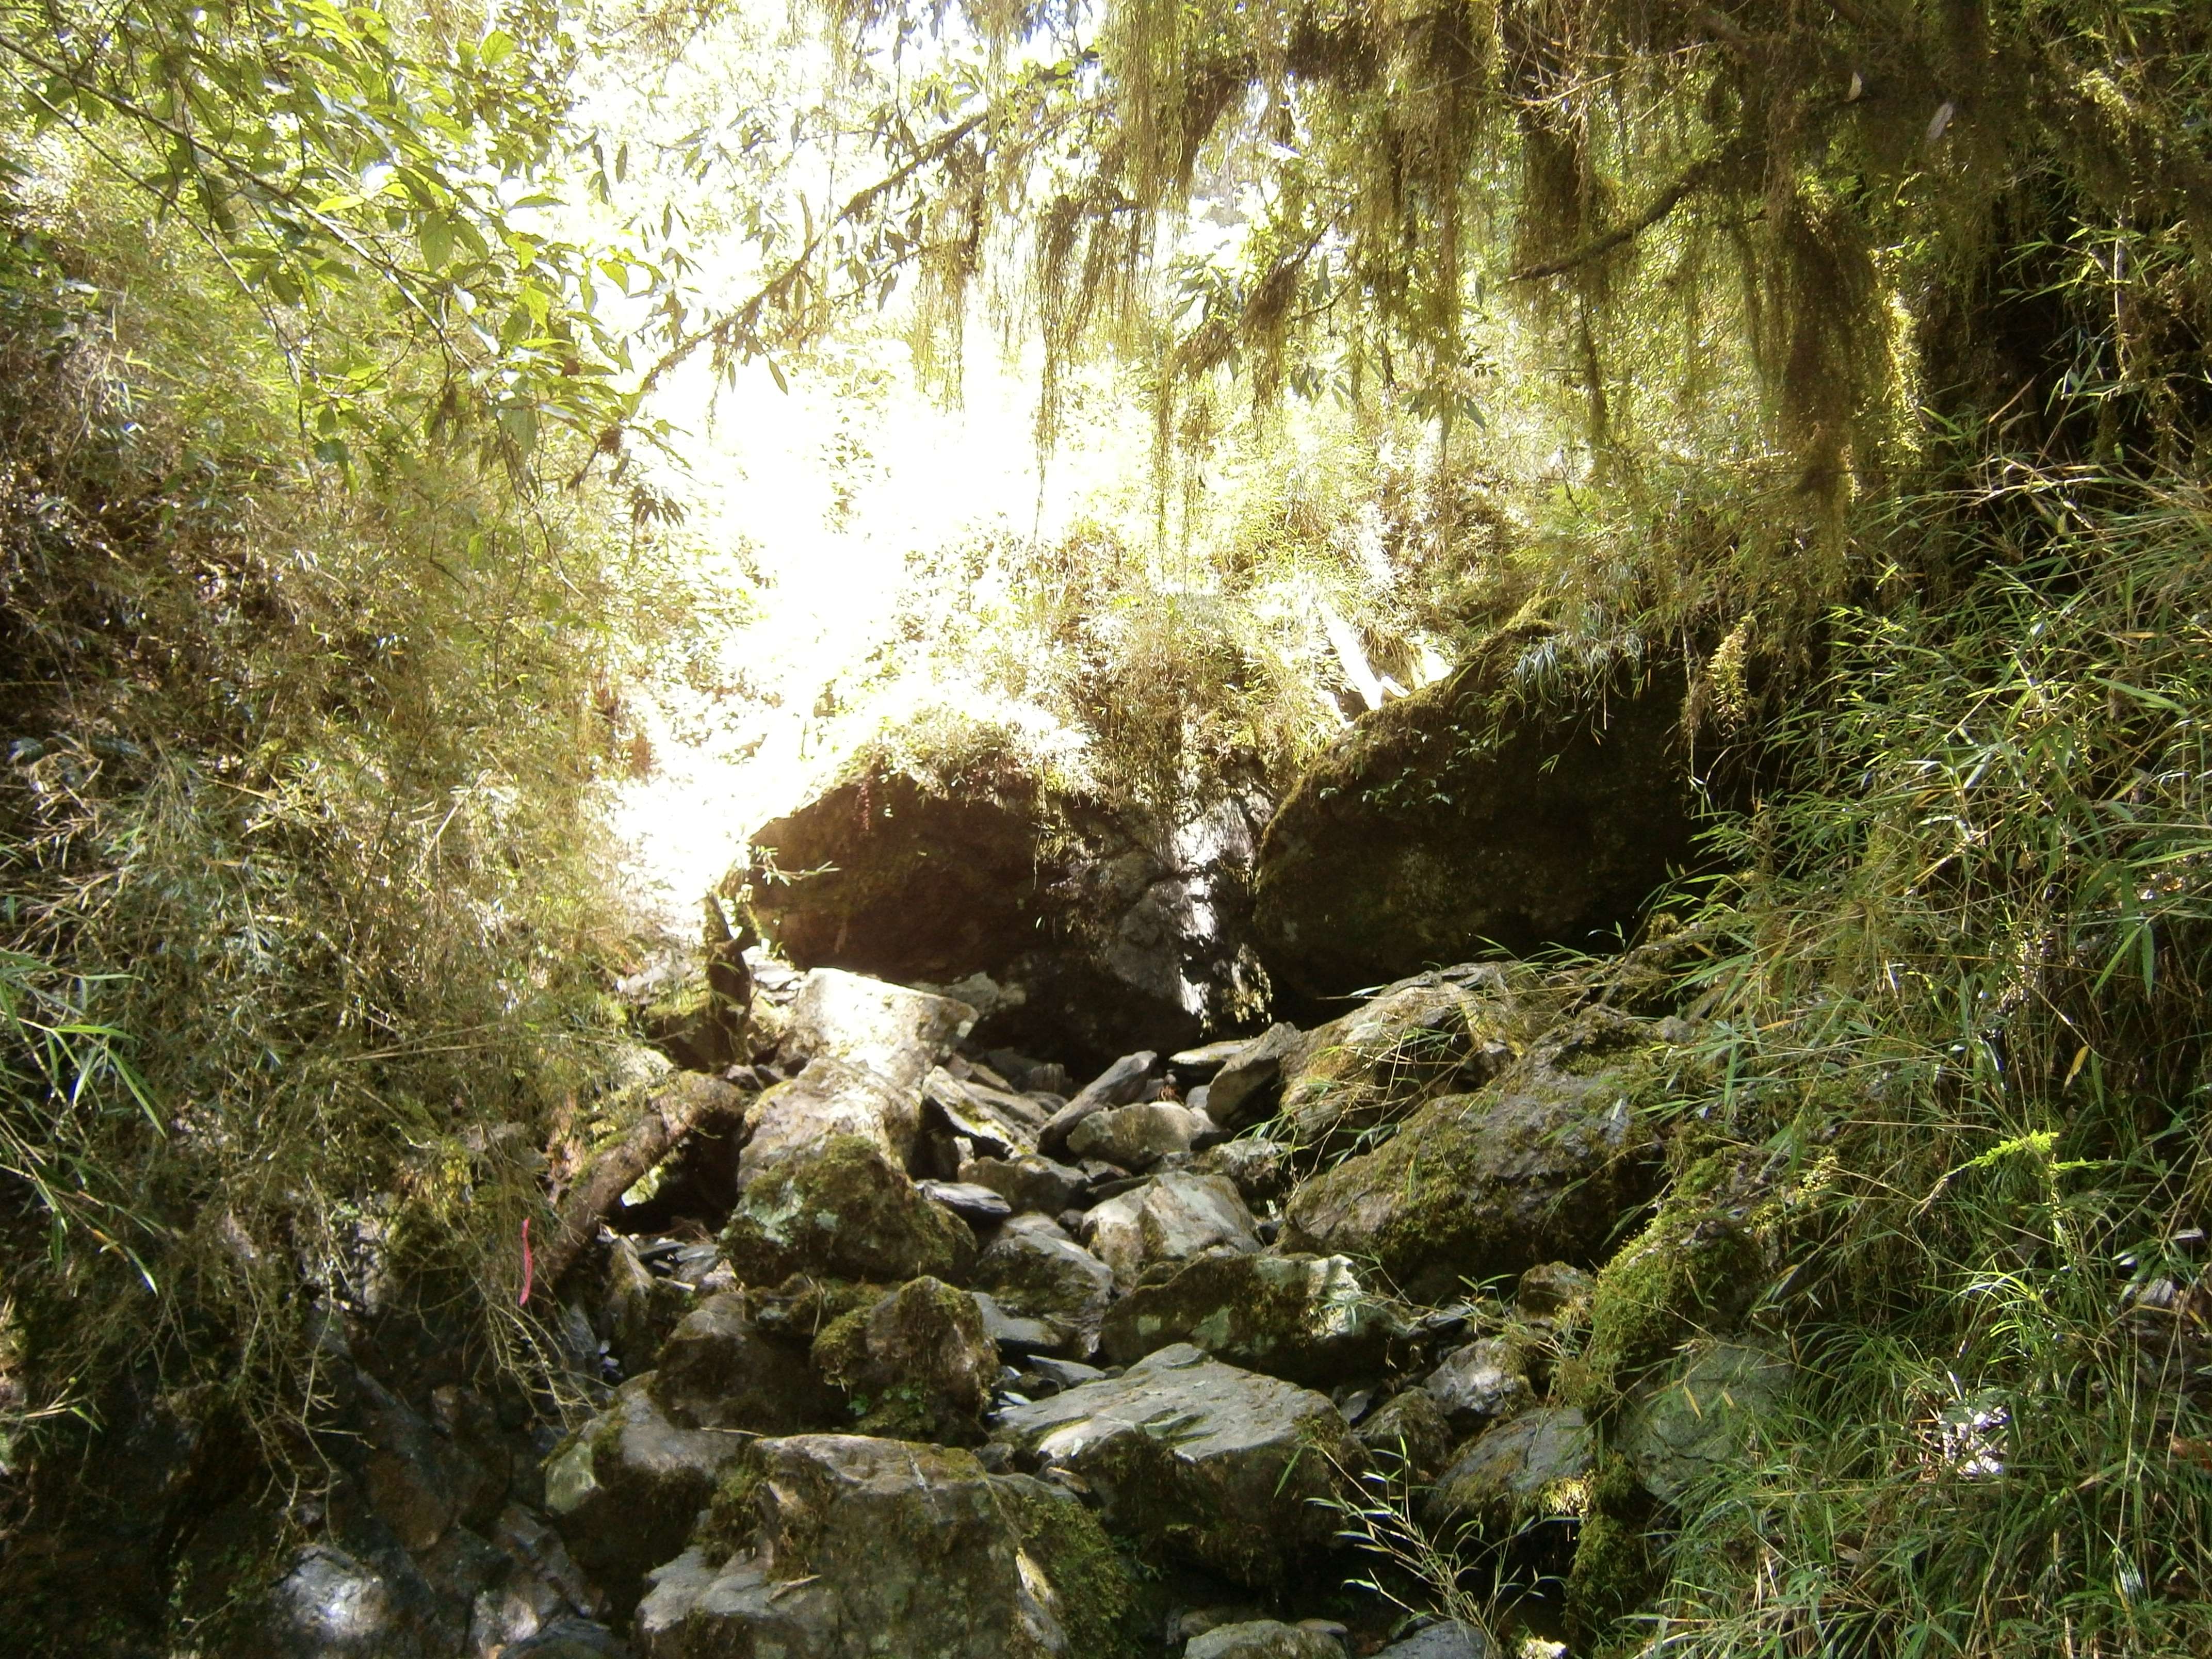
The stream is rocky, and strewn with boulders.
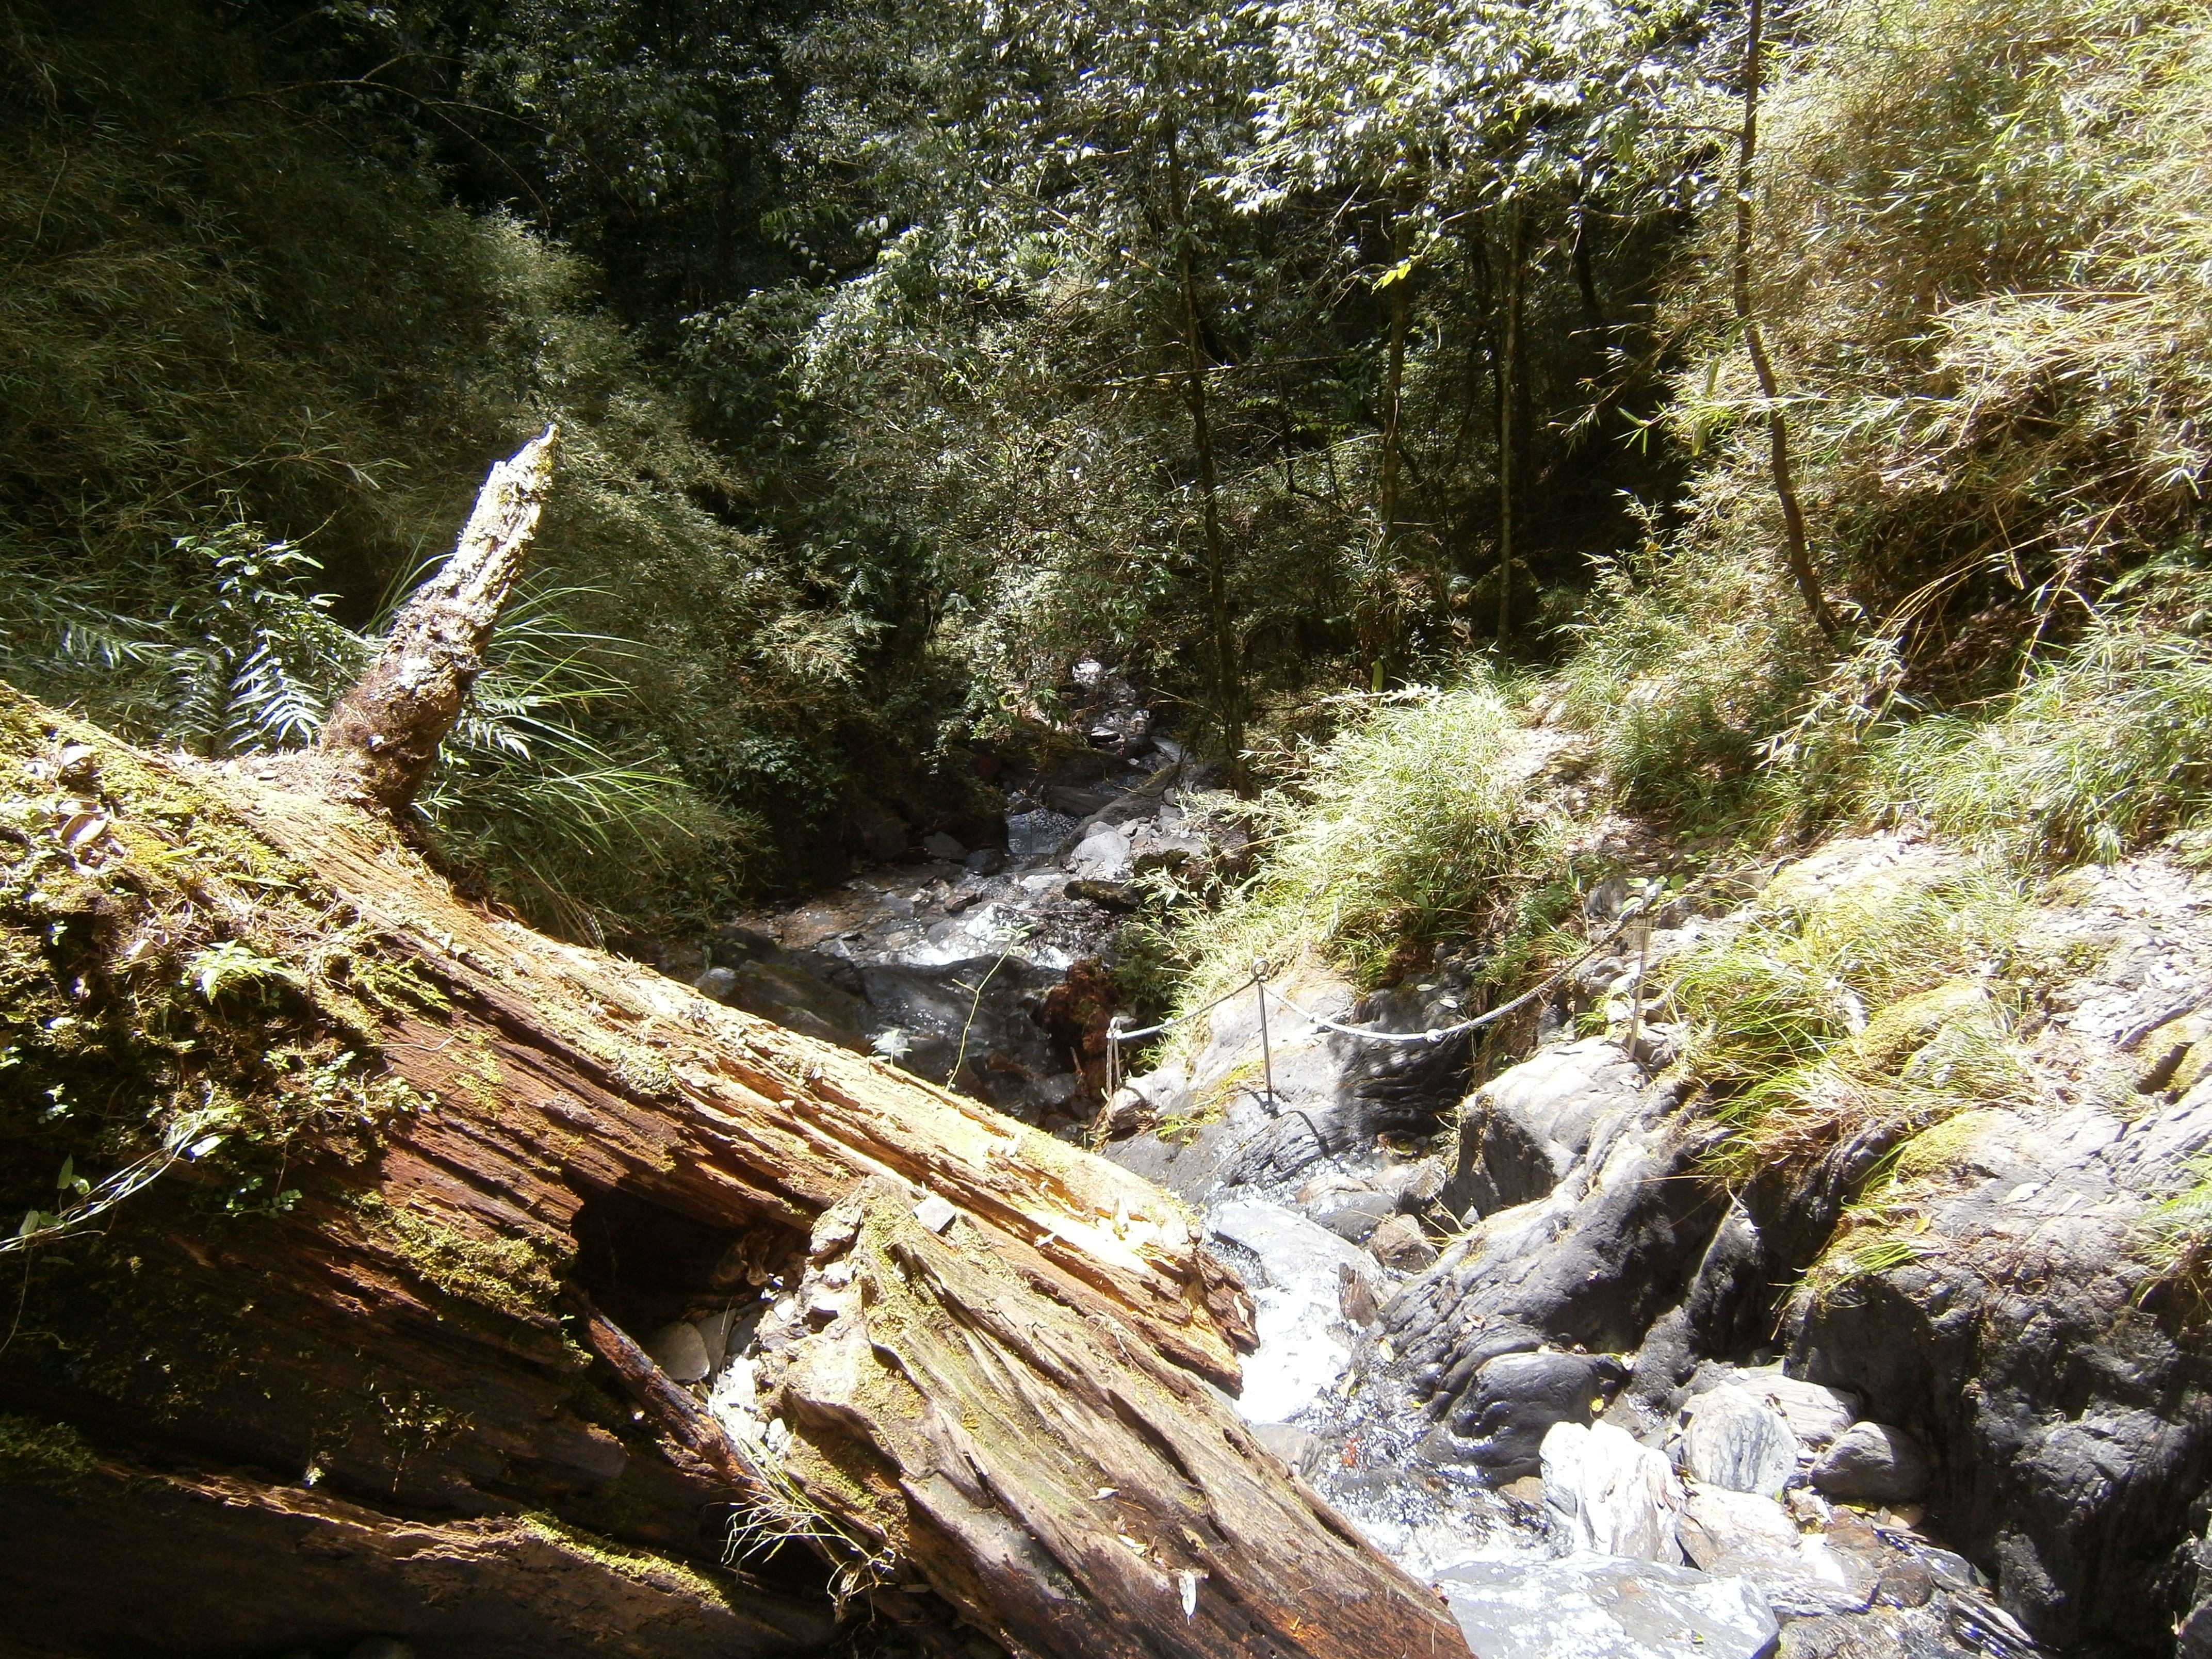
Steeper sections with water were protected with ropes and posts.
Eventually the stream reaches a river, where a second signpost points in the direction of the Nanhu River cabin.
A signpost indicates the direction to continue.
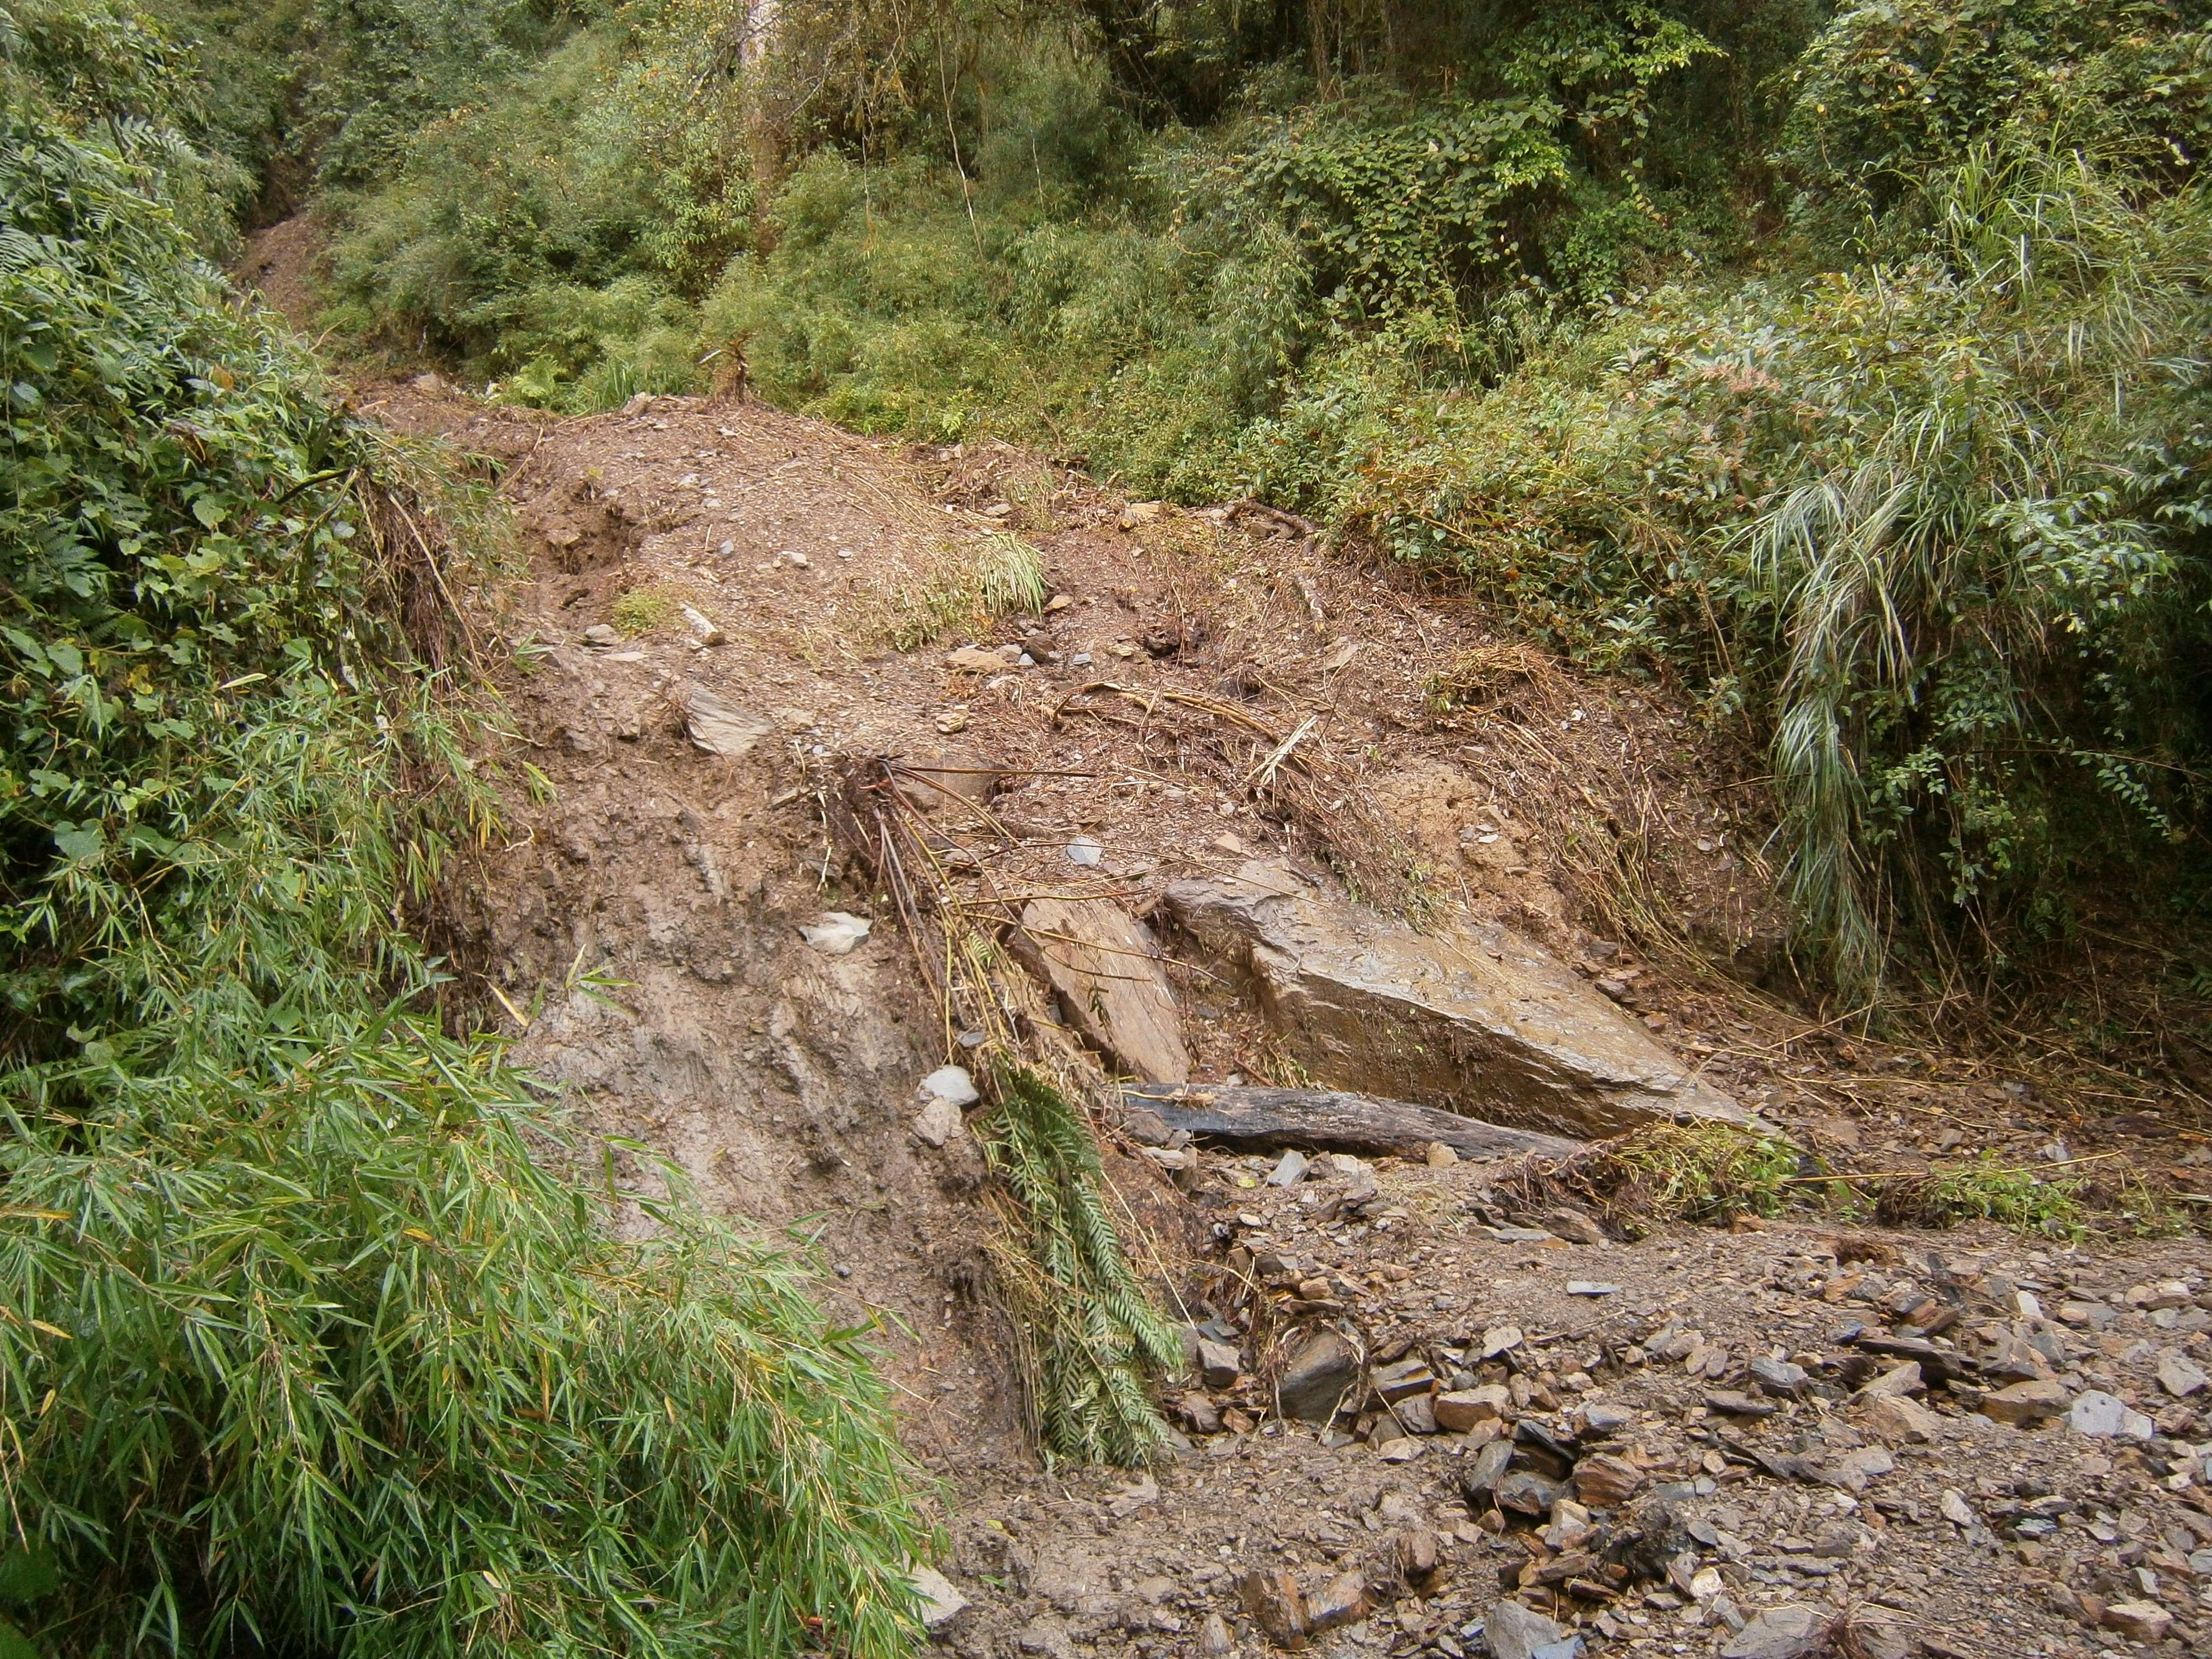
From here the trail continued a short distance along the riverbank. More fresh landslides blocked parts of the route along this short section.
More landslide aftermath along the riverbank.
A short distance downstream I found the Nanhu River cabin. It is roughly constructed and quite run down, but could be used as shelter if necessary. Were one to break this trip up over four or five days, the area around the cabin would serve as a decent first night’s campground.
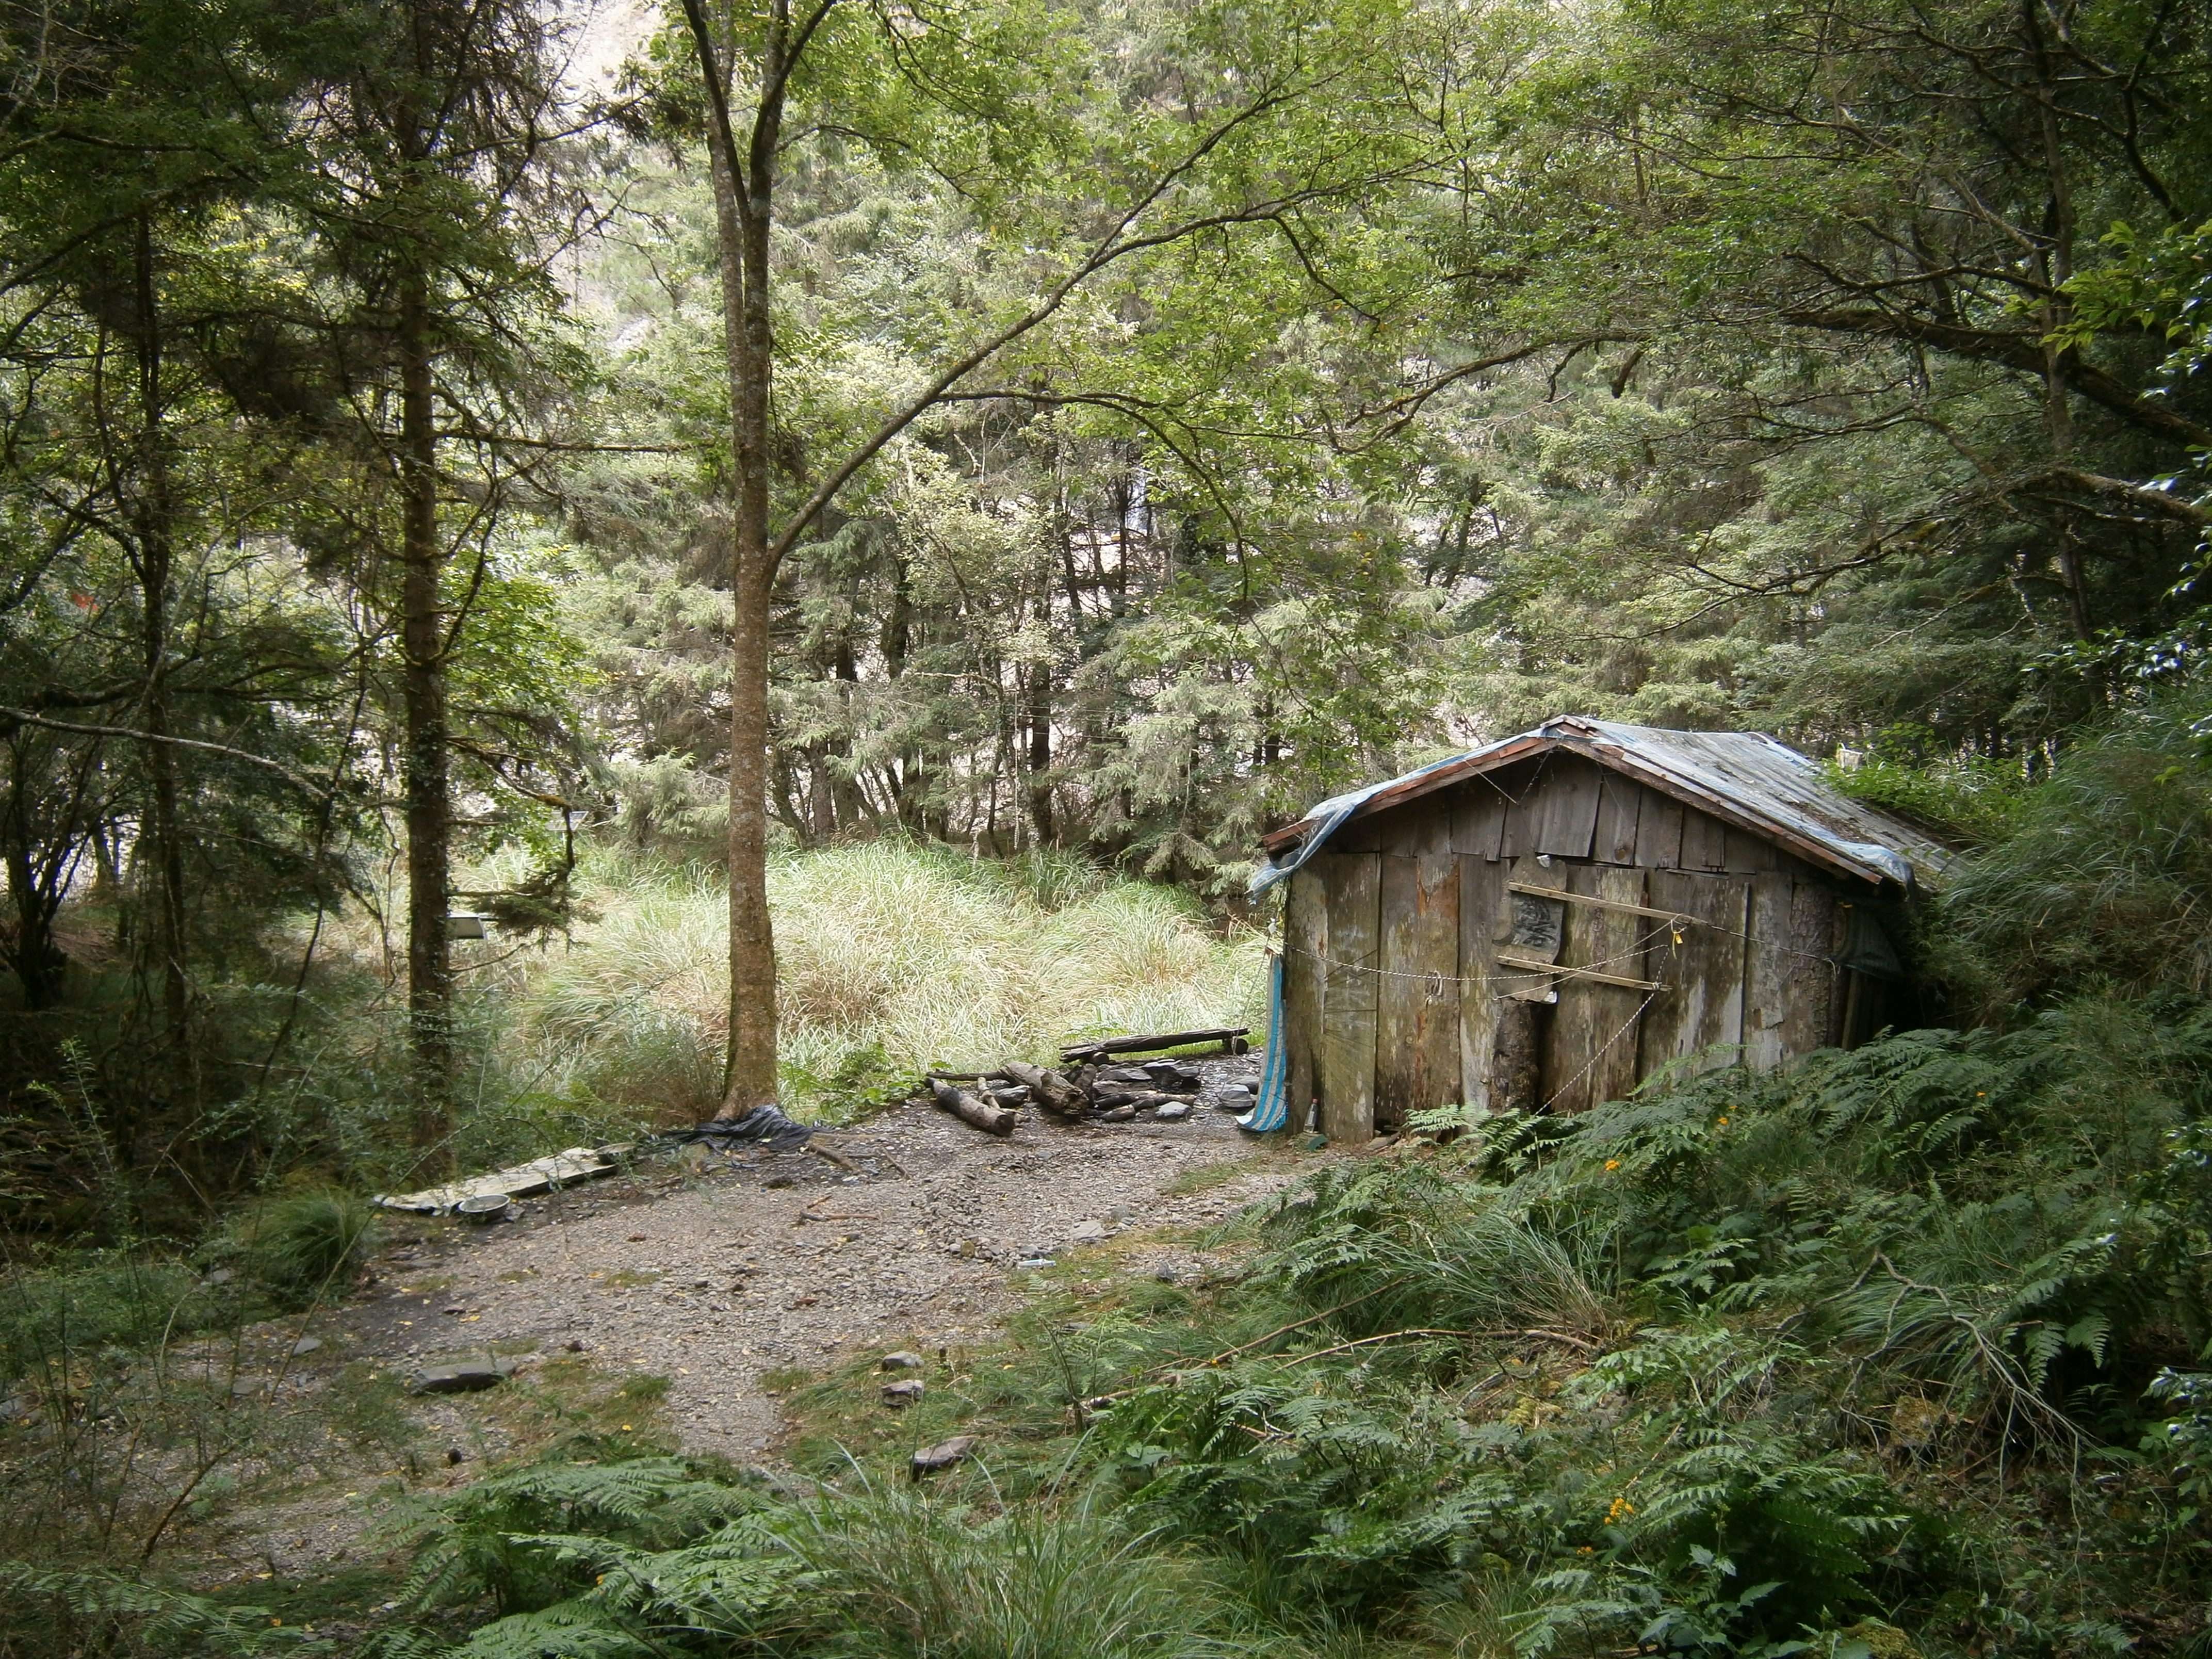
The Nanhu River Cabin.
Past the cabin a trail leaves the river and heads south, uphill. This trail was marked with hiking tags. The overland section here is long, 8.3km according to the map, and ascends some several hundred meters before descending back down to the river on the other side – uphill both ways. On the other side of the overland trail, another signpost points in the direction of the Zhongyangjian River Cabin (中央尖溪木屋), a further 2.2km along the banks of the river. To my dismay, I found the Zhongyangjian river swollen and running deep, likely due to the recent typhoon and heavy rains.

The Zhongyangjian River cabin is a further 2.2km southeast once the route rejoins the river.

The river was deeper than anticipated.
From here on the route follows the Zhongyangjian river to the base of Zhongyangjian Shan itself. It had been a long day, and I decided to stop here and pitch my camp in a clearing near the river. I would use this campsite for the next two nights.

My campsite for two nights.
Day 2: Up early, I began following the river southeast towards the Zhongyangjian River Cabin. This section of the route follows rocky riverbanks, but frequent crossings are required due to the cliffs which line both sides of the water and occasionally protrude over the water. This became very taxing, as with the water higher than expected there was usually no means of crossing the river without getting wet. After taking my boots off for the first two crossings I gave up and kept them on, guaranteeing wet feet for the rest of the day.
Looming rock walls framed sections of the river.
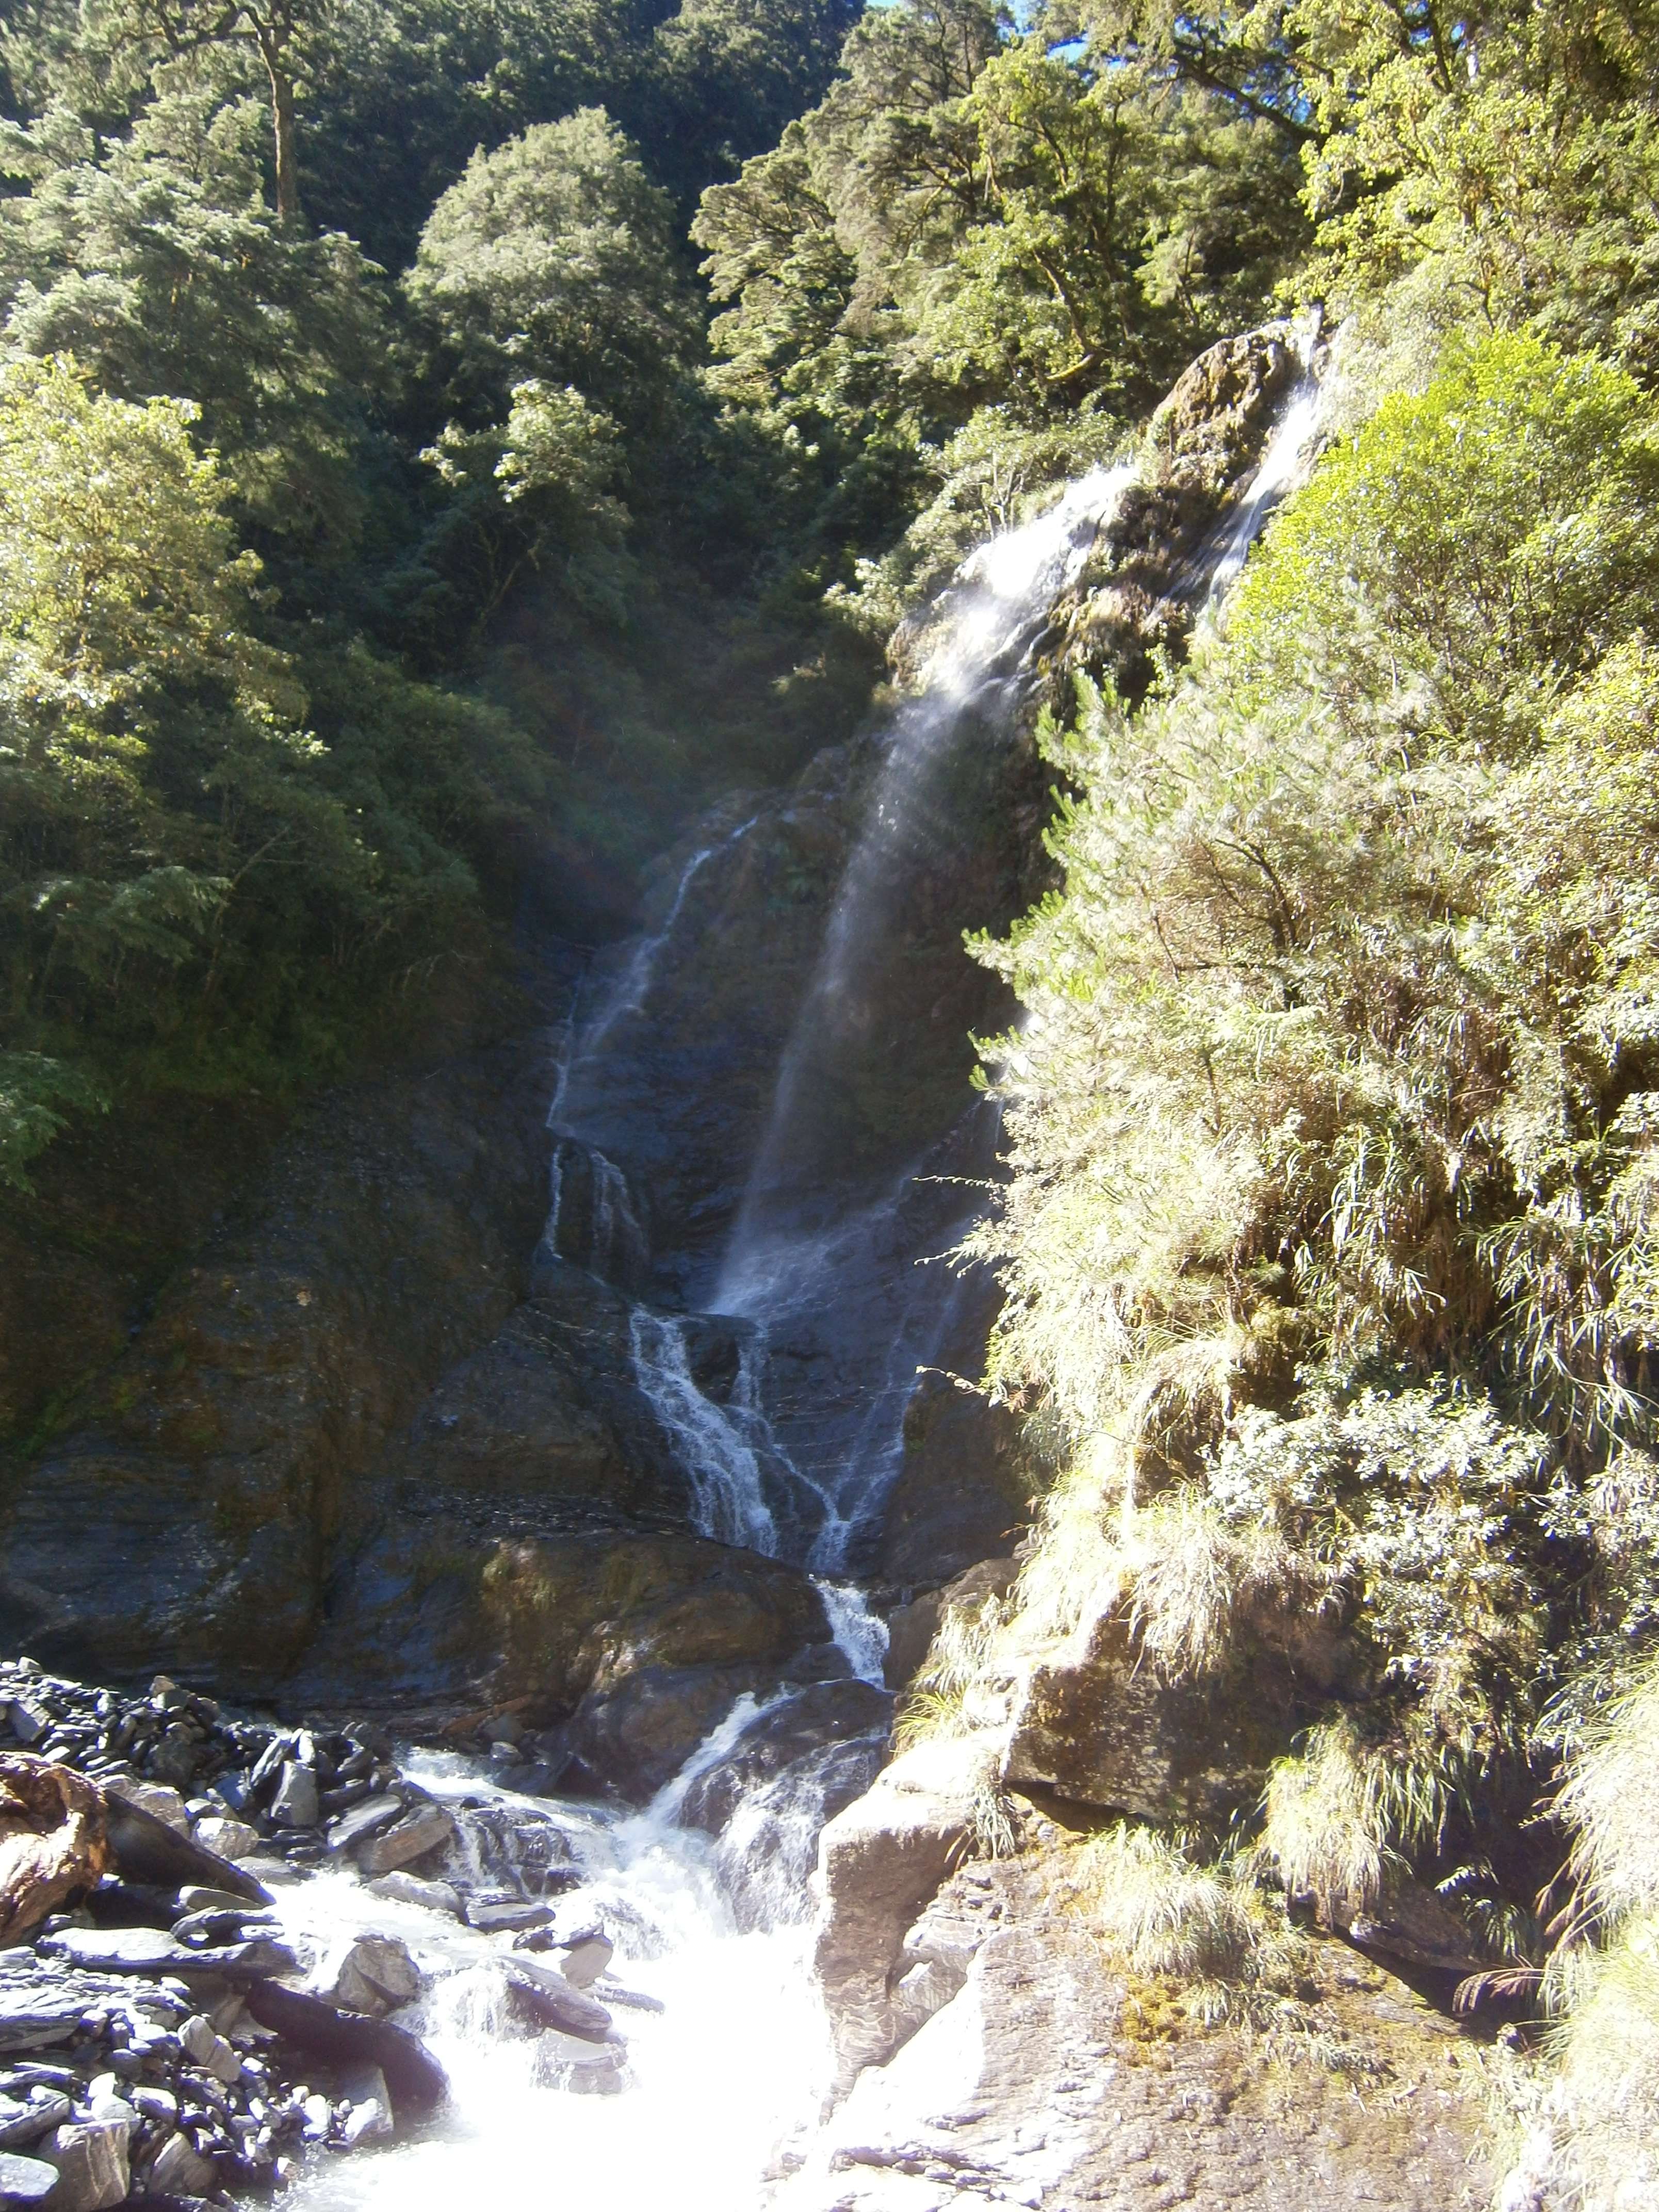
A nice waterfall at a bend in the river, just before the Zhongyangjian River Cabin.
I reached the Zhongyangjian River Cabin and took a short break to take a look inside. A little trail off of the river makes the cabin hard to miss. Similar to the Nanhu River Cabin, the hut is crude and run down. Another good area for camping, but staying in the hut itself wouldn’t be pleasant.

The Zhongyangjian River Cabin.

The very basic cabin interior – it looked leaky!
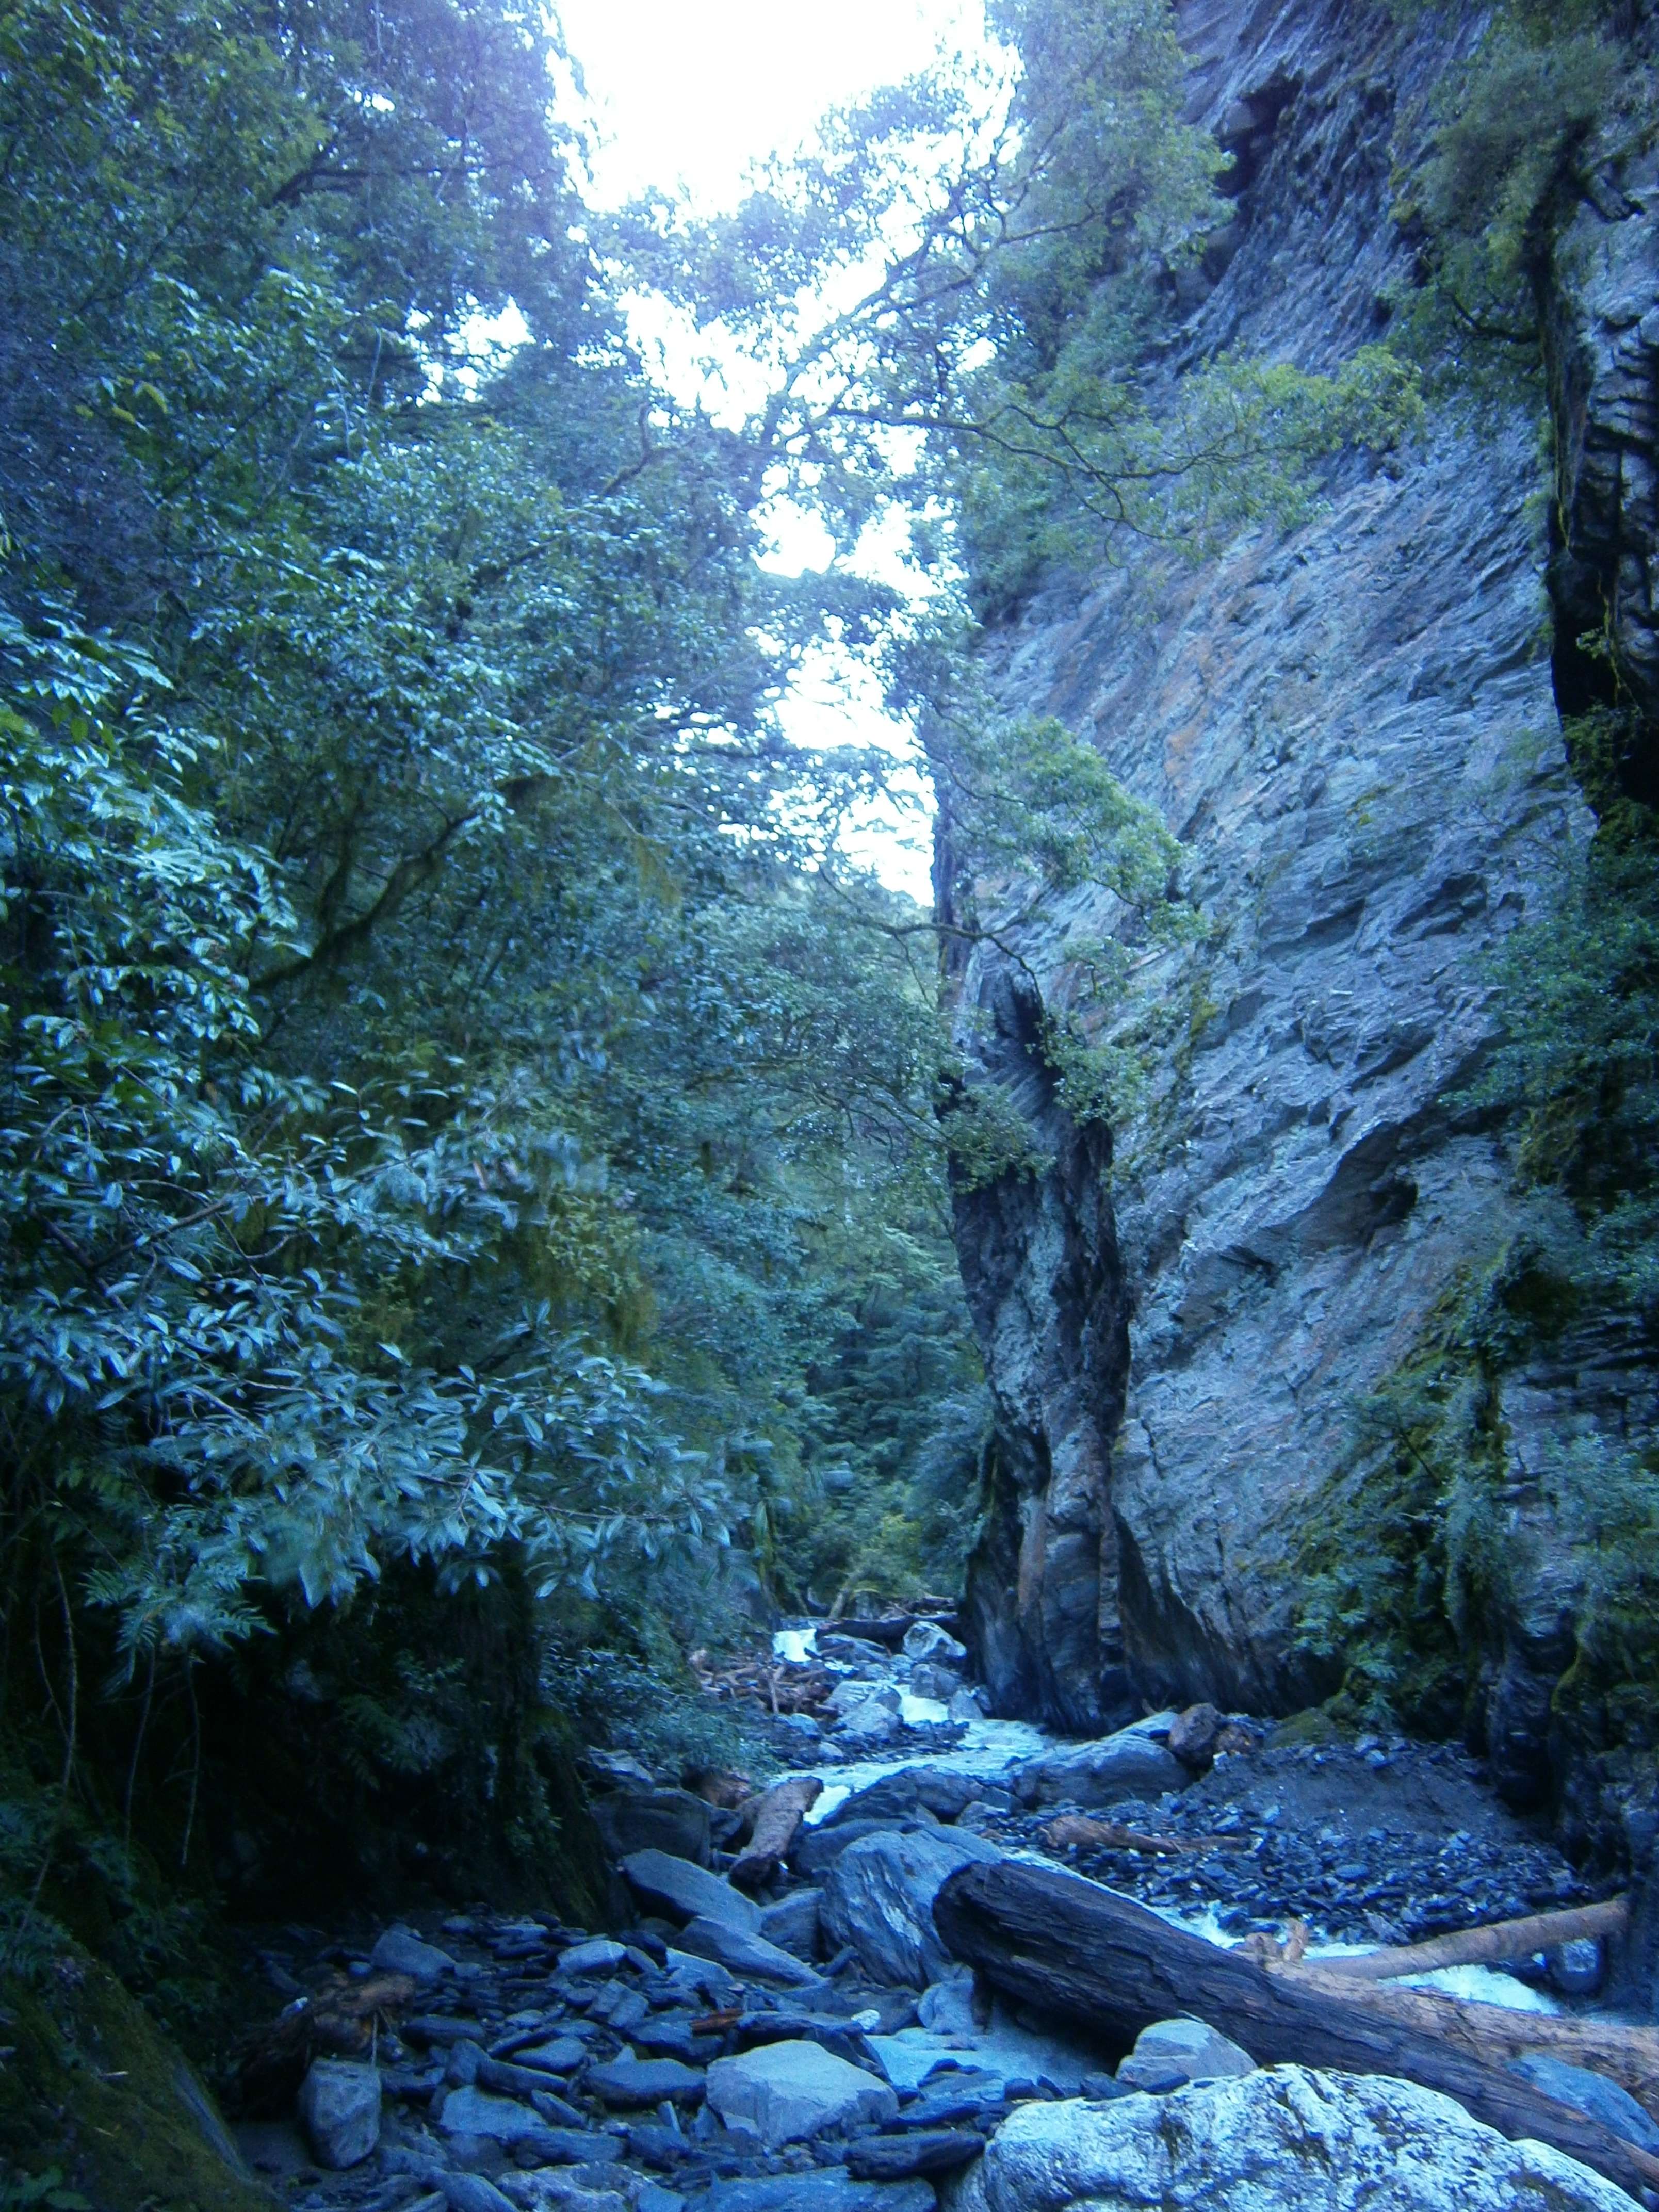
Continuing along the riverside, now moving south, the river grew narrower and crossings were more frequent.

The river grew narrower, its walls more defined.

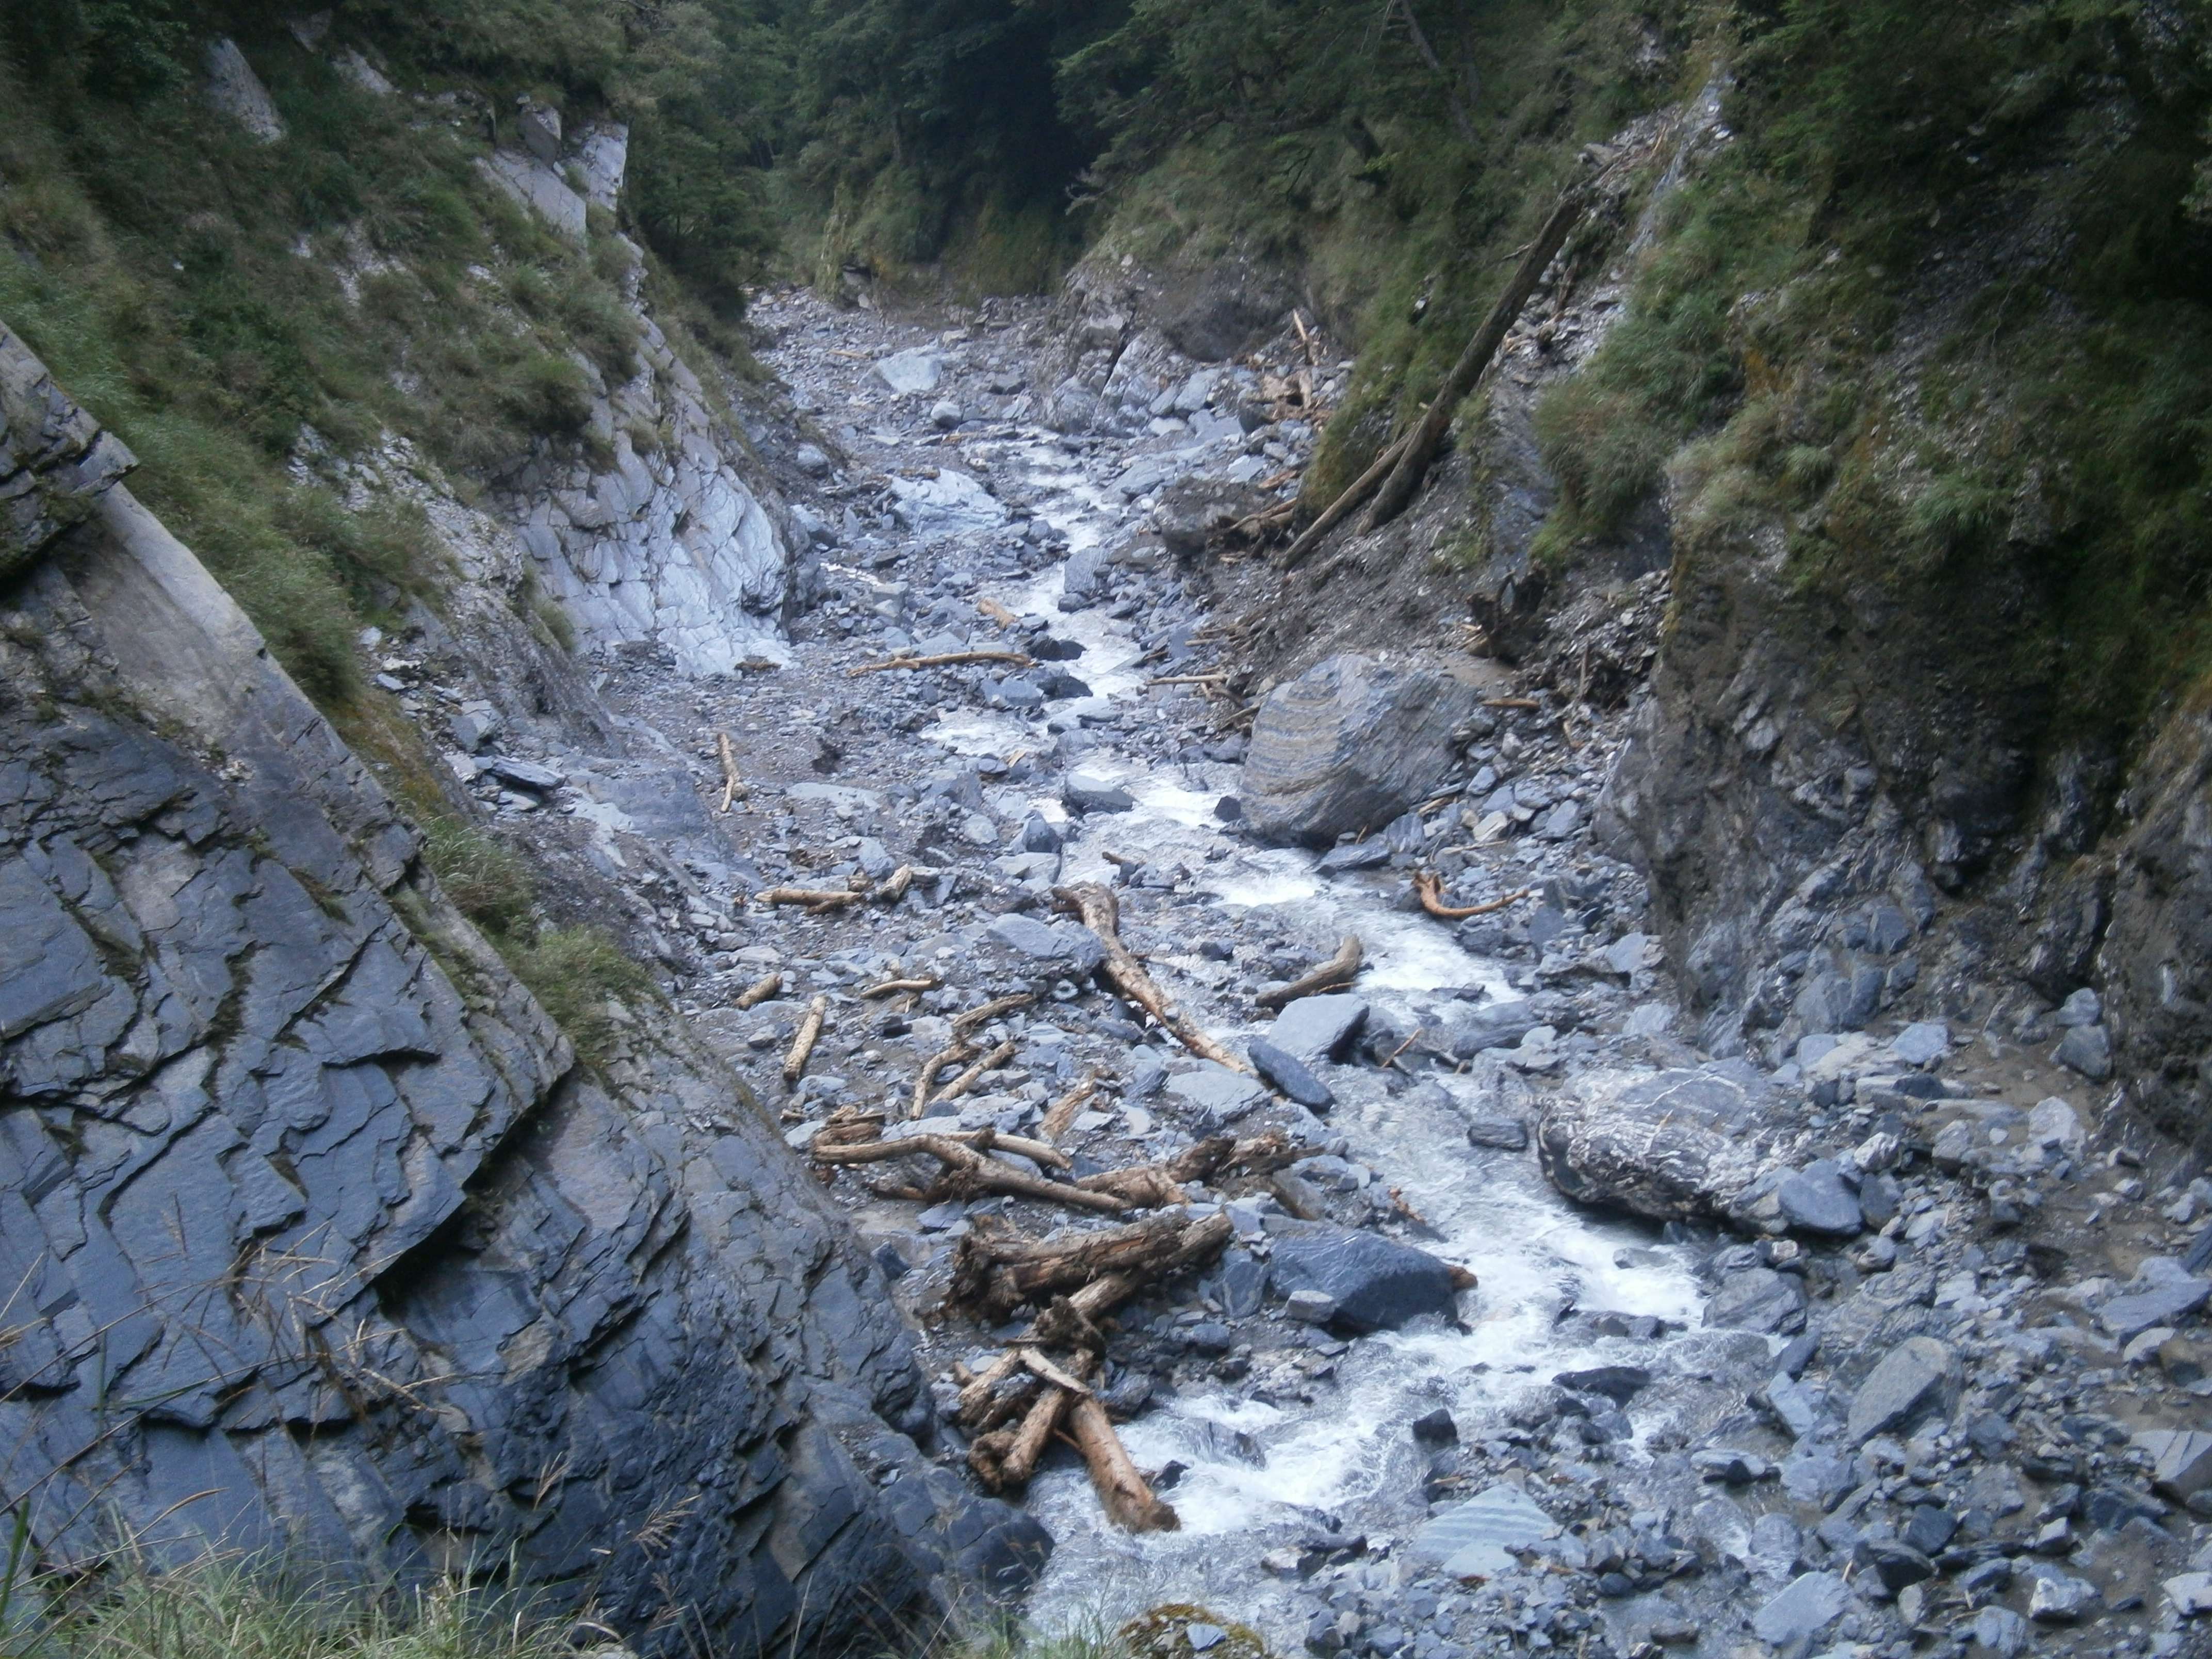
The river cuts through the rock, creating some visually interesting terrain.
Further upriver, I finally caught sight of Zhongyangjian Shan in the distance. Clouds were moving overhead and granted only brief windows of view.

My first glimpse of Zhongyangjian Shan.
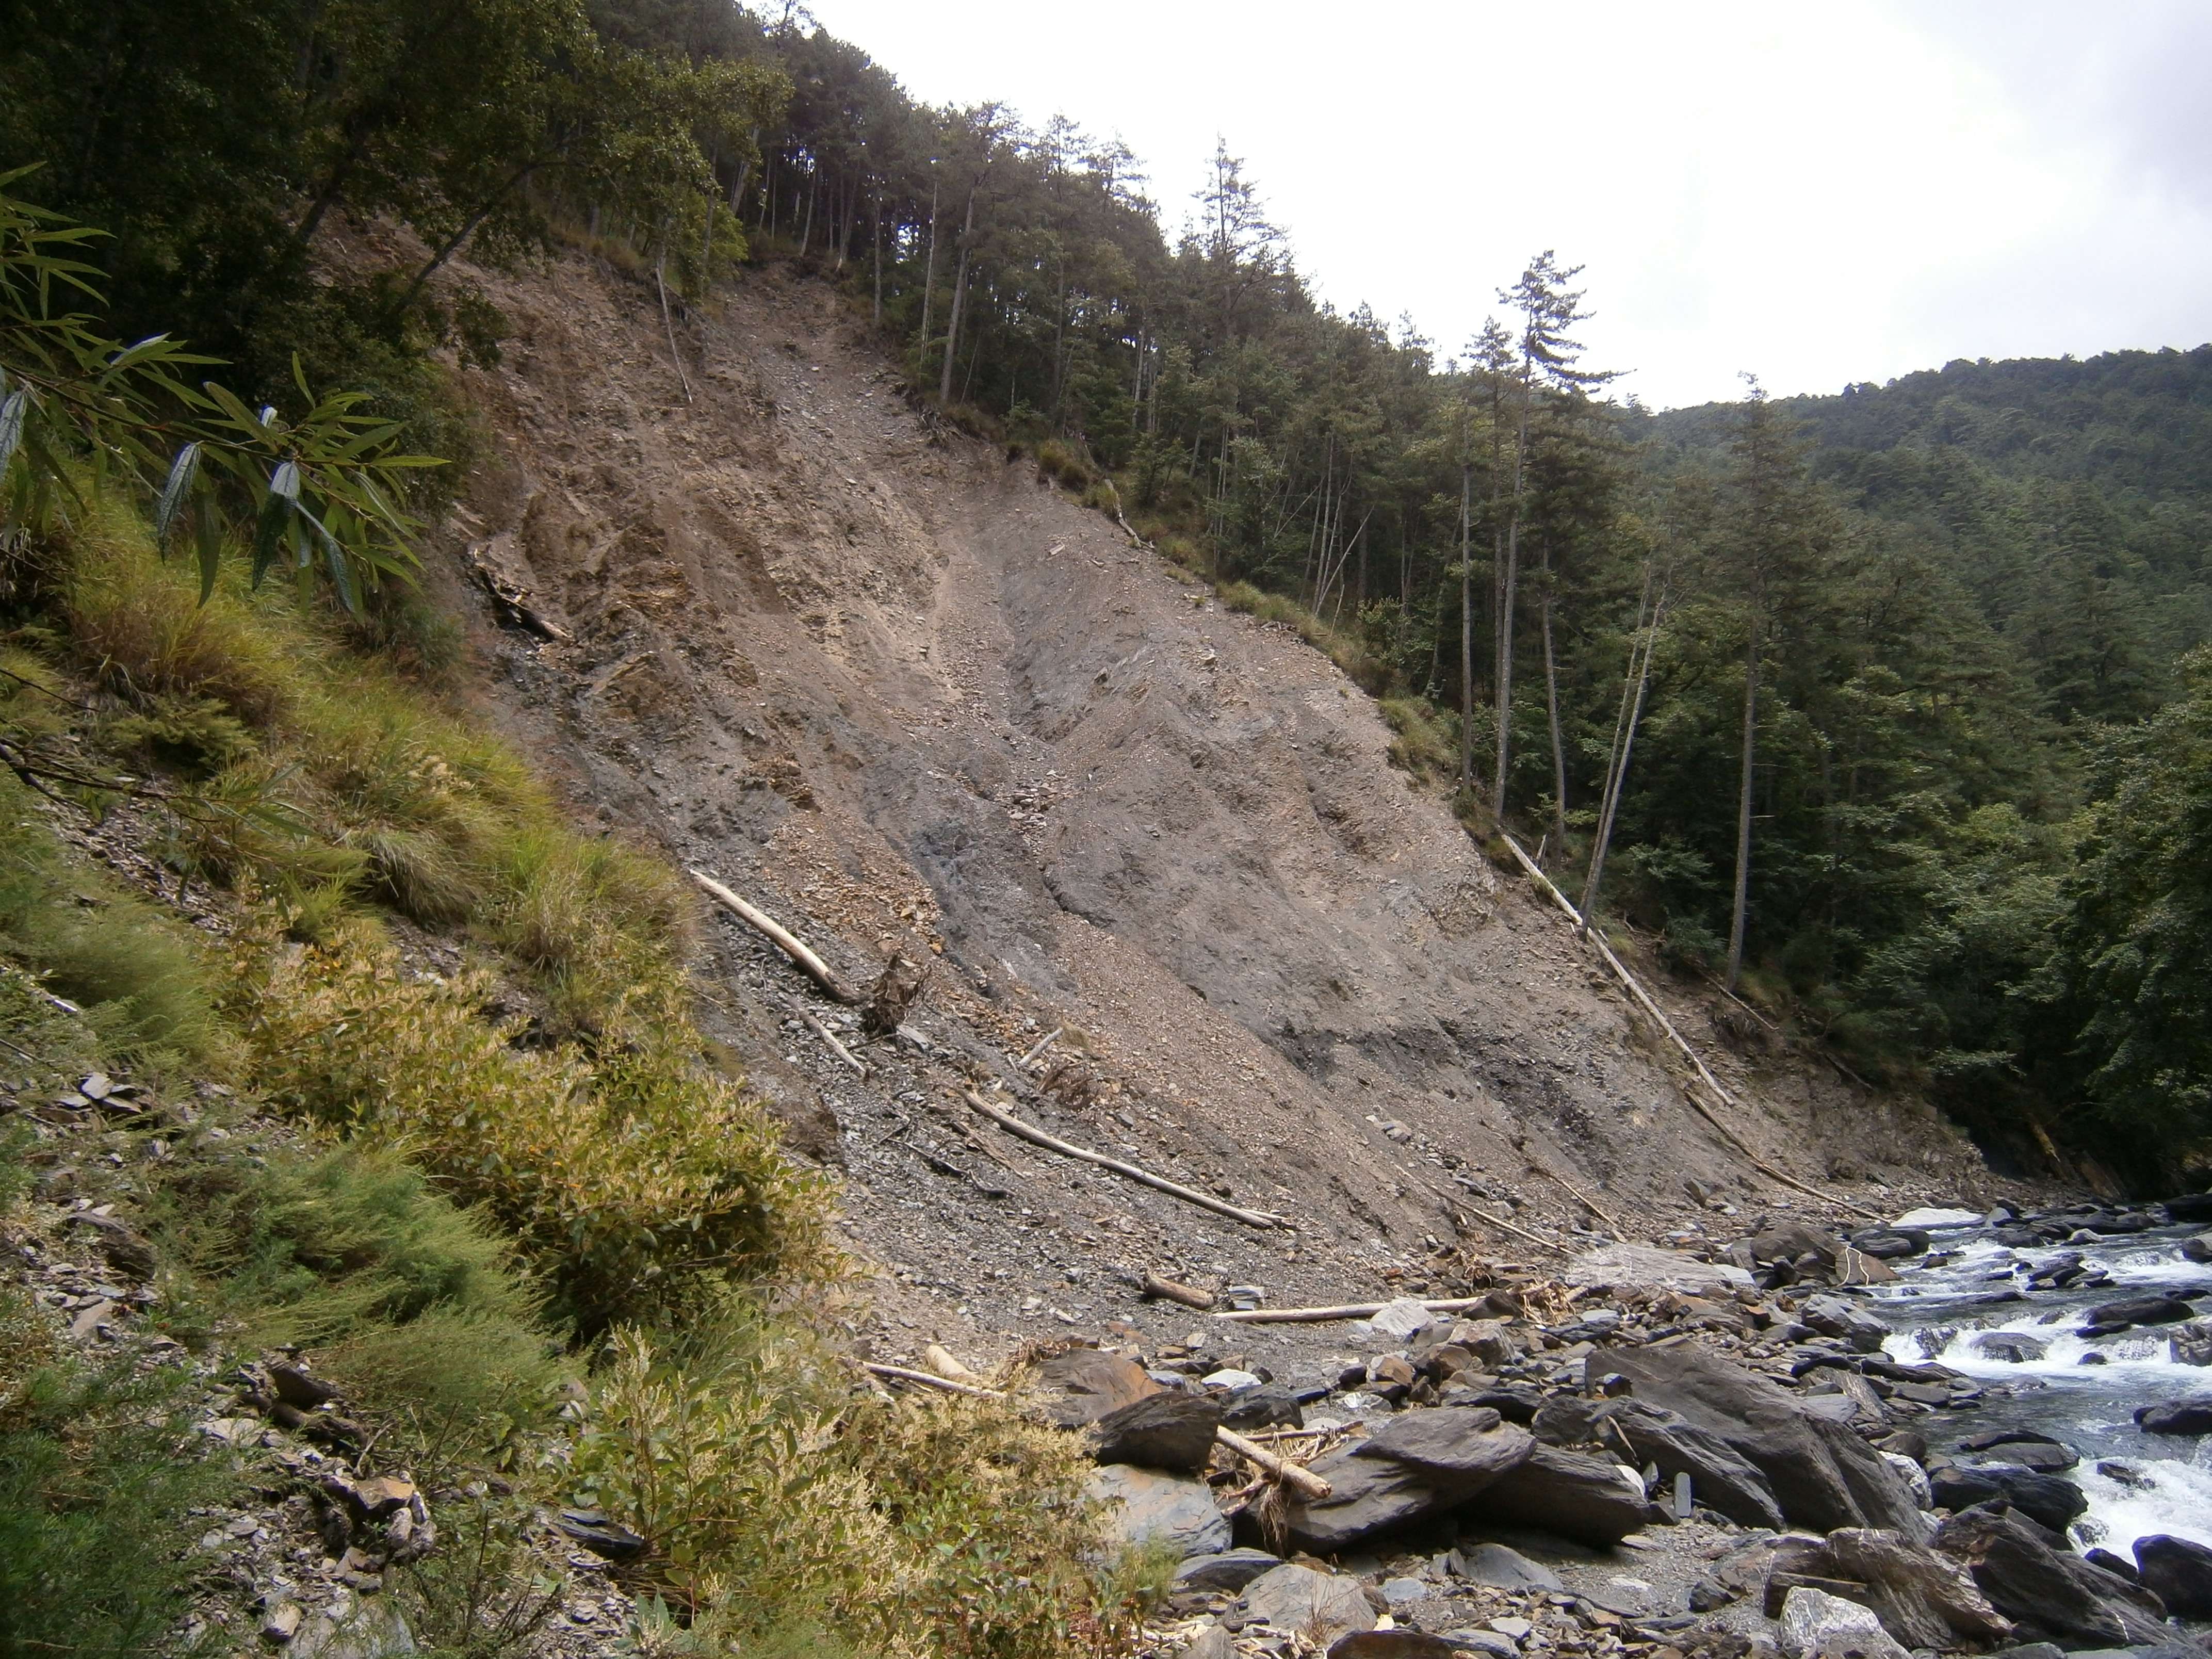
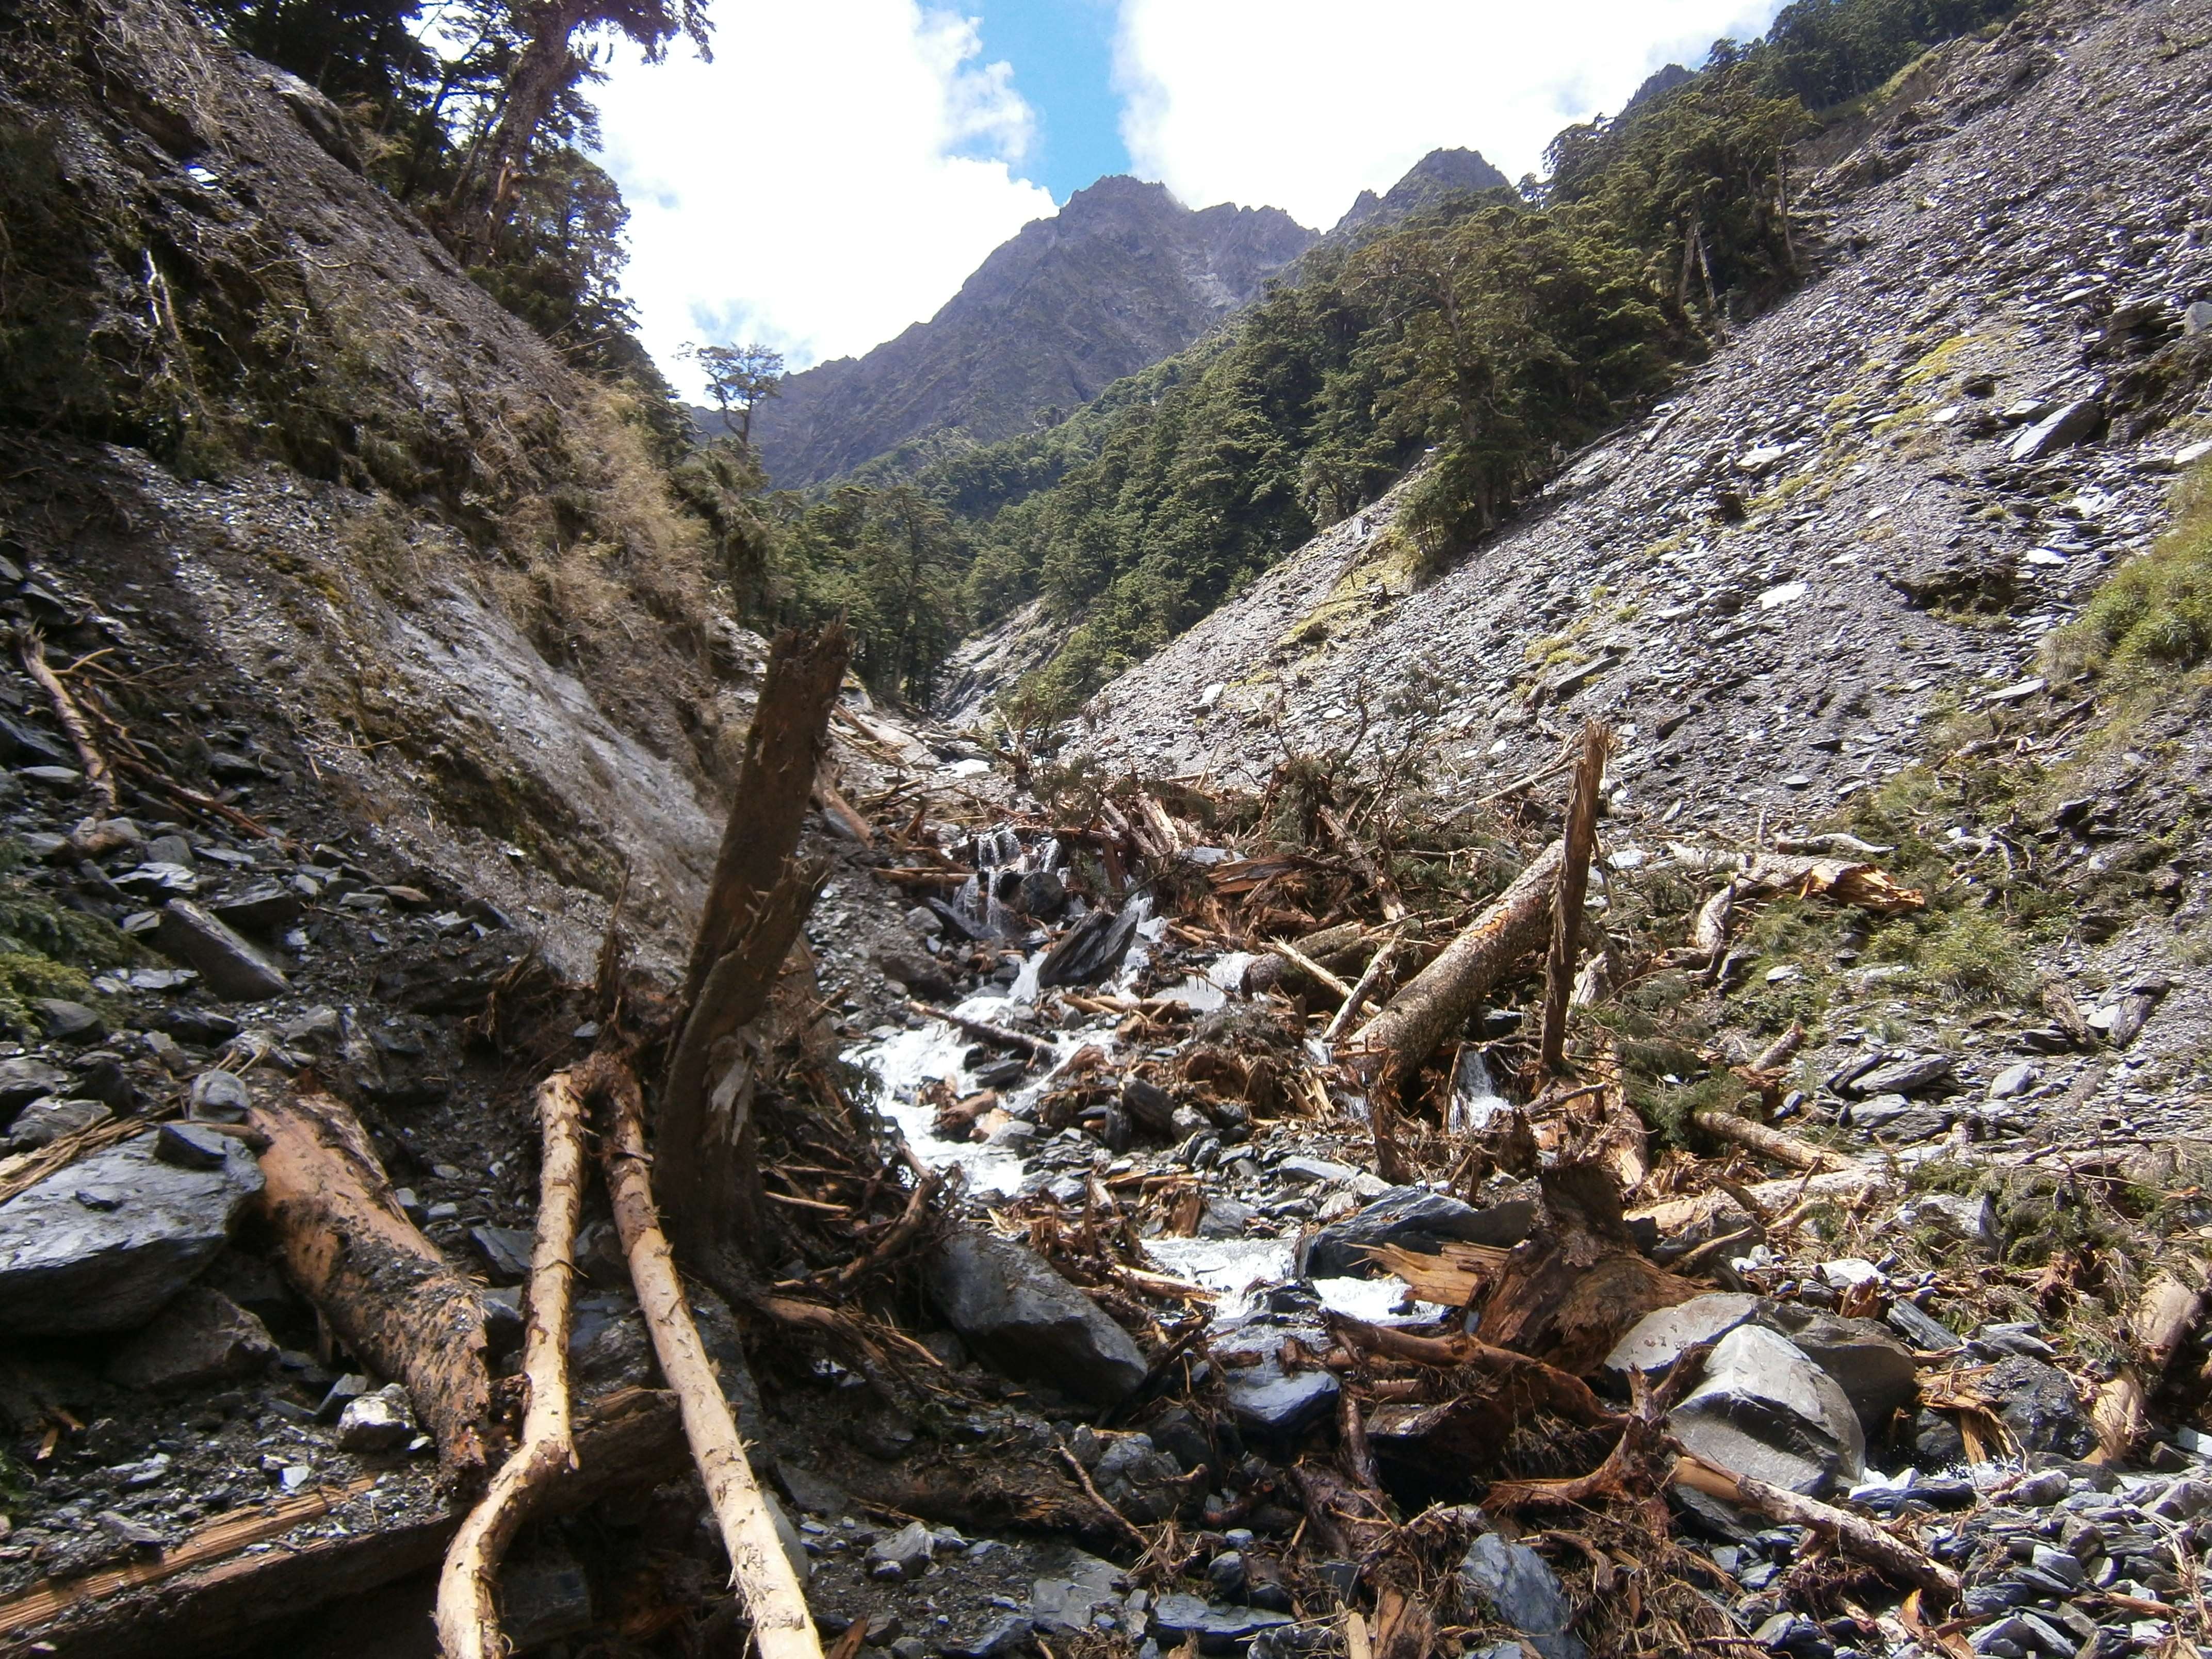
Near the base of the mountain the terrain begins to get steeper, and the river continues uphill. Huge, freshly collapsed landslides had wiped out sections of forest along the riverbank, and clogged the river with debris.

Looking upriver towards Zhongyangjian Shan, the river obstructed by landslides.
Going was slow here, as the only way forward was through a mess of trees, branches, rocks, and dirt.
In the middle of one of the worst sections, Zhongyangjian Shan in the distance.
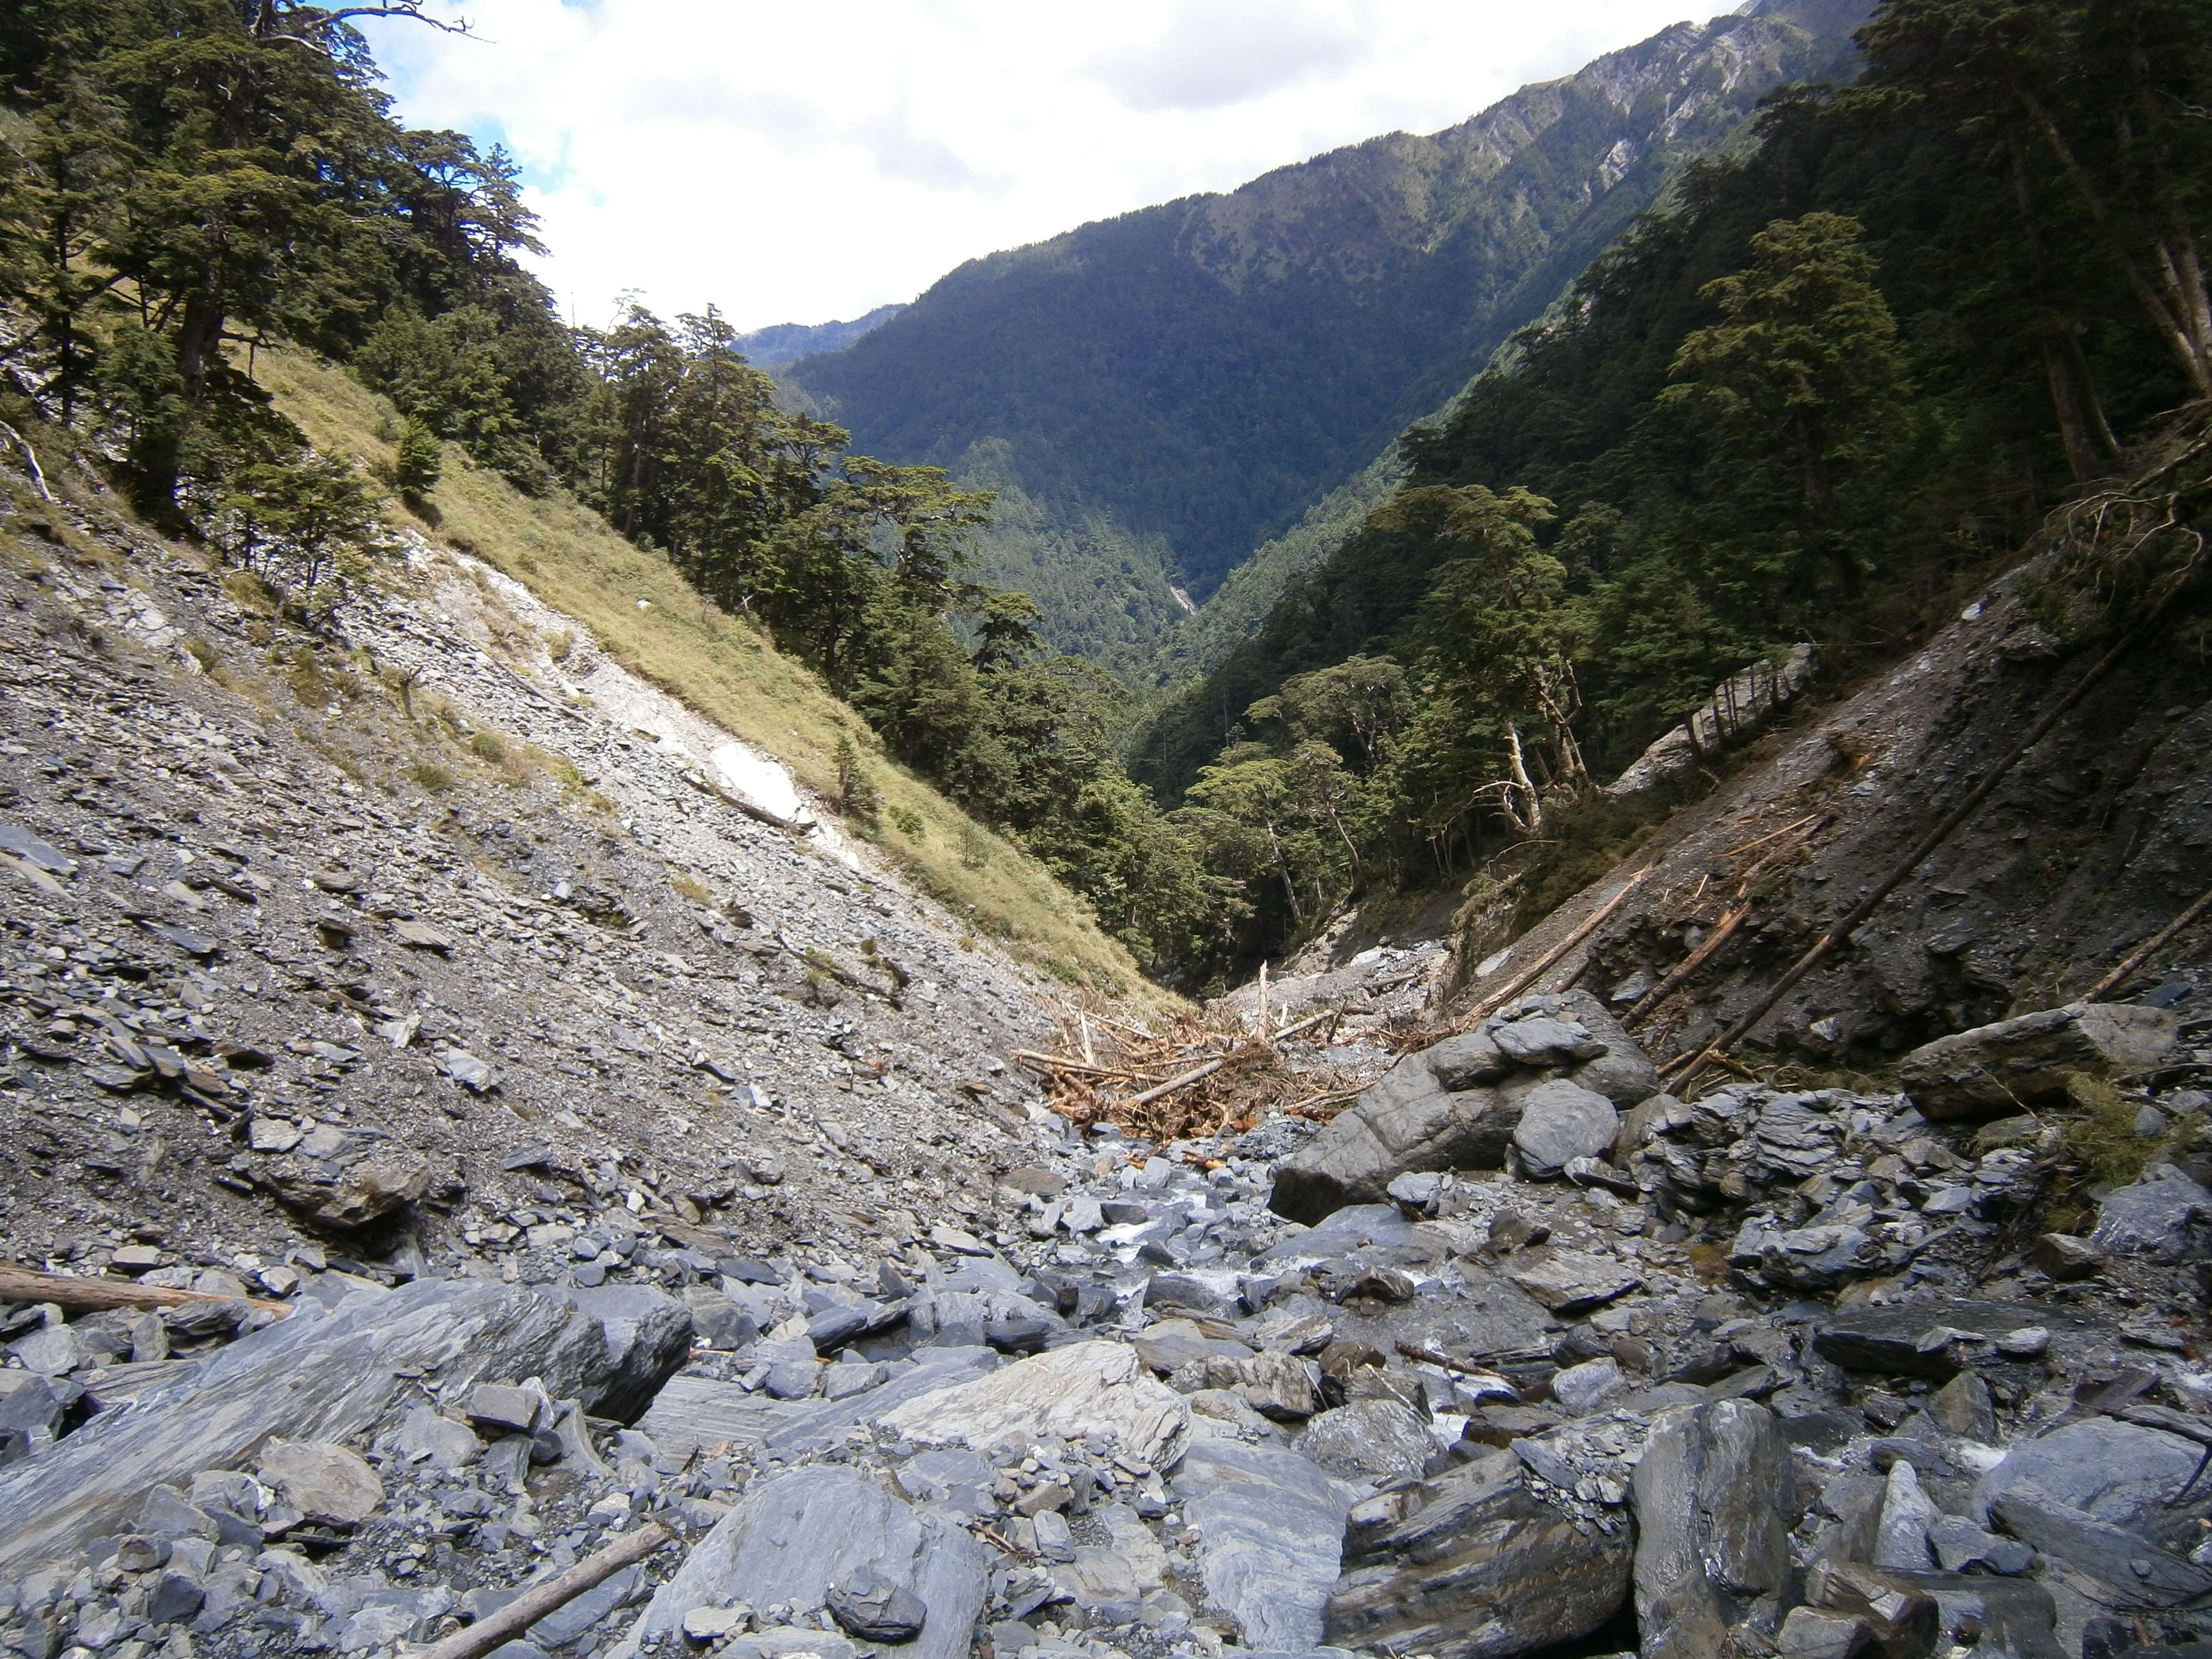
Looking back at the landslide below.

Continuing upriver, a small cliff had to be circumnavigated.
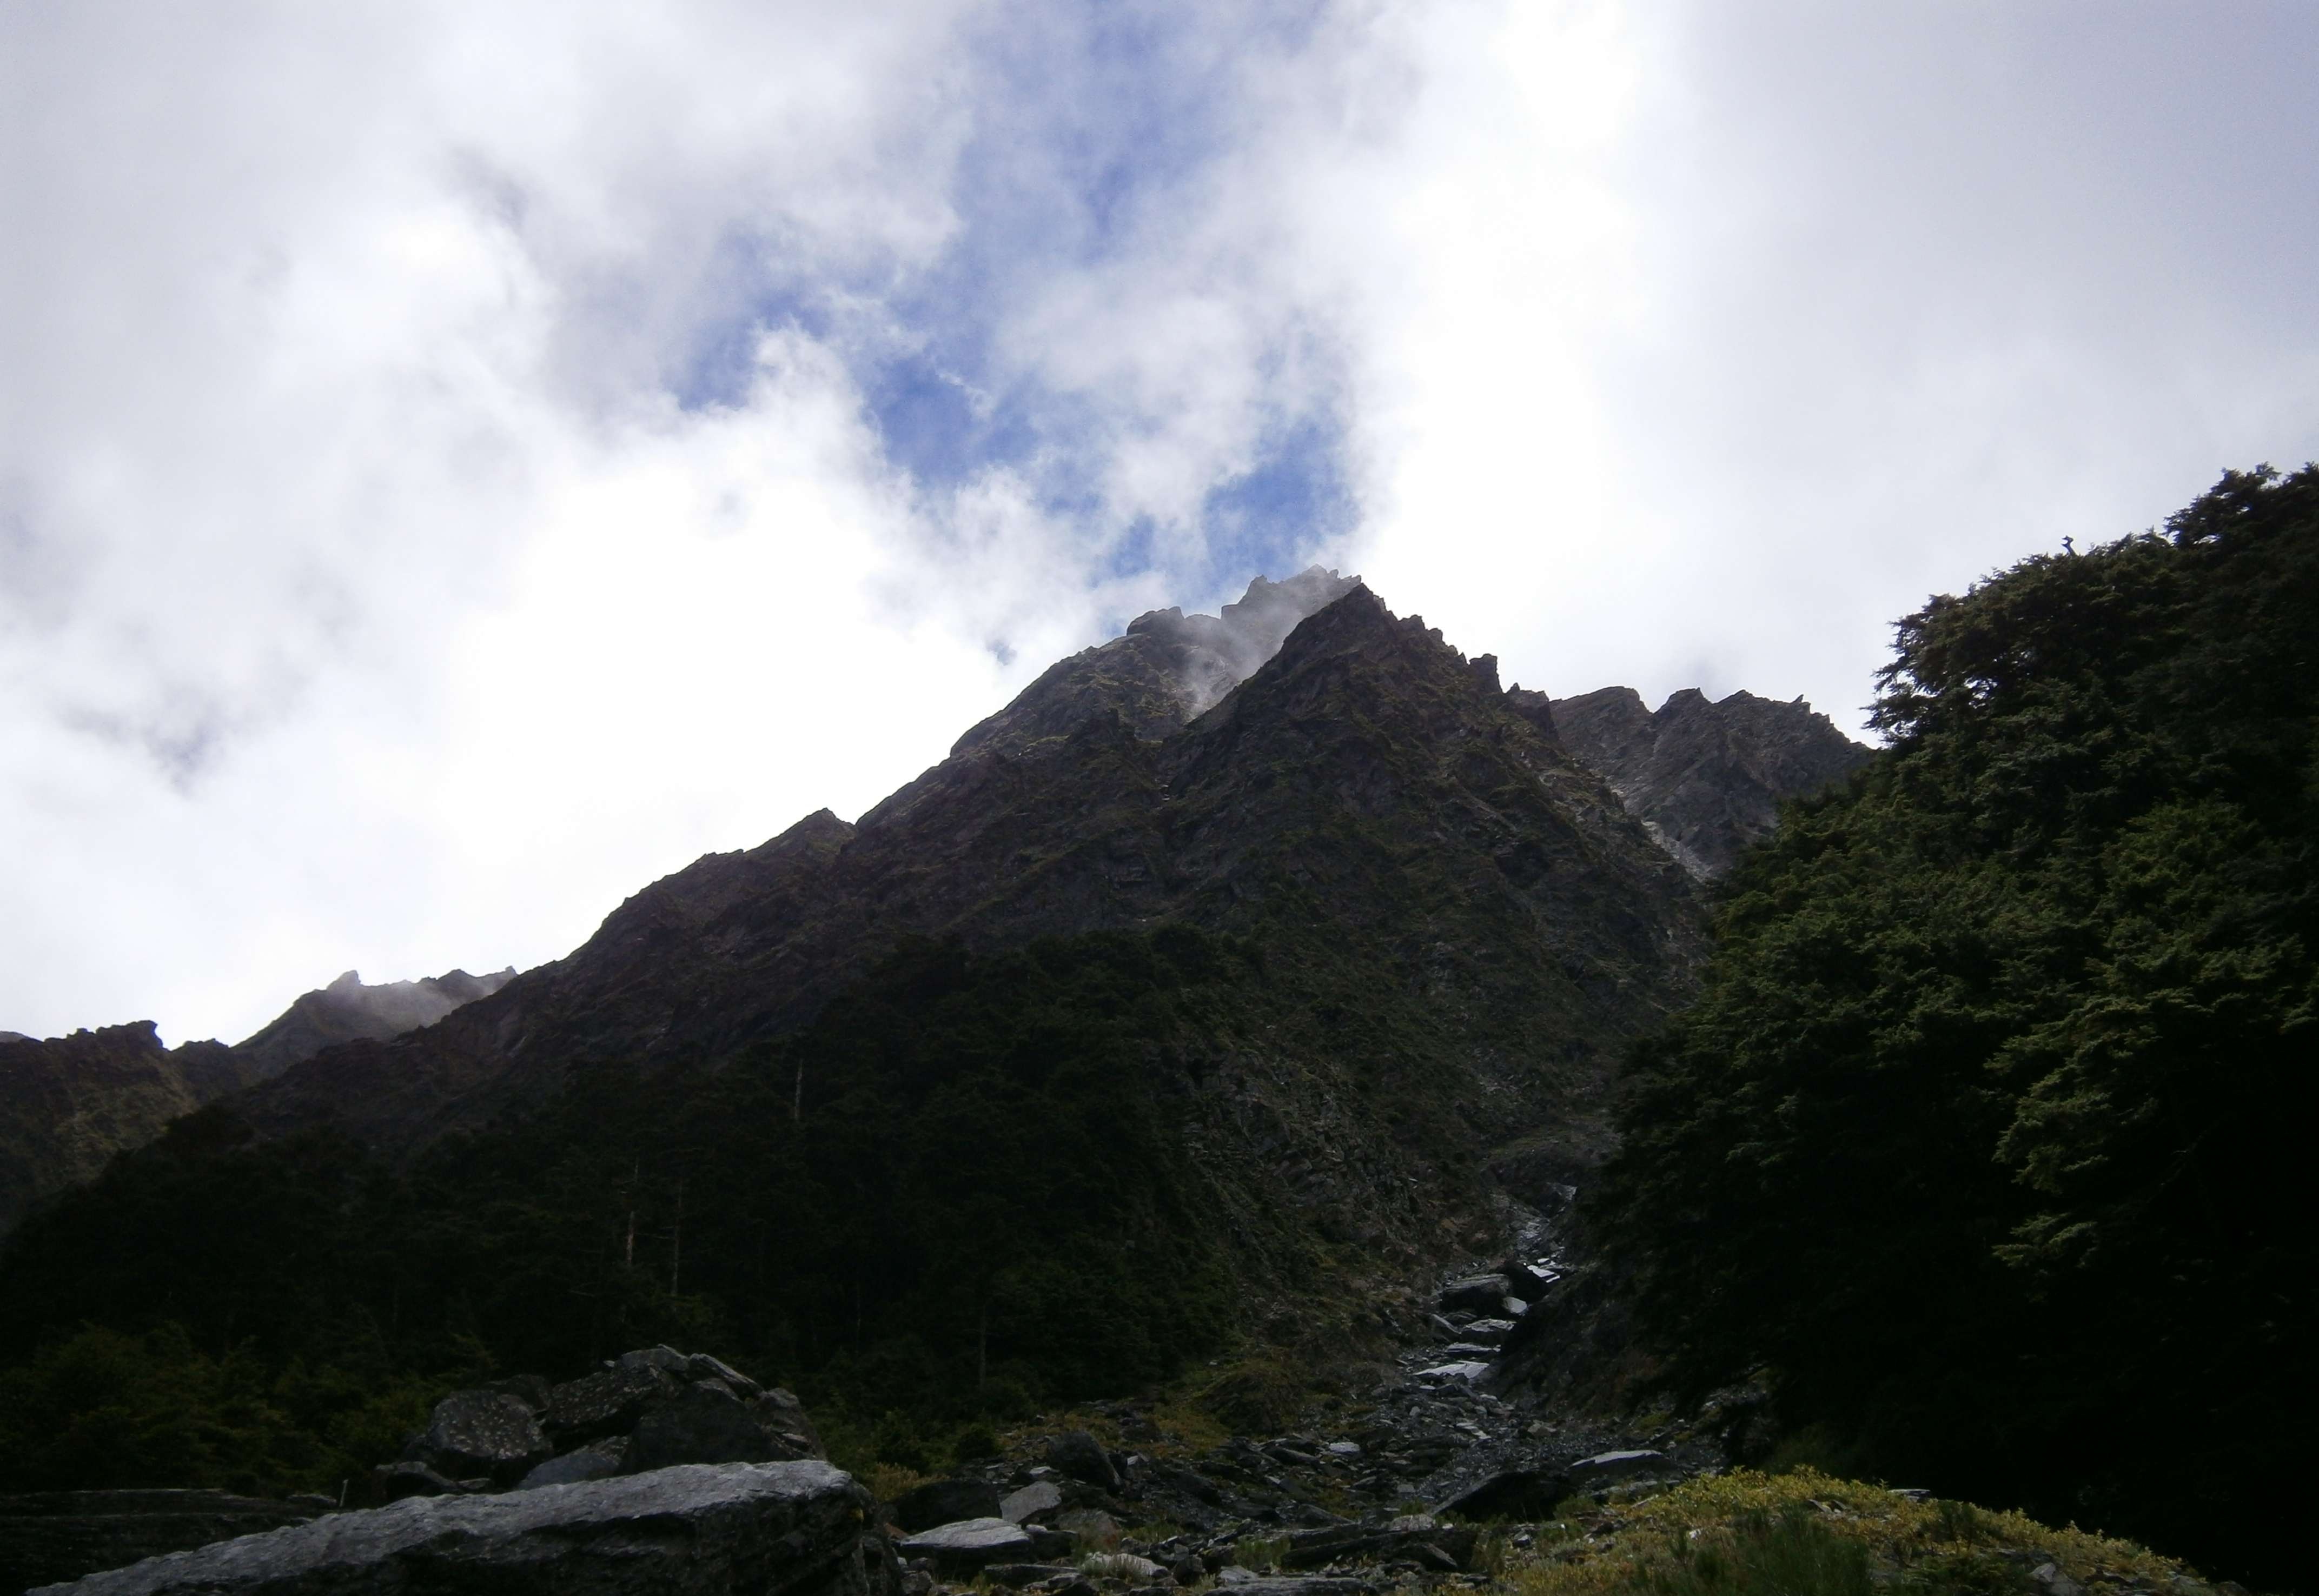
Ahead I could see the mountain through brief gaps in the clouds churning overtop. The river tapered off, replaced by a moderate slope of loose scree.
Zhongyangjian Shan waited ahead.

A scree slope continues after the river disappears.
Looking behind me I could see the river and the route I’d taken far below.

Looking down the scree slope, near the top.
Eventually, the scree breaks onto the saddle between Zhongyangjian Shan’s main peak and east peak. Up here the ground is covered in grass and even some trees. As soon as I reached the saddle, clouds rolled in and a light drizzle began.

A signpost marks the saddle at the top of the scree slope, the main peak less than 1km away.

The saddle is covered in vegetation.
A usage path leads upwards to the summit. One final, steep section at the top has mounted ropes.

A path leads to the summit.

Ropes just below the summit.
At the top I stayed long enough to take a few photos, and then began to descend, concerned that the light rain might develop into an afternoon shower, which could make the return trip down the river tricky and dangerous.

The summit sign.
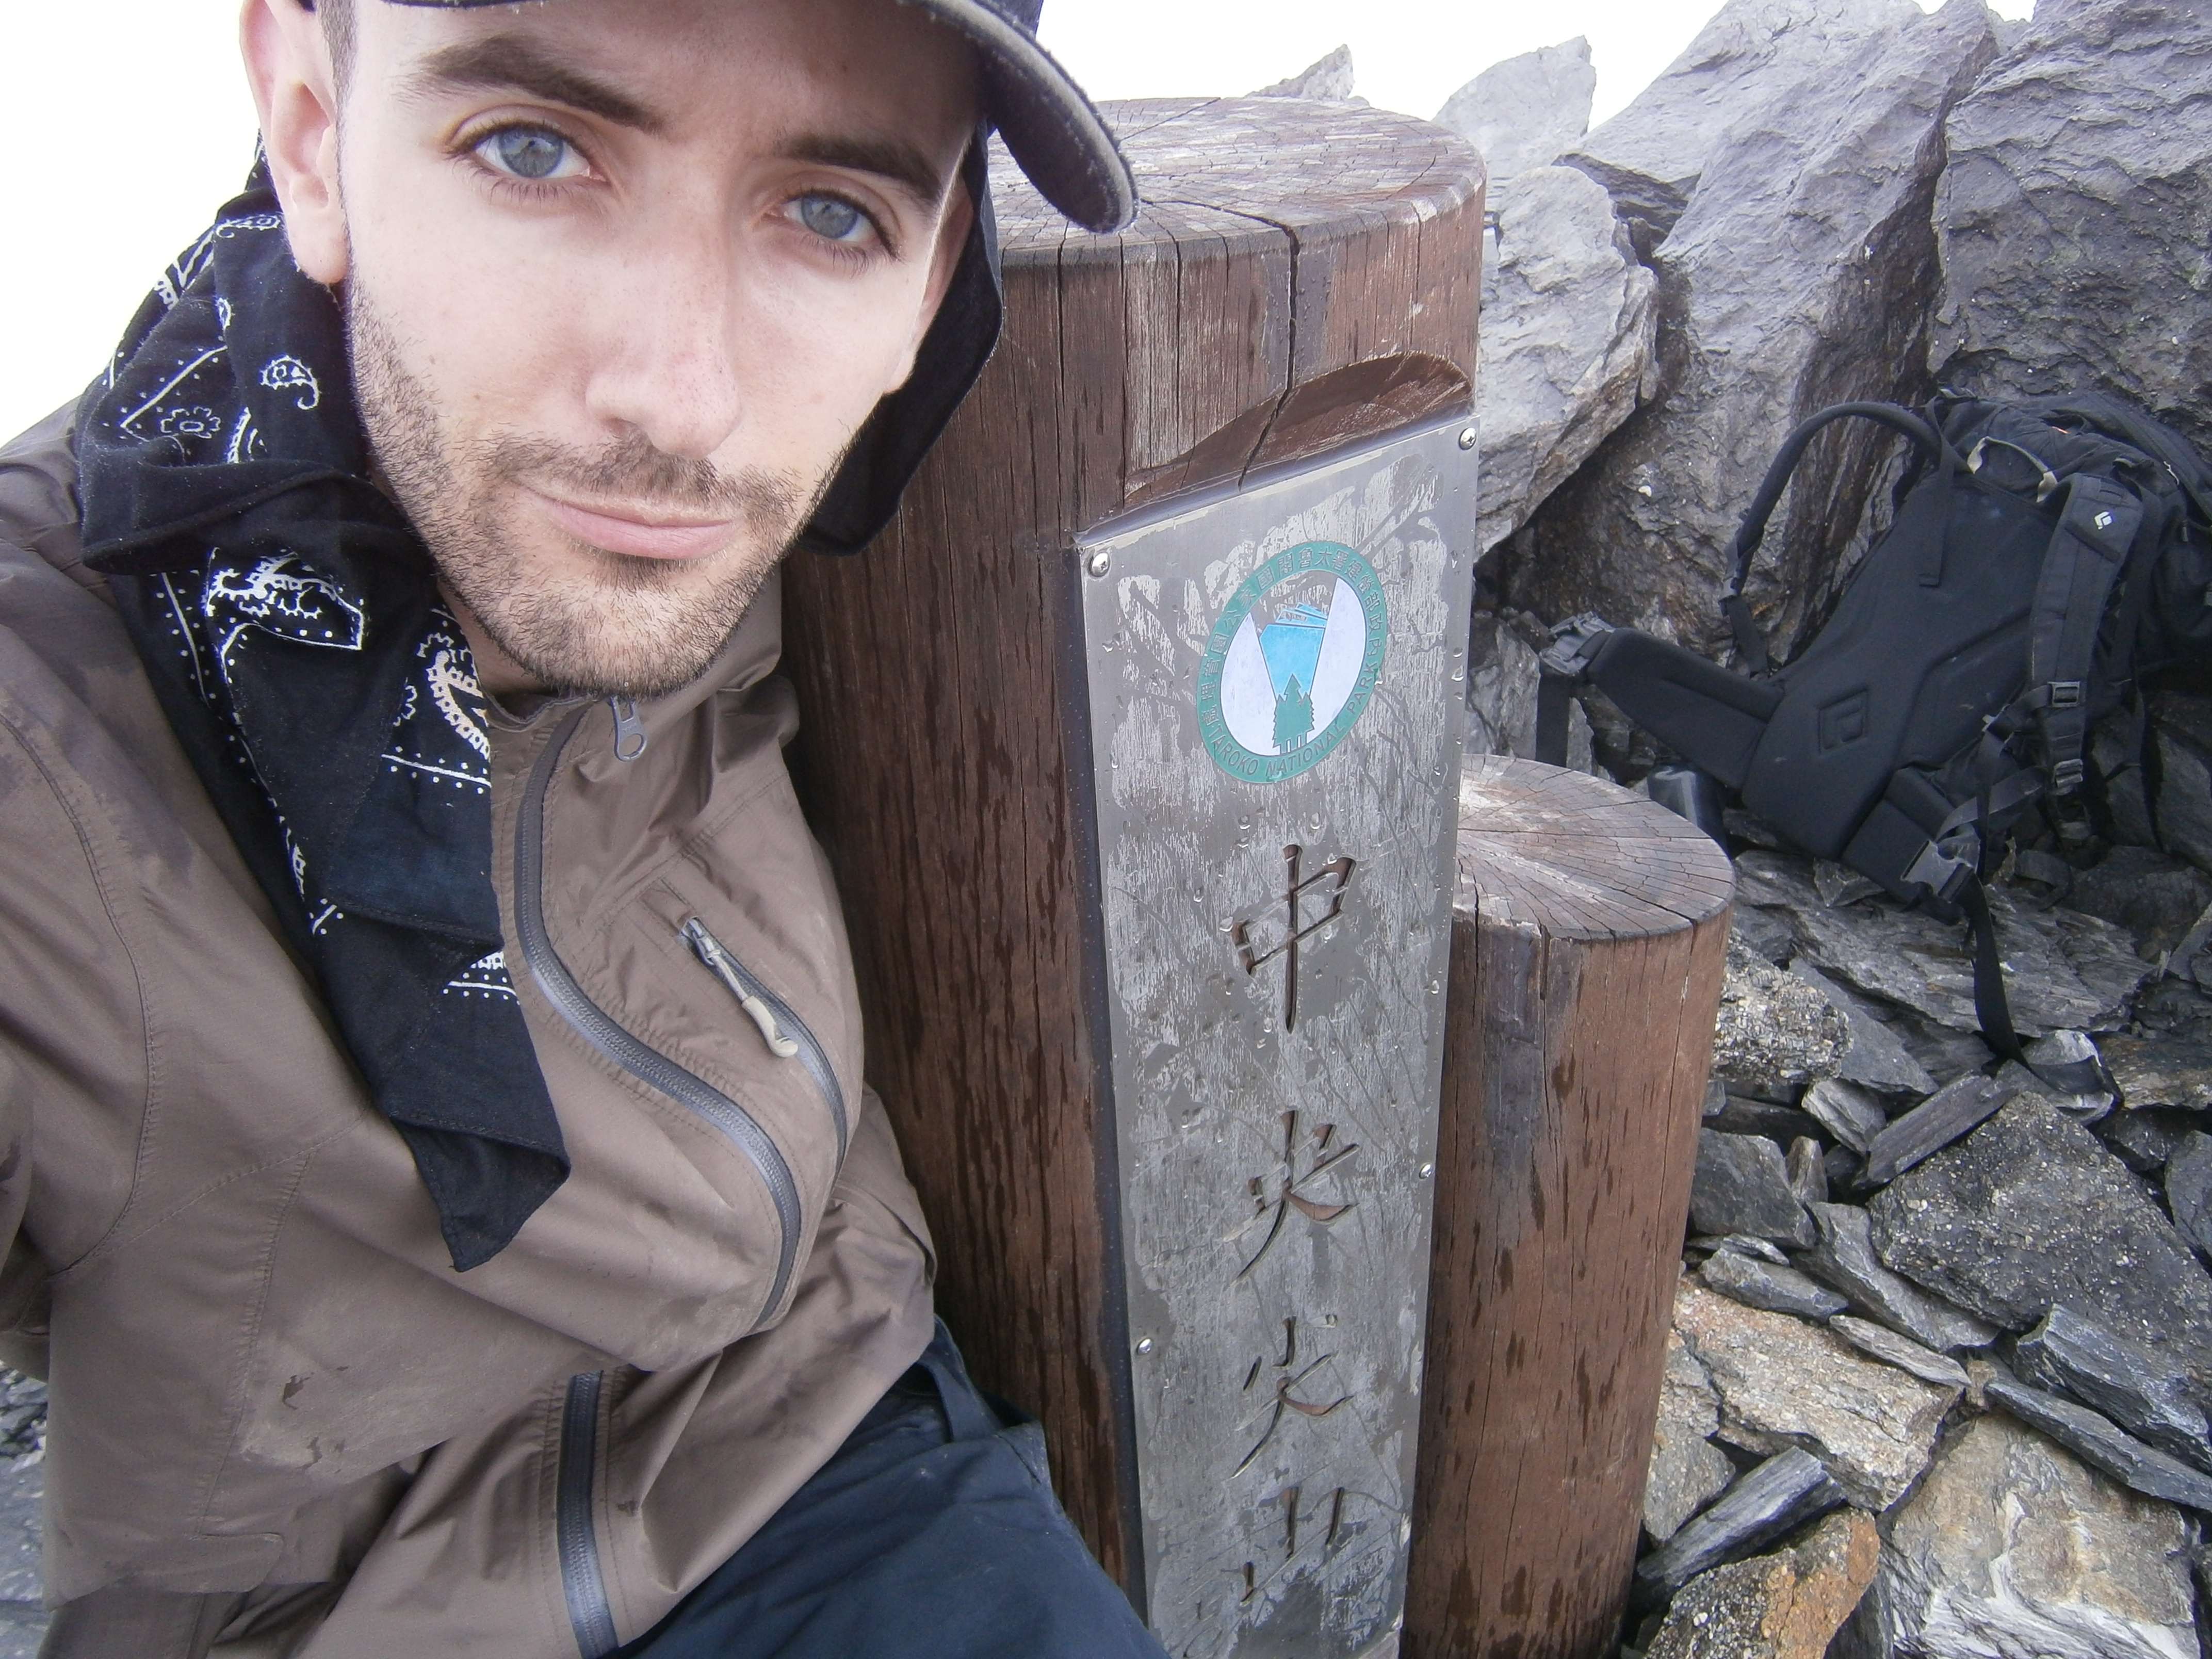
Feeling accomplishment, despite the clouds and lack of view.
On the way down the clouds moved onwards, and blue skies returned. This would be my final view of the mountain – clouds would return soon and obscure it for the rest of this day, and all of the next. After seeing Zhongyangjian Shan in the distance so often during other hikes, its fierce shape compelling me to plan a climb, the mountain’s continually clouded presence seemed somehow symbolic.

A window in the clouds gave me a final view.
On the way down I stopped to take better photographs of the large landslides along the river.
A closer look at one of the landslides near the base of the mountain.

The recent typhoon had taken out swathes of forest along the river.
From my vantage point uphill, I could see that the much of the debris I had encountered earlier came from the landslides above.
The debris-filled river from above.
Near my campsite, I found what appeared to be fresh deer tracks in the mud.

Tracks in the mud.
By the time I returned to camp it had been a 13 hour day of hiking – much, much longer than planned due to frequent river crossings and slow progress over the landslides.
Day 3: I packed up camp, and headed back overland towards the Nanhu River Cabin. My route out was identical to my route in, with no exceptional differences to the first day of the trip. Of note, the section of stream which had taken me down towards the Nanhu River Cabin was slower and trickier on the way up and out.
Back at the first trail split, on the ridge which leads to the Yunling cabin and Nanhuda Shan, I was delighted to find a perfect, clear view into Syue Ba National Park. Zhongyangjian Shan, unfortunately, remained cloud covered and was not visible to the south. On the ridge I met a pair of hikers headed for Nanhuda Shan, the first people I’d encountered in three days.

A lovely view of Syue Ba National Park and some of its mountains.
Back at the trailhead, some 11 or 12 hours of hiking from my campsite, I hitchhiked all the way home with a truck driver hauling vegetables from rural Ilan into Taipei City. We made several stops across Ilan county to load up bundles of cabbage and other produce. I couldn’t have been luckier, not only was the road leading to the trailhead damaged and traffic very sparse, but the trucker’s drop off was close to where I’d left my motorcycle in Taipei, just one MRT stop away. Riding with this trucker was an experience unto itself, and gave me an interesting firsthand perspective on rural Taiwan.
Hiking Zhongyangjian Shan was one of the best mountain trips I’ve had in Taiwan. The mountain is very remote, with an approach lengthy enough for a solid multi-day trip. Hiking Zhongyangjian Shan alone really immersed me in the environment of the mountain; the final portion of the route up the river was especially memorable.
Accessibility
Once past the Nanhu River Cabin, there are several good spots for camping along the route, with reliable water from the river. Officially, however, one is only supposed to camp at the cabins themselves. Past the Zhongyangjian River Cabin, there are no areas large enough to accommodate camping until one reaches the Zhongyangjian Shan saddle.
The Nanhuda Shan trailhead, also the entry point for a Zhongyangjian Shan hike, is fairly easy to access. Take a bus or train to Yilan City or Luodong, and rent a motorbike. Alternatviely, a taxi in costs around NT$2500. Be sure to check road conditions beforehand – the road is typically damaged or even wiped out after a big typhoon.
Hiking Zhongyangjian Shan requires national park entry permits from Taroko National Park, as well as Police issued mountain entry permits. The park entry permit requires two Taiwanese group members; one as the “group leader”, and one as the “emergency contact”. I did this hike alone, but still needed to have a Taiwanese friend on my permit. The Taroko National Park permit website (In Chinese) is located here:
http://permits2.taroko.gov.tw/welcome/index.aspx
Police permits can be applied for here (In Chinese). For the website to load, you need to use Internet Explorer (other browsers do not work with this website) and adjust the encoding for ‘Chinese Traditional, Big5′ (found through Page -> Encoding):
http://eli.npa.gov.tw/E7WebO/index02.jsp


